
NOTE
This is the current version of the Step FalloutNV Guide. Don't forget to
endorse Step on the Nexus if you like the guide. Please report any problems or confusing instructions on the latest
Feedback & Bug Reports pinned forum topic.
This Release
This is our third release of the Step Fallout: New Vegas guide (see Step Versioning Documentation). It focuses on animations, sounds and weather and lighting effects:
- Animations: animation packs of dedcated animations for firearms, unarmed and melee weapons were added
- Weapon and explosion sounds are enhanced with mods that utilize scripts for better compatibility
- Various lighting fixes, better looking moon at night, and dust effects in the distance
- Mods that add new content were removed in favour of cut content restoration
See the changelog for more details and to determine if upgrading from a previous version is advisable.
Step FalloutNV Guide
General Information
This is the official Step modding guide for Fallout: New Vegas on the PC. Its goal is to provide an "enhanced vanilla" look and feel with a focus on exploration gameplay. It was adapted from ex-Step staff EssArrBee's official guide, Fear & Loathing In New Vegas, to adhere to the Step Mandate and conform to the quality and performance expectations of all official Step Guides.
- This Guide requires Fallout: New Vegas with all DLC.
New to Modding?
We recommend that you ...
- read through this Guide at least once before attempting installation.
- follow all linked guides and read through them, as well.
There is a lot of information to absorb and learn in order to successfully build a modded game. We and the community, have brought together a lot of this information into guides as a free and hopefully convenient resource for all. New and experienced modders alike will find many answers within these guides and linked resources. This Guide is written in such a way that it expects users to know the basics of modding and related tools (e.g. mod managers, LOD optimizers, configuration utilities, etc.). However our support forums are always available for our users.
Nomenclature and Instructions
The following nomenclature is used throughout this guide and should be understood before proceeding.
- 'tick' means 'check': Frequently, the word 'check' or 'checked' can mean 'ensure' in addition to "check mark", so 'check' is not used where it is synonymous with 'tick' to avoid any mistakes that can (and have) happened from this conflation.
- Baseline: The recommended install option is shown within the Baseline column of the mod tables below.
- Step Patches: Custom patches created for the respective Step Guides. Always use them!
Expand Instructions!
Click the heading below to expand detailed instructions that are collapsed by default for readability:
➕ [Click to show]➖ [Click to hide] Click Me, I'm a Spoiler!
I have more instructions for those that need them.
Expand mod table detailed instructions:

System Requirements
FalloutNV should be run on a relatively modern Windows 10/11 64-bit desktop or laptop, gaming capable PC. While CPU specs and performance are important factors, they matter only to a point beyond which is diminishing return on investment. Smooth gameplay, LODGen-related tools, and ENBSeries post-processing are most limited by the GPU performance coupled to the resolution at which the game is run.
- The minimum specs assume that the recommended 'baseline' mod options will be installed, which are biased towards 'performance' options when available.
- The recommended specs assume a bias toward 'quality' and assume higher quality mod options will be installed when available.
- CPU/GPU Marks should be within the ranges listed below. Refer to the links for examples.
| Hardware
|
Minimum
|
Recommended
|
| CPU CPU Mark Range
|
4,000 - 7,000
|
> 7,000
|
| System RAM
|
8GB
|
16GB
|
| GPU G3D Mark Range
|
8,000 - 10,000
|
> 10,000
|
| Video RAM
|
at least 4GBs
|
8GBs or higher
|
| Game Drive
|
HDD
|
SSD
|
| Resolution
|
1080p (HD)
|
1440p (QHD)
|
Time Commitment
Be aware it will take anywhere from several hours to a several days to complete this build from start to finish. This time will vary greatly depending on internet download speed and user experience. Following are cumulative time estimates on average:
- 3-6 hours : Steps 1 - 3 (modding-environment setup)
- 10-12 hours : Step 4 (mod download, installation)
- 4-6 hours : Steps 5 - 7 (LODGen, post-build configuration, and fine-tuning the build)
STEP 1
Game & Tool Installation
Install Direct X 9
Fallout: New Vegas is an older game that runs under Direct X 9. Direct X 9 does not come with the standard Windows 10 package and has to be installed. Therefore, before proceeding with the System Setup make sure to download and install the Direct X Runtime Libraries:
- Follow the link to Microsoft's page.
- Download the archive to a location of your choice.
- Double-click on the file to install.
Those who have not completed the System Setup Guide (SSG) should STOP and do so now BEFORE beginning Step 2! This is a perquisite for completing this guide, as many of the following instructions reference concepts, tools, and even file paths established in the SSG.
FNV BSA Decompressor

NOTE
Based on feedback on the Nexus, this tool does not seem to work with localized (translated) versions of
FalloutNV . This is a good place to issue a warning that the Guide was made with the English-language version of
FalloutNV in mind, and results with localized versions of the game will vary. Support for localized versions is not provided.
BSA stands for Bethesda Software Archive, a special format used for compressing resource files (like the sounds, maps, animations, textures, models, etc.) for Bethesda Softworks games. An archive makes organizing data much easier than having it exist in dozens or hundreds of separate folders.
As it turns out, however, these archives have some inherent issues (most notably, MP3 files packed as a BSA cannot be played by the game) and are not optimized for performance. Step recommends the use of FNV BSA Decompressor to fix the inherent sound bugs and improve loading times.
Install FNV BSA Decompressor
Using the FNV BSA Decompressor is not mandatory for the completion of the guide, but highly recommended for general performance boost and fixing potential sound issues. Follow the steps below:
- Download the archive manually to a location of choice.
- Extract the archive to the *Tools* folders created in the previous section of the guide (e.g.
..\Modding\Tools\FNV BSA Decompressor).
Using the BSA Decompressor is covered in the modding section (Step 4).
Ultimate Edition ESM Fixes
A FalloutNV specific tool that automatically cleans vanilla ESMs for stability and better optimization.
Installing Ultimate Edition ESM Fixes
Using the Ultimate Edition ESM Fixes is not mandatory for the completion of the guide, but highly recommended for general performance boost. Decrease in loading times during area transition was noticeable during testing. Follow the steps below:
- Download the archive manually to a location of choice.
- Extract the archive to the *Tools* folders created in the previous section of the guide (e.g.
..\Modding\Tools\Ultimate Edition ESM Fixes).
Cleaning the vanilla master plugins via the tool is covered further in the guide (in Step 4).
STEP 2
Tool Configuration
Mod Organizer - FalloutNV Initialization
FIRST, follow the System Setup Guide. The below instructions describe how to initialize a FalloutNV instance in Mod Organizer (MO). If MO was installed as a Portable application, the instructions below will need to be interpreted accordingly. If a FalloutNV instance was created in Step 1 or otherwise, simply select the instance. Otherwise:
➕ [Click to show]➖ [Click to hide] Steps - Initialize FalloutNV in MO
- Launch MO by running its executable (e.g.
..Modding/Tools/Mod Organizer/ModOrganizer.exe)
- Upon load, click the Instance Manager button
 .
.
- Click on [Create new instance].
- Select Skyrim Special Edition and click [Next].
- If the game wasn't found, manually browse to the game's location.
- Name the instance something like
FalloutNV or keep the default. Click [Next].
- (optional) change the location of data stored. Step recommends the default location, unless space restraints prevent this. Click [Next].
- A confirmation window will display with the installation information. Click [Finish].
- MO is now ready to use with this guide.
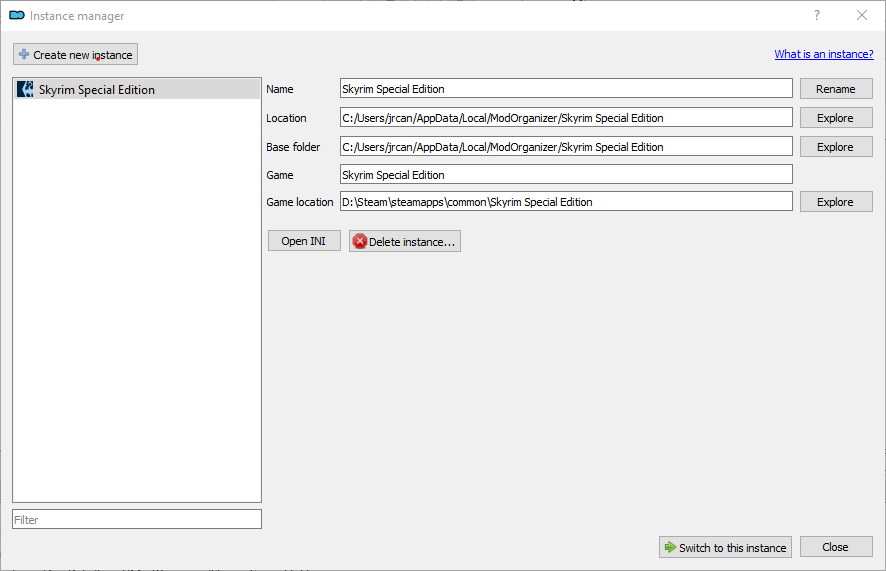
Step 2
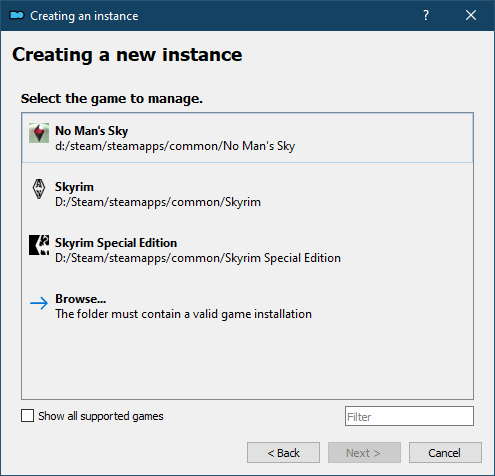
Step 4
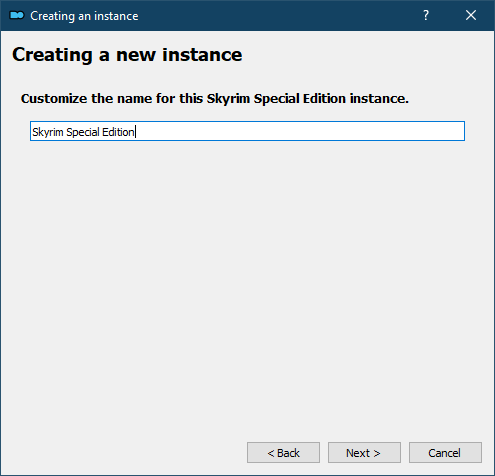
Step 5
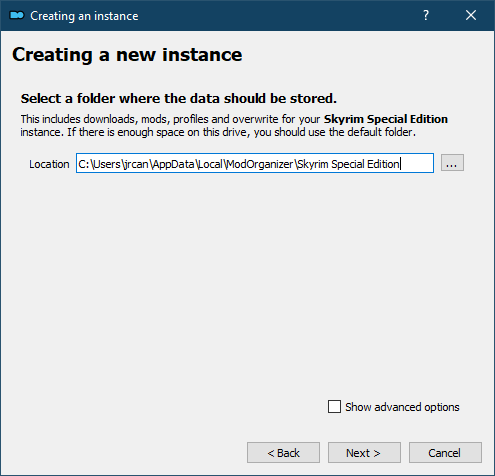
Step 6
Profile Setup
MO's profile feature allows the creation of multiple mod builds that rely on the same mod list and mod-level configurations (learn more about profiles). For the purpose of this guide, a single mod configuration is all that's needed. Begin by creating a profile:
➕ [Click to show]➖ [Click to hide] Steps - Profile Setup Instructions
- Launch MO, choosing the Fallout New Vegas Instance.
- On the Default profile, arrange the mods in the left pane in the following order:
- FalloutNV.esm
- DeadMoney.esm
- HonestHearts.esm
- OldWorldBlues.esm
- LonesomeRoad.esm
- GunRunnersArsenal.esm
- ClassicPack.esm
- MercenaryPack.esm
- TribalPack.esm
- CaravanPack.esm
- Click the
 button on the menu bar.
- Select the Default profile.
- Ensure the Use profile-specific Game INI Files box is ticked and click [Copy].
- Name the new profile
Step Fallout New Vegas, or anything similar.
- Ensure that both Use profile-specific Game INI Files and Automatic Archive invalidation boxes are ticked.
- Close the window by clicking [Close].
- Select the Step Fallout New Vegas profile from the profile selection down-drop.
- If users receive a notice saying some INI files were missing and will be copied. This is normal.
- If an error is displayed about missing "modlist.txt" files, restart MO (or do a system reboot if one hasn't been done yet).
- Now click the
 button and select [Create empty mod].
- Name it xEdit Output.
Tool Setup
All tools installed in the System Setup Guide should already be configured in MO. Some tools will have been auto-detected and added; nevertheless, ensure the settings below are set correctly for all tools. xEdit is used in this example:
➕ [Click to show]➖ [Click to hide] Steps - Tool Setup
- For xEdit, it is useful to create a mod into which all xEdit ouput can be directed in order to keep it all together:
- Click
 at the top of the left pane in MO, and select "Create empty mod".
- Type
xEdit Output, and select [OK].
- Place this mod at the top of the mod list just below the vanilla game files.
- Click
 at the top of the main Mod Organizer window.
- In the left pane of the executables config, click the [+] to add a new executable, and then [Add from file...].
- Browse to the SSEEdit.exe file (e.g.
..Modding/Tools/xEdit/SSEEdit.exe).
- This should auto-fill most of the fields.
- Change the title to xEdit.
- Input the following in the Arguments field separated by a single space:
- e.g.
-IKnowWhatImDoing -FNV -AllowMasterFilesEdit
- "-IKnowWhatImDoing": This turns off a warning presented when users make edits.
- "-AllowMasterFilesEdit": By default xEdit will not allow master file editing. This enables that.
- Tick the Create files in mod instead of overwrite box. Select the xEdit Output mod from the drop-down.
- Tick the Use applications icon for desktop shortcuts box.
- Click [Apply].
- Repeat these steps to add the remaining executables as indicated in the table following.
- Arrange the tools in any order using the up and down buttons above the list. This will dictate the order that tools are listed in the MO "Run" dropdown menu. Close the window by clicking the [OK] button.

NOTE
For tools previously installed, adjust the arguments below for use with
FalloutNV.
| Application Title
|
Executable
|
Argument(s)
|
| xEdit
|
xEdit.exe
|
-FNV -IKnowWhatImDoing -AllowMasterFilesEdit
Tick the Create files in mod instead of overwrite box and select the xEdit Output mod from the drop-down.
|
| xEditQuickAutoClean
|
xEditQuickAutoClean.exe
|
-FNV
Tick the Create files in mod instead of overwrite box and select the xEdit Output mod from the drop-down.
|
| LOOT
|
LOOT.exe
|
--game="FalloutNV"
|
| xLODGen
|
xLODGenx64.exe
|
-lodgen -FNV -o:"DriveLetter:\Modding\Tools\xLODGen\xLODGen_Output"
Replace DriveLetter: with the drive letter of the 'Modding' folder.
|
Tools can be arranged in any order using the up and down buttons above the list. This will dictate the order they are listed in the MO "Run" dropdown menu. When complete, close the window by clicking the [OK] button.
BethINI Setup
BethINI needs to be run for the current MO profile to establish the configuration files before beginning mod installation. This ensures that all users share a common configuration during the modding process. As such, please do not deviate from the instructions below.
BethINI Initialization
➕ [Click to show]➖ [Click to hide] Steps - Initialize BethINI
- Close MO and run BethINI (e.g.
..Modding/Tools/BethINI/BethINI.exe).
- If prompted by Windows protection, click More Info and then [Run anyway].
- When BethINI launches, select "Fallout New Vegas" from the game selection box.
- Allow BethINI to handle custom INIs, if prompted.
- Go to the Setup tab and ensure the
- Ensure the Game path is correct (e.g.
..\Steam\steamapps\common\Fallout New Vegas).
- Ensure the Mod Organizer path is correct (e.g.
..\Modding\Tools\Mod Organizer).
- The INI Path name depends on the MO Profile Setup
- If BethINI does not automatically display the profile created previously, browse to the applicable MO's
/Profile folder.
- Select the Step Fallout New Vegas profile folder, and click [Open].
- Click [OK] at the prompts to restart BethINI with the desired profile configured. Allow BethINI to handle custom INIs, if prompted.
- BethINI should restart whenever the INI path changes in order to associate the MO profile information.
- Return to the Setup tab.
- The “Auto-detect Invalid Settings”, “Always Select Game”, and “Modify Custom INIs” boxes should be ticked.
- If BethINI will be used for multiple games from a single installation, the “Always Select Game” box should be ticked.
- Keep BethINI open.
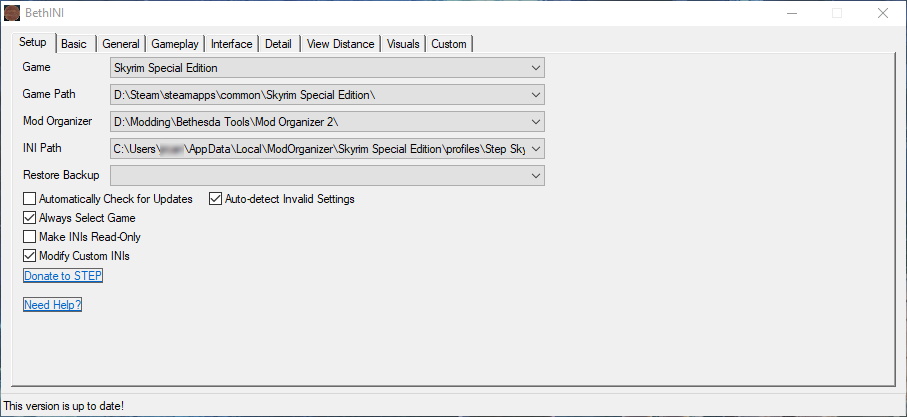
BethINI Setup
BethINI Basline Configuration
Configure BethINI as described in the steps below. Please do no deviate from these instructions at this time:
| [ Basic ]Click to show/hide
|
- Click the [Default] button and wait until the "Your INI files have been successfully reset to default values." message is displayed.
- Click the [High] preset and wait until the "Video settings have been set for BethINI high quality." message is displayed.
- Please avoid the temptation to click 'Ultra' for now, even if the PC is high-end.
- Tick Recommended Tweaks and wait until the "Recommended tweaks have been automatically applied." message is displayed.
- Window Resolution should match the system resolution.
- Window Resolution should match the system resolution.
- Click the [High] preset for the initial setup.
- The recommended Antialiasing is "4x" for the initial setup.
- The recommended Anisotropic Filtering is "8x".
- Tick the boxes next to:
- Transperancy AA
- VSync
- Enable File Selection
|
| [ General ]Click to show/hide
|
- The Screenshots directory, Filename, and Index can be set to whatever the user desires. Screenshots are taken by pressing the Print Screen button on the keyboard PrtSc.
- Untick the box next to Intro Logos.
|
| [ Gameplay ]Click to show/hide
|
- NPC Use Ammo is optional, but NOT recommended. The developers haven't provided NPCs with a substantial amount of ammo, so they will run through it pretty fast and then be forced to engage in melee, making the game easier in the process.
|
| [ Interface ]Click to show/hide
|
Most settings on the Interface tab are up to user preference, but the defaults are fine.
|
| [ Detail ]Click to show/hide
|
- Water and Shadow quality can be increased or decreased based on performance. For baseline setup, leave them as-is.
- Decal Quantity should be increased to [High].
File:BethINI-FalloutNV-Detail.png
|
| [ View Distance ]Click to show/hide
|
- The Object, Actor, and Item fade values are user preference.
- Set Light Fade to 8192
- Set Grass Fade to 10240
- uGridsToLoad should never been changed from vanilla's default of 5.
|
| [ Visuals ]Click to show/hide
|
Do not change anything.
|
| [ Custom ]Click to show/hide
|
- Do not change anything.
- Return to Basic tab, and click [Save and Exit].
|
STEP 3
Cleanup and Considerations
LOOT
At any time during the mod installation process, LOOT should be used to sort plugin load order before running the game. This is necessary to ensure proper plugin priority (load order), which can have a dramatic impact on the game. Users not running the game during the mod installation step of the Guide can wait to sort after this step is complete. To sort with LOOT:
- Launch LOOT via Mod Organizer 2 from the executables drop-down menu at the top of the right pane.
- If LOOT fails to start, try adding the following argument as described in Tools Setup:
--single-process. If LOOT cannot find the game directory, add the path to the FalloutNV game folder to Installed Path under LOOT settings.
- Click the [Sort Plugins] icon at the top of the LOOT window.
- Several plugins will show warnings. The next section describes how to clean them up.
- Click [Apply] button, which has replaced the Sort button at the top.
- Close LOOT.

NOTE
When running LOOT
before completing the Step Guide, additional warnings may be indicated. These will all be addressed by the end of this Guide.
Up to this point, users should only have the following plugins, in the order listed:
- FalloutNV.esm
- DeadMoney.esm
- HonestHearts.esm
- OldWorldBlues.esm
- LonesomeRoad.esm
- GunRunnersArsenal.esm
- ClassicPack.esm
- MercenaryPack.esm
- TribalPack.esm
- CaravanPack.esm
If the plugins are not in the order listed, run LOOT now.
- Make sure that the line is pasted exactly as provided here and remains on one line.
The tool does not support other games in the Bethesda catalogue and can be deleted once as the installation of the guide is proved to be successful (the test run is further in the guide).
Cleaning Vanilla Master Files
Cleaning FNV's master files can improve stability and reduce loading/transition times, but Step does not reccommend using xEdit to clean vanilla master files (another tool is used instead). We continue to provide general plugin cleaning instructions for those mods that may require it.
Standard Cleaning Procedures
➕ [Click to show]➖ [Click to hide] Steps - Toggle cleaning procedures...
- Run xEditQuickAutoClean from the drop-down executable list in MO.
- On the plugin selection window, double-click on the mod being cleaned (e.g. Update.esm).
- Once xEdit is finished, click [X] at upper right to close. A backup of the original plugin will automatically be saved into (e.g.,
../xEdit Output/FNVEdit Backups) inside of xEdit Output mod (or in Overwrite at the bottom of the MO mod list (left) pane id previous instructions were NOT followed!).
- To verify the plugin has been cleaned, LOOT can be run again, and no warnings should be apparent.
Cleaning the vanilla master plugins via a tool is covered further in the guide (in Step 4).
Stability INI Tweaks
This section contains INI Tweaks that are crucial to the game's stability but cannot be implemented via BethINI.
Navigate to Tools/INI Editor on MO's toolbar. Choose the Fallout.ini tab and edit the following lines (or add them if they are not present):
➕ [Click to show]➖ [Click to hide] Steps - Removing mouse acceleration...
[Controls]
fForegroundMouseAccelBase=0
fForegroundMouseAccelTop=0
fForegroundMouseBase=0
fForegroundMouseMult=0
➕ [Click to show]➖ [Click to hide] Steps - Improving memory management...
[General]
bPreemptivelyUnloadCells=1
[BackgroundLoad]
bSelectivePurgeUnusedOnFastTravel=1
[Audio]
iAudioCacheSize=8192
iMaxSizeForCachedSound=1024
➕ [Click to show]➖ [Click to hide] Steps - Multi-threading support...
Step recommends to input the actual number of cores on the CPU. Here's how to discover the number of cores for those that need a guide].
[General]
bUseThreadedAI=1
iNumHWThreads=4 -->adjust this number to correspond to the number of cores on the actual CPU used.
- Click [Save] when ready and close the window.
Understanding the Step Patches
A “conflict resolution” patch, or CR Patch, is a plugin that resolves conflicts between various active plugins. They allow using various mods together without any major issues while still achieving the desired outcome from the mods. Thus, the Step Patches are one part patch and one part mod.
The Step Patches are built specifically for the Step mod list. They are required and are dependent on specific mods as noted in the mod list. They will not resolve conflicts with any applicable mods that are not within the guide's mod list, though.
Step Patches
- Step FalloutNV - Conflict Resolution Patch (Step Patch - Conflict Resolution)
- For those that would opt for their own custom lighting and weather mods
- Patches all applicable mods except for Lighting and Weather mods
- Required for all users!
- Step FalloutNV - Lighting and Weather Patch (Step Patch - Lighting and Weather)
- The current version of this guide does not utilize or require a Step Patch - Lighting and Weather.
- Step FalloutNV - Post-Processing Patch (Step Patch - Post-Processing)
- The current version of this guide does not require post-processing patch.
STEP 4
At this point, the PC modding environment should be fully set up and ready for mod installation.
IMPORTANT: Please read ALL of the following carefully!
- This guide can be installed in one of TWO ways:
- All mods from all ModGroups (mod tables) installed. This is recommended, due to the coordination of this build in terms of lighting, weather, and ENB. These are usually the most difficult aspects of a build to get right, given vanilla Skyrim's rather wonky lighting 'incoherence'.
- All mods from all ModGroups EXCEPT for the optional ModGroup, 18-Lighting and Weather. Use this approach if a custom lighting/weather solution will be applied. Note that our post-processing configuration will likely not be compatible, so this is essentially much like #4 (we obviously can't support a custom configuration for this aspect of the guide).
- After installing a mod, ALWAYS enable the mod and any related plugins in MO unless otherwise instructed.
- If no Notes or Step recommendations are provided for a particular mod, all options are valid.
- Mods should be arranged in MO in the order that they are listed to ensure other mods further down the list overwrite/override those occurring before them.
- Mods are listed in alphabetical order within each Mod Group and any deviations from this are purposeful to achieve the desired outcome.
- Always install plugins (ESMs/ESPs), unless otherwise noted.
- Always follow LOOT's advice in regards to mod cleaning and sorting unless otherwise noted.
- Do NOT extract BSAs if support is expected.
ModGroup Separators
Mod Organizer features the ability to create separators within the mod list to group mods for easier visual reference. Step recommends using these separators for each ModGroup below:
➕ [Click to show]➖ [Click to hide] Steps - Create MO Separators
- Click
 at the top of the mod list pane.
- Select [Create Separator], and give the separator a name. Step recommends using the Mod Group names (i.e., Extensions, Resources, Lighting and Weather, etc.).
- Create a new separator for each new Mod Group while working through the Guide.
- Separator colors can be customized by right-clicking on any separator and selecting Select Color.
Mod Table Reference
Below is the legend and reference for the mod tables used in this guide.
Mod Table Legend
|
|
|
|
|
Table Flags
|
A red vertical bar indicates that the mod is required by Step Patch - Conflict Resolution.
A yellow bar indicates that the mod is required by Step Patch - Lighting and Weather.
A green bar indicates that the mod is required by Step Patch - Post-Processing.
A blue bar indicates the mod supports or otherwise relates to mods in the 21-Post-Processing ModGroup.
|
|
|
|
|
|
Mod Name
|
Nexus mod name presented as a link to Nexus for download.
|
|
|
|
|
|

|
Link to the mod's wiki page, which includes various information about the mod.
|
|
|
|
|
|

|
Link to the mod's forum discussion topic.
|
|
|
|
|
|
Baseline
|
This notes the Step Baseline version or option of the corresponding mod that should be installed, and usually refers to options affecting performance/quality. General suggestions are located in the "Notes" column; see below.
|
|
|
|
|
|
Instructions
|
Brief note specifying a recommended install option.
In some cases, mods will have several options. In such cases, click [Expand] to expand the mod row to reveal detailed instructions.
|
Quick Reference
01-Tools
- Standalone applications that aid in the management of the modding process
|
|
|
|
|
Mod Name
|
Baseline
|
Instructions
|
|
|
|
|
|
FNV BSA Decompressor 
|
|
Detailed Instructions available
|
- Run FNV BSA Decompressor.exe
- Under the Fallout: New Vegas header, click [Browse] and point the tool to FNV's root folder (i.e.
..\Steam\steamapps\common\Fallout New Vegas sub-folder for Steam users).
- Click Decompress and wait for the process to finish.
- Read carefully the information that appears under the Decompression has completed! header and make the necessary checks (as instructed), then close the tool.
The tool does not support other games in the Bethesda catalogue and can be deleted once the installation of the guide is proven to be successful (the test run is further in the guide).
|
|
|
|
|
|
Ultimate Edition ESM Fixes 
|
|
Detailed Instructions available
|
- Now, in Mod Organizer, right-click anywhere on the left-hand pane and select Create Empty Mod.
- Name the mod Vanilla ESM Cleaned in the pop-up window, then click OK.
- Right-click on the newly created mod folder and choose Open in Explorer from the drop-down menu, then copy the file path.
- Navigate to where Ultimate Edition ESM Fixes was installed (i.e.
..\Modding\Tools\Ultimate Edition ESM Fixes) and run Installer.exe.
- Under the Fallout: New Vegas header, click [Browse] and point the tool to FNV's root folder (i.e.
..\Steam\steamapps\common\Fallout New Vegas sub-folder for Steam users).
- Under the ESM Fixes header, click Browse and paste the file path to the Vanilla ESM Cleaned mod that was created.
- Click [Install], and wait for the process the finish, then close the tool.
- Back in Mod Organizer press the Refresh button on the top left.
The tool does not support other games in the Bethesda catalogue and can be deleted once the installation of the guide is proven to be successful (the test run is further in the guide). Cleaning any other plugin follows the standard cleaning procedure.
|
02-Extenders
- Mods that expand on the inherent functionality of a game or another mod without themselves affecting content
|
|
|
|
|
Mod Name
|
Baseline
|
Instructions
|
|
|
|
|
|
FNV 4GB Patcher 
|
|
Detailed Instructions available
|
| Even though the GOG version of Fallout New Vegas is pre-patched to make the FNVPatch.exe executable able to use up to 4GB RAM, this guide still requires users to install the FalloutNV 4GB Patcher from Nexus regardless, as it has a built-in compatibility with NVSE and shaders like SweetFX and Reshade.
ROOT FILES INSTALLATION
- Download the latest version. Choose manual download from the download tab at Nexus.
- Place the FNVPatch.exe file into
Fallout New Vegas\ (not the data directory!), usually found at ...\Steam\steamapps\common\Fallout New Vegas.
- Run FNVPatch.exe.
SETTING UP MO
Use MO to call the game executable, not "NVSE" or the launcher. The game is now "patched" to see 4GB of memory and will automatically load NVSE if present.
|
|
|
|
|
|
NVSE 
|
|
Detailed Instructions available
|
ROOT FILES INSTALLATION
- Download the latest archive.
- Place all *.exe and *.dll files into
Fallout New Vegas folder (not the data directory!), usually found at <.../Steam/steamapps/common/Fallout New Vegas>. Should be four files:
- nvse_1_4.dll
- nvse_loader.exe
- nvse_editor_1_4.dll
- nvse_steam_loader.dll
Various online guides suggest users to create a custom NVSE.ini file to handle memory allocation. This is no longer required as the most current version of New Vegas Tick Fix (NVTF) provides memory handling instead. Attaching memory handling functions to NVSE while using NVTF simultaneously might ultimately decrease game stability instead.
RESTART MO
If NVSE is installed correctly, MO will detect it and show it in the executables drop down.
|
|
|
|
|
|
JIP LN NVSE Plugin 
|
|
Detailed Instructions available
|
INSTALLATION
Download and install the latest version.
.INI FILE EDITS
WARNING: These edits must be repeated every time the mod is updated.
- It is recommended to change some of the default INI settings:
- Double-click the mod in Mod Organizer and select [Ini-Files].
- Find the following lines and change their values to the ones below (save and close the file when done):
bEnableNVACAlerts=1
bNPCWeaponMods=1
uWMChancePerLevel=2
uWMChanceMin=10
uWMChanceMax=20
- Players are encouraged to tweak uWMChanceMin and uWMChanceMax in order to adjust the chances of weapon mods appearing on NPC weapons to their personal preferences.
|
|
|
|
|
|
NVTF - New Vegas Tick Fix 
|
|
Detailed Instructions available
|
INSTALLATION
Download and install the latest version.
The full functionality of this mod can only be unlocked in windowed mode. It is recommended to use it in conjunction with One Tweak. Do not use this mod with an ENB, they are not compatible.
.INI FILE SETUP
WARNING: These edits must be repeated every time the mod is updated.
- It is recommended to change some of the default INI settings:
- Double-click the mod in Mod Organizer and select [Ini-Files].
- Find the following lines and change their values to the ones suggested (save and Exit when done):
bRedoHashtables=1
bModifyDirectXBehavior=1
bEnableThreadingTweaks=1
bToggleTripleBuffering=1
HIGH FPS (ABOVE 60 HZ) TWEAKS
The Havok engine that's incorporated in Fallout New Vegas causes various bugs at FPS above 60Hz. For most users Step recommends capping the games maximum FPS at 60 via the videocard drivers. However, this might not be desired by users who own high-end videocards and monitors capable of refresh rates above 60Hz. The following sections support for those that want to play the game at higher than 60 FPS:
- Use your videocard drivers to cap the game at the desired FPS.
- Double-click the mod in Mod Organizer and select [Ini-Files].
- Now go to the [FPSFix] section and adjust the
iMaxFPSTolerance to the desired maximum FPS amount +60. For example, if your monitor's refreshrate is 120 Hz, you should set the value at (120+60)= 180. You MUST ensure your game FPS do not go above iMaxFPSTolerance =be it with an FPS capper or another method, otherwise the game's logic will speed up.
- Find the following line in the [GTC] section and make sure the value is set as suggested:
bFPSFix=1
- Those that still experience issues should try the alternative FPS Fix:
[GTC]
bFPSFix=0
bAlternateGTCFix=0
- In same occasions playing at high FPS will cause the so-called "Spider Hands" glitch (player's fingers growing longer). Find and modify the following line to fix it:
bSpiderHandsFix=1
|
|
|
|
|
|
New Vegas Heap Replacer 
|
|
Detailed Instructions available
|
INSTALLATION
- Download the archive from Nexus, using the Manual Download option.
- Open the archive and extract d3dx9_38.dll from that folder into
Fallout New Vegas\ folder (not the data directory!), usually found at ...\Steam\steamapps\common\Fallout New Vegas.
- While the archive i9s still open, extract the contents of the Data folder (it should contain just a folder named NVHR) into FNV's Data folder, usually found at
...\Steam\steamapps\common\Fallout New Vegas\Data.
- Make sure that you extract only the contents of NVHR's Data folder and nor the Data folder itself. To check it, navigate to FNV's Data folder, usually found at
...\Steam\steamapps\common\Fallout New Vegas\Data and check its contents. It should contain a NVHR folder inside and not another Data folder.
|
|
|
|
|
|
One Tweak 
|
|
Detailed Instructions available
|
| One Tweak works in fake fullscreen mod, which itself works only under capped FPS. While opting not to install One Tweak will not have any adverse effects on gameplay itself, it prevents crashes when minimizing the game to the Windows taskbar and turning additional monitors on a multi-monitor configuration on/off. Still, guide users that prefer to play in fulscreen mode should skip this mod.
INSTALLATION
Download and install normally through MO.
FALLOUTPREFS.INI EDIT
Once the installation is complete, click the Tools button at the top of MO and select INI Editor:
- Select the FalloutPrefs.ini tab and check the value of the following line:
- If the line does not exist, paste it in.
- If it exists, make sure their values are exactly the same as below.
[Display]
bFull Screen=0
Save and close.
|
|
|
|
|
|
ShowOff NVSE Plugin 
|
|
Detailed Instructions available
|
| Download and install both ShowOff NVSE and ShowOff INI main files. Select Merge when prompted.
(Alternative download link:Github link. Use only if the file is not on Nexus.)
|
Game Launch Test
At this stage, the preliminary build should be tested to confirm that there are no issues with the modding environment or engine-level mod configurations:
- Start the game by running the NVSE launcher from Mod Organizer. The game should load to the main menu without issue.
- Exit the game using the standard menu options.
If the game launched and loaded as expected, continue forward. Otherwise, all instructions were not followed, and something was missed. Revisit the installation steps above starting with the System Setup Guide in Step 1. If a careful review of the previous instructions does not resolve the issue, post on the guide support forums for help.

WARNING
Beyond this point, DO NOT launch the game again until instructed to do so.Many of the following mods are interdependent, and launching the game prematurely will most likely result in issues or failures. Please DO NOT post on the forums for support of non-issues relating to a failure to RTFM.
03-Resources
- Mods solely providing assets intended specifically for use by other mods without themselves affecting content
|
|
|
|
|
Mod Name
|
Baseline
|
Instructions
|
04-Foundation
- Baseline mods that should be overridden by other mods AND/OR that make widely-accepted programmatic changes expected by other mods
|
|
|
|
|
Mod Name
|
Baseline
|
Instructions
|
|
|
|
|
|
Unofficial Patch NVSE Plus 
|
|
Detailed Instructions available
|
INSTALLATION
Download and install the latest version.
.INI FILE EDITS
WARNING: These edits must be repeated every time the mod is updated.
It is recommended to change some of the default INI settings:
- Double-click the mod in Mod Organizer and select [Ini-Files].
- Find the following lines and change their values to the ones suggested (save and Exit when done):
[OPTIONS]
bChristineSkills=1
bCompanionSuiteEffects=1
bKnockdownExploitFix=1
bMissingDMReturnOptions=1
bPyromaniacBurningDamageFix=1
bRetroactiveExplosionImmunityFix=0
bReturnToSenderMoraleFix=1
bStrongerEuclidDeathRay=1
|
|
|
|
|
|
Collision Meshes 
|
|
Detailed Instructions available
|
INSTALLATION
- Download and install the Main file
- Download and install the Update to 1.6.4. When the "Mod Exists" warning appears, choose [Merge].
- Download and install the Hectrol Tumbleweed compatibility and OJO BUENO Texture Pack compatibility Miscellaneous files.
- When the "Mod Exists" warning appears, choose [Merge].
Optional Performance Tweaks
The highly detailed meshes can lead to FPS loss. Following the instructions below can improve general FPS:
Hide the following folders to improve FPS (instructions for hiding files/folders):
meshes\clutter\billiards
meshes\clutter\bobbypin
meshes\clutter\cafeteria
meshes\clutter\consoles
meshes\clutter\duckovs
meshes\clutter\gardengnome
meshes\clutter\grill
meshes\clutter\hamradio
meshes\clutter\hospital
meshes\clutter\maintenance
meshes\clutter\mopbuckets
meshes\clutter\mannequins
meshes\clutter\nv_gomorrah
meshes\clutter\nvkhanrugs
meshes\clutter\nvwoodbarrel
meshes\clutter\office
meshes\clutter\rugs
meshes\clutter\sportsequipment
meshes\clutter\Tenpenny
meshes\clutter\tricycle
meshes\clutter\tv02
|
|
|
|
|
|
FNVLODGen 
|
|
Detailed Instructions available
|
| Download and install FNVLODGen Resources Main File and NMC LOD texture fix Optional File. Select Merge when prompted.
NOTE: FNVLOGen = 'xLODGen', which was installed as instructed in the System Setup Guide, so the "FNVLODGen #.#.#" Main File can be disregarded.
|
|
|
|
|
|
Improved Sound FX v0821 
|
|
Detailed Instructions available
|
INSTALLATION
Download the main file only.
- Download the file manually to a location of your choice.
- Drag and drop the archive to the Downloads tab of MO.
- Double-click on the archive in MO to install the mod.
- This mod comes with a BAIN installer:
- Tick both Data and DLC esps in the installer.
- Wait for the installation to finish and double-click on the mod to open it.
Disable all plugins (instructions for disabling plugins) except:
Improved Sound FX.esp
Then enable the following plugin:
Improved Sound FX - Merged major DLC.esp
|
|
|
|
|
|
MGs Neat Clutter Retextures 
|
|
Detailed Instructions available
|
| Download and install MGs Pack Ojo friendly 7, Beige Pack, Duct Tape and Flat mop_mop bucket. Select Merge when prompted.
|
|
|
|
|
|
Much Needed LOD 
|
|
Detailed Instructions available
|
| Download and install the main file and Much Needed LOD - NMC Patch and Much Needed LOD - Ojo Bueno Patch optional files. Select Merge when prompted.
|
|
|
|
|
|
NMCs Texture Pack 
|
Medium Pack
|
Detailed Instructions available
|
INSTALLATION
- Download and install "NMCs Textures NV MEDIUM Pack" Parts 1 and 2 main files.
- Whenever the "Mod Exists" warning appears, choose Merge.
- Download and install the Naval Chair Fix, Patch All Sized Packs and Water Tower Clark County Fix update files.
- Whenever the "Mod Exists" warning appears, choose Merge.
- Download and install the X-Y Ratio Main screen for NMCs Texture Pack optional file, where X-Y corresponds to your monitor's resolution (e.g. mine's 16:9).
- When the "Mod Exists" warning appears, choose Merge.
|
|
|
|
|
|
Asterras Many Fixes 
|
|
Detailed Instructions available
|
INSTALLATION
- Download:
- Asterra's Many Fixes with Fixes For Minor Annoyances (Main Files)
- Asterra's Many Fixes - Collision Meshes compatibility (Optional Files)
- Asterra's Many Fixes - NMC's Texture Pack compatibility (Optional Files)
- Asterra's Many Fixes - Semi-Transparent Door Glass compatibility (Optional Files)
- Install the Asterra's Many Fixes with Fixes For Minor Annoyances main file first.
- Install the optional files in any order or merge them (Whenever the Mod Exists warning appears, choose [Merge])
|
|
|
|
|
|
POCO BUENO Texture Pack 
|
|
Detailed Instructions available
|
| Download and install the main file and the PocoBueno Skeleton Transparency Fix optional file. Select [Merge] when prompted.
|
|
|
|
|
|
[ Wasteland Clothing Hires Retexture] 
|
|
Detailed Instructions available
|
| The mod is deleted from all official mod pages. Players that manage to find a copy (Google can help) should still use it, as it is the only clothing retexture worth using.
INSTALLATION
- Download the file manually to a location of your choice.
- Drag and drop the archive to the Downloads tab of MO.
- Double-click on the archive in MO to install the mod.
|
05-Animation and Physics
- Mods that affect animations or physics
|
|
|
|
|
Mod Name
|
Baseline
|
Instructions
|
|
|
|
|
|
Ragdolls 
|
|
Detailed Instructions available
|
| Download and install the Ragdolls and NOT the Ragdolls TTW main file. Then install the Blind Deathclaw and the ED-E fixes under the Optional Files tab. Choose [Merge] when prompted.
|
|
|
|
|
|
Animated Ingestibles 
|
(english)
|
Download and install the main file and the update file. Select [Merge] when prompted.
|
|
|
|
|
|
Anniversary Anim Pack 
|
|
Download and install the main file and the Tactical Reload Addon optional file. Choose [Merge] when prompted.
|
|
|
|
|
|
Anniversary Anim Pack - General Bugfix 
|
|
Detailed Instructions available
|
- Download and install both main files. Choose [Merge] when prompted.
- Download and install the One-handed melee swing sound overlap fix 1a and Tactical Reload Addon Fixed optional files in any order. Choose [Merge] when prompted.
|
|
|
|
|
|
Better Posture 
|
|
During install, right click "Data" and select "Set data directory", then click [OK].
|
|
|
|
|
|
Camp McCarran Animated Monorail 
|
|
Detailed Instructions available
|
| Download and install Camp McCarran monorail animation stand alone version and Monorail Proper Sounds. Select [Merge] when prompted.
|
|
|
|
|
|
FNV Clean Animation 
|
|
Detailed Instructions available
|
| Download and install the Main File, the Update File and the optional FO3 Weapons Patch. Choose [Merge] when Prompted.
|
|
|
|
|
|
Hit's Anims - Season 1 
|
|
Download and install both the main and the optional file. Select [Merge] when prompted.
|
06-Models and Textures
- Mods that replace existing models or textures
|
|
|
|
|
Mod Name
|
Baseline
|
Instructions
|
|
|
|
|
|
Weapon Enhancement Pack 
|
|
Detailed Instructions available
|
| A Fallout 3 mod. Needs manual installation.
INSTALLATION
- Download the file manually to a location of your choice.
- Drag and drop the archive to the Downloads tab of MO.
- Double-click on the archive in Mo to install the mod.
|
|
|
|
|
|
Cherry Bomb HD retexture and remodel 
|
|
Detailed Instructions available
|
INSTALLATION
- Download and install the Round mesh for cherry bomb optional file.
- Download the 512x512 textures miscelaneous file.
- Install the file. It has a BAIN Installer, tick the Default 512x512 box only and then click [OK].
- When the Mod Exists warning appears select [OK].
|
|
|
|
|
|
Dog 2K 
|
|
Detailed Instructions available
|
A Fallout 3 mod. Needs manual installation:
- Download the file manually to a location of your choice.
- Drag and drop the archive to the Downloads tab of MO.
- Double-click on the archive in MO to install the mod.
|
|
|
|
|
|
FNV LOD Supplementation 
|
|
Download and install both the main file and the Optional Overpasses file. Select [Merge] when prompted.
|
|
|
|
|
|
HD Desk Fan 
|
|
Detailed Instructions available
|
| Install the HD Desk Fan V1 - Darker propeller main file and the Higher quality mesh fix optional file. Select [Merge] when prompted.
|
|
|
|
|
|
Hectrol FX Duststorm Deluxe Highres Retex 
|
|
Detailed Instructions available
|
INSTALLATION
- Download and install the main file.
- Expand Hectrol FX Duststorm Deluxe.
- Right-click on 1024 and select Set data directory, then click [OK].
|
|
|
|
|
|
High Resolution Cigarette 
|
|
Detailed Instructions available
|
INSTALLATION
- Download and install the main file.
- Expand High Res Cig - AIO Burned Version.
- Right click Snubbed and select Set Data Directory.
- Press [OK] to install.
|
|
|
|
|
|
High-Res Hula Girl Retex and Resource 
|
|
Detailed Instructions available
|
INSTALLATION
- Download the Coconut Bra main file.
- Expand Jockerine's Hula Girl Retex - Coconut Bra.
- Right-click on 512, select Set Data Directory, then press [OK].
|
|
|
|
|
|
Laser Weapon Iron Sights 
|
|
Detailed Instructions available
|
| Download and install the Laser Weapon Iron Sights - Gun Runner's Arsenal Merged and Plasma Weapon Iron Sights - Gun Runner's Arsenal Merged file only. Choose [Merge]] when prompted.
During download the files will incorrectly state a TTW dependency. This message can safely be ignored.
|
|
|
|
|
|
Nut Water Overhaul 
|
|
Detailed Instructions available
|
INSTALLATION
FOMOD Instructions
Nut Water Overhaul
|
|
|
The instructions provided above are incompatible with ENB (STEP does not recommend using ENB for Fallout: New Vegas anyway).
|
|
|
|
|
|
Pimpboy 
|
Pimpboy - Sapphire
|
Detailed Instructions available
|
INSTALLATION
Download and install your version of choice (Sapphire is recommended).
FEMALE MESH FIX
In order to carry over the fixes from YUP:
- Right-click on the mod in the left pane of MO and choose Open in explorer.
- Navigate to
...\meshes\pimpboy3billion and find pimpboyarm.nif.
- Create a copy of pimpboyarm.nif and rename it to pipboyarmfemale_fixed.nif
|
|
|
|
|
|
PMs HD Ammo Boxes 
|
1024/512
|
Download and install PM's HD Ammo Boxes - 1K Diffuse 512px Normals only.
|
|
|
|
|
|
PSRO - Peripheral Scope Reticle Overhaul 
|
|
Detailed Instructions available
|
INSTALLATION
- Download and install the 1a. PSRO - Peripheral Scope Reticle Overhaul main file.
FOMOD Instructions
PSRO - Peripheral Scope Reticle Overhaul
|
- Status Check
- Pick Your Position
- Finish
|
- 2. (Optional - only if you like Depth of Field (DoF) effects) Download and install the 1b. PSRO - Peripheral Depth Blur . When the Mod Exists warning appears, select [Merge]
INI EDITS
- Open the INI Editor from MO's taskbar.
- Add the following line under [Display] in both Fallout.ini and FalloutPrefs.ini (save and close when done):
[Display]
fScopeScissorAmount=0
|
|
|
|
|
|
Retextured Labels - Food and More 
|
|
Detailed Instructions available
|
INSTALLATION
- Install Food Labels first.
- Install Additional Retextures second and choose [Merge] when prompted.
- Install High-Res Sugar Bombs last.
- Expand High-Res Sugar Bombs
- Right-click 512, select Set Data Directory, then press [OK].
- When the Mod Exists warning appears, choose [Merge].
|
|
|
|
|
|
Semi-transparent Door Glass 
|
|
Detailed Instructions available
|
| Install the Main File.
Hide the following files (as they are fixed by Asterra's Many fixes) (instructions for hiding files/folders):
meshes\dlcanch\dungeons\office\doors\dlcanchoffdoorbigred01.nif
meshes\dungeons\nv_craftsmanhomesinterior\nvcraftsmanrmendb.nif
|
|
|
|
|
|
Skinned Mesh Improvement Mod 
|
|
Detailed Instructions available
|
The link leads to a Nexus archive page. Manual download is the only option:
- Download the file manually to a location of choice.
- Drag and drop the archive to the Downloads tab of MO.
- Double-click on the archive in MO to install the mod.
|
|
|
|
|
|
Simplified Weapon Retexture Project 
|
|
Detailed Instructions available
|
| Download and install the main file and Simplified WRP - No Repeater Peep Sight optional file. Choose [Merge] when prompted.
|
|
|
|
|
|
Textures Over Time 
|
|
Install only the ''FlagStoneWalls, HH_Sandstone, and Sandbags main files. Select Merge when prompted.
|
|
|
|
|
|
Ultra-Luxe Interior Re-texture 
|
|
Detailed Instructions available
|
INSTALLATION
- Download the main file.
- Double-click on the mod in the Downloads tab to install.
- Expand the UL Retex from the menu and untick everything except Default - Replace All Curtain Textures.
- Right click on Default - Replace All Curtain Textures and choose Set data directory, then click [OK].
|
|
|
|
|
|
Wasteland Flora and Terrain Overhaul 
|
|
Detailed Instructions available
|
| WARNING: Do not clean the mod's plugin. Even if LOOT suggest that you do so.
Install the Wasteland Flora and Terrain Overhaul main file and the Landscape Seam Fix, Honest Hearts Trees and Plants and Rocks Overhaul and UHQNV Rocks - Roads and Terrain Overhaul optional files. Select Merge when prompted.
|
|
|
|
|
|
WTH - Weapon Textures from Heaven 
|
2k version
|
Detailed Instructions available
|
| Download and install WTH - Weapon Textures from Heaven 2k main file. Then, download and install WTH - AMR Suppressor Fix optional file. Select Merge when prompted.
|
07-Sounds and Music
- Mods that affect sounds or music
|
|
|
|
|
Mod Name
|
Baseline
|
Instructions
|
|
|
|
|
|
All Explosion Sounds Overhaul 
|
|
Detailed Instructions available
|
| Download and install the main file. Then download and install the All Explosion Sounds Overhaul SCRIPT Version optional file. Select [Merge] when prompted.
|
|
|
|
|
|
Mojave Music Radio - Extended 
|
|
Detailed Instructions available
|
INSTALLATION
These are the instructions for adding 45 songs to Mojave Music Radio, raising the total number of songs to 60.
- Download and install the MMRE Music Pack 1 and MMRE Music Pack 2.
- When the Mod Exists warning appears, choose [Merge].
- Download and install the MMRE ESPs file.
- When the Mod Exists warning appears, choose [Merge].
Disable plugins (instructions for disabling plugins):
Move all plugins except MojaveExtended60.esp into "Optional ESPs".
If a bigger package is installed, make certain to use the proper plugin.
|
08-Character Appearance
- Mods that affect the appearance of the player character or NPCs
|
|
|
|
|
Mod Name
|
Baseline
|
Instructions
|
|
|
|
|
|
Fallout Character Overhaul 
|
|
Detailed Instructions available
|
Foreward
The current version of Fallout Character Overhaul (FCO) contains multiple errors and poorly written scripts and should not be used as a standalone mod. However, the assets of FCO (textures and meshes) are still required by other mods on this guide.
INSTALLATION - MAIN FILE
FOMOD Instructions
Fallout Character Overhaul 3.0
|
- Fallout Character Overhaul 3.0
- Addons
- Teeth Textures
- Options
- Fallout Character Overhaul 3.0
|
INSTALLATION - UPDATE
- Install the Fallout Character Overhaul 3.01 Update.
- When MO asks for confirmation, click Merge, not Replace.
Disable plugins (instructions for disabling plugins):
FCO - OHSB NPC Edits.esp
FCO - Russel.esp
FCO - NPC Change.esp
Ensure that FCO - Master.esm is the only plugin listed in the "Available ESPs" box.
MANDATORY INI EDITS
- Once the installation is complete, click the Tools button at the top of MO and select INI Editor
- Check the value of the following line in both fallout.ini and falloutprefs.ini.
- If the line does not exist, paste it in:
- If it exists, make sure their values are exactly the same as below:
[General]
bLoadFaceGenHeadEGTFiles = 1
|
|
|
|
|
|
FCO - The Last Few Edits 
|
|
Detailed Instructions available
|
INSTALLATION
- Download and install the main file.
- Install FCO - The Last Few Edits Patches optional file.
- When MO asks for confirmation, click Merge, not Replace.
Disable plugins (instructions for disabling plugins):
FCO - The Last Few Edits - JSUE Patch.esp
FCO - The Last Few Mojave Raiders Patch.esp
Ensure that FCO - The Last Few Edits.esm, FCO - The Last Few Edits.esp and FCO - The Last Few Edits - YUP Patch.esp are the only plugins listed in the "Available ESPs" box.
|
|
|
|
|
|
Type3 Body and Armor Replacer 
|
|
Detailed Instructions available
|
| This page has been flagged as Adult Content!. The page and the related mod contain no explicit content.
INSTALLATION
- Download and install the New Vegas Type 3 Armor Pack Complete V2_1 main file.
- Download the CombatMk1, CombatMk2, Fieldhand outfit Fix, Leather Armor Wrist fix update files.
- Install the update files. During install click Merge, not Replace, when asked.
- Download the Business Suit with Shirt and Tie and Merc Charmer with stockings optional files.
- Install the update files. During install click Merge, not Replace, when asked.
|
|
|
|
|
|
Old World Blues Armors for Type 3 
|
|
Detailed Instructions available
|
| This is a Not Safe For Work (NSFW) mod page!
For the most vanilla-like options, install the main file and the Patch for StealthSuit- Fixed and Modest Patient Gown optional files.
INSTALLATION
- Download and install the main file.
- Download the Patch for StealthSuit- Fixed and Modest Patient Gown optional files.
- Install the update files. During install click Merge, not Replace, when asked.
|
|
|
|
|
|
Roberts Male Body FNV 
|
|
Detailed Instructions available
|
| This is a Not Safe For Work (NSFW) mod page and installer!
Direct download links are provided in the Installation section below. The SFW options are provided by default.
INSTALLATION
- Download and Install the Roberts New Vegas Main - Underwear 3_4 main file first.
- Download and Install from optional files:
- Whenever the Mod Exist warning appears, choose [Merge] in order to overwrite the main file.
- Download and Install from miscellaneous files:
- Whenever the Mod Exist warning appears, choose [Merge] in order to overwrite the main file.
BUGFIXING
The male hand textures included with Robert's are problematic. Follow these instructions to fix them:
- Right-click on the Roberts Male Body FalloutNV mod in MO's left pane and slect Open in Explorer.
- Navigate to
textures\characters\raider, hold [Shift] and select handmale.dds, handmale_n.dds, handmale_sk.dds, handmale_1st.dds, handmale_1st_n.dds and handmale_1st_sk.dds.
- Right click on the selected files and choose [Copy].
- Navigate to
textures\characters\male and paste the selected files.
|
|
|
|
|
|
ADAM Reborn 
|
|
Detailed Instructions available
|
FOMOD Instructions
ADAM Reborn
|
- Main
- Complete Version or Custom Install
- Original Gloves
- Which gloves do you want?
- Alternate Riot Gear Helmet
- Do you want to install alternate Riot Gear Helmet?
- NCR Trooper
- Do you want to install NCR Trooper module?
|
|
|
|
|
|
|
AMidianBorn NV Book Of Water 
|
|
Detailed Instructions available
|
INSTALLATION
- Download BOA NV The Book Of Flesh.
- Double click on the downloaded file to install. In the Quick install menu rename the file to
aMidianBorn NV Book Of Flesh, then press [OK] to finish the installation process.
- Download nov 2011 book of steel.
- Double click on the downloaded file to install. In the Quick install menu rename the file to
aMidianBorn NV Book Of Steel, then press [OK] to finish the installation process.
Disable plugins (instructions for disabling plugins):
Boacombat2glove.esp
boa ncrpahelmet.esp
|
|
|
|
|
|
Bornagain Combat Armor 
|
2048
|
Detailed Instructions available
|
| Download and install the Lite Version and the BornagainFNVCombatArmorLonesomeRoad4096 optional file. Choose [Merge] when prompted.
|
|
|
|
|
|
The Legacy of X13 - An Armor Overhaul 
|
|
Detailed Instructions available
|
INSTALLATION
- Download and install the Dead Money Assassin Suit file.
- Download the FULL - Default Armour main file for vanilla look. Alternatively, you can install any of the alternative color retextures (indicated with "Red", "Blue", "Green" in the header. Take a look in the gallery section of the mod to choose).
- During install of the FULL - Default Armour file click [Merge].
- Download and install the 3-2 Patch main file.
- When the Mod Exists warning appears, click [Merge].
- Download and install the Type 3 Mesh optional file.
- When the Mod Exists warning appears, click [Merge].
|
09-Fixes
- Mods have a programmatic component that fixes various bugs and/or inconsistencies
|
|
|
|
|
Mod Name
|
Baseline
|
Instructions
|
|
|
|
|
|
Climate Control NVSE 
|
|
Download and install both the main file and the optional file. Select [Merge] when prompted.
|
|
|
|
|
|
FNV LOD Texture Patches 
|
|
Install both main files and the "Tecium LOD patch for Ojo-Poco" optional file. Select Merge when prompted.
|
|
|
|
|
|
Improved Lighting Shaders 
|
|
Detailed Instructions available
|
INSTALLATION
Download and install the main file. Then download and install the Millenia's Environment Map Shader Fix Copatible Shaders optional file. Choose [Merge] when prompted.
RECOMMENDED .INI FILE TWEAKS
WARNING: These edits must be repeated every time the mod is updated.
- Double-click the mod in Mod Organizer and select [Ini-Files].
- Change the following values:
iMaxLightCount = 12
bIncreaseLightBuffers = 1
- 3. Click the [Save] icon.
|
|
|
|
|
|
Logic and Consistency Fixes 
|
|
Detailed Instructions available
|
INSTALLATION
- WARNING: Mod versions newer than v 1.1 have a bug that will break the quest "Birds of Feather". Most of the fixes in the newer versions will also cause conflict with other mods in this guide.
- Go to the Old Files section on the bottom of the page and manually download version 1.1 to a location of the user's choice.
- Drag and drop the archive to the Downloads tab of MO.
- Double-click on the archive to install the mod.
|
|
|
|
|
|
Strip Lights Region Fix 
|
|
Detailed Instructions available
|
| Download and install the main file and Strip Lights Region Fix - Vault 22 Flora Overhaul Remastered optional files. Select [Merge] when prompted.
Compatibility with other mods is provided in the STEP Conflict Resolution Patch.
|
10-Gameplay-General
- Mods that affect general or multiple gameplay mechanics
|
|
|
|
|
Mod Name
|
Baseline
|
Instructions
|
|
|
|
|
|
Delay DLC Redux 
|
|
Detailed Instructions available
|
| Download and install the main file and the Delay DLC Redux - Pre-Order Pack Placement optional file. Make sure you 'do not get the TTW versions by mistake. Select [Merge] when prompted.
|
|
|
|
|
|
LStewieAls Tweaks 
|
|
Detailed Instructions available
|
INSTALLATION
- Download and install the main file.
- Download the "Quick Scope Anims" optional file.
- Install the optional file. When the "Mod Exists" warning appears, choose [Merge].
nvse_stewie_tweaks.ini
A preconfigured ini file required to take full advantage of lStewieAl's tweaks is included in the STEP Guide CR patch further in the guide.
|
|
|
|
|
|
Unfound Loot 
|
|
Detailed Instructions available
|
| Download and install the main file and the optional ini file. Overwrite when asked.
INSTALLATION
This mod is no longer on the Nexus. Use the alternative download link instead.
- Download the main and the optional ini files to a location of your choice.
- Drag and drop the files to the Downloads tab in MO.
- Install the files in any order you like. When the Mod Exists warning appears, choose [Merge].
|
11-Gameplay-AI and Combat
- Mods that affect AI, stats, or combat mechanics of NPCs
|
|
|
|
|
Mod Name
|
Baseline
|
Instructions
|
|
|
|
|
|
Fallout 4 Survival Mode - Style Damage 
|
|
Detailed Instructions available
|
| (Optional) This mod will increase difficulty by a notch, so skip it for a more vanilla experience.
Download and install the NVSE version from optional files. It has no plugin and can be disabled at any time if the settings prove too hard.
|
|
|
|
|
|
Quick Grenade Hotkey 
|
|
Detailed Instructions available
|
| Instructions for oHUD compatibility available
INSTALLATION
Download and install the mod normally.
oHUD COMPATIBILITY
In order to get oHUD support for this mod do the following:
- Right-click on the mod and select Open in Explorer
- Go to
\menus\prefabs\grenadehotkey\ and right-click on GrenadeKeyHUD.xml, then select Open with... from the dropdown menu.
- Open the file with Notepad or Notepad++.
- Find the set of lines in the first block and change to match the second block following (save and exit when done):
<visible>
<copy src="ActionPoints" trait="visible" />
</visible>
<visible>
<copy src="ActionPoints" trait="visible" />
<and>
<copy src="io()" trait="_iHUD_CND" />
<gt>0</gt>
</and>
</visible>
5. Save and close the file.
|
12-Gameplay-Economy
- Mods that affect currency, rewards, values, rates, or any other economy-related mechanics
|
|
|
|
|
Mod Name
|
Baseline
|
Instructions
|
|
|
|
|
|
Casino Exchange All 
|
|
Download and install the Casino Exchange All 1-5a main file. During install tick the Pre-War Money option.
|
|
|
|
|
|
Economy Overhaul 
|
|
Download and install the main file and the Economy Overhaul - Default INI. Choose [Merge] when prompted.
|
13-Gameplay-Immersion
- Mods that help to improve game immersion and role-playing scenarios
|
|
|
|
|
Mod Name
|
Baseline
|
Instructions
|
|
|
|
|
|
Helmet Overlay 
|
|
Detailed Instructions available
|
| (Optional) This mod is optional as helmet overlay effects may not fit everyone's taste. Please visit the mod page to decide whether the mod is needed. It is not required by the Step patches and can be skipped.
INSTALLATION
- Download and install the main file.
- In the installer tick Medium (2k) on the Texture Resolution screen.
- Tick Enable on the Texture pre-loading screen.
EXTENDING THE LIST OF SUPPORTED HEADGEAR
- Two items featured on the Step Guide are not currently supported by Helmet Overlay. Follow the steps below to provide support:
- Right-click on Helmet Overlay in the left pane of MO and select Open in Explorer from the drop-down menu.
- Find and open the Helmet Overlay folder. There should be a file named
default.txt inside it.
- Open the txt file and scroll to the very bottom of it.
- Press
Enter (also known as Backspace)to start a new row and paste the following lines of text exactly as written bellow:
@EMR-StealthSuitMkII.esp:00331E $ranger_blu.dds $helm.dds 1 ; Stealth Suit Operative Helmet
- 5. Save and close the file when done.
|
|
|
|
|
|
More Rads In the Ass 
|
(Script Runner)
|
Detailed Instructions available
|
| (Optional) This mod will increase difficulty by a notch, so skip it for a more vanilla experience.
INSTALLATION
Install (Script Runner) main file only.
INI TWEAKS
- Double-click on the mod in the left pane of MO.
- Go to the INI_Files tab.
- Tweak the values to personal preference.
- Setting everything to
-1 disables all changes to RADs (it works as a failsafe).
|
|
|
|
|
|
Ownerless Trash 
|
|
Download and install the Ownerless Trash with DLC Optional File only.
|
14-Gameplay-Quests
- Mods that alter aspects of quests and/or related lore
|
|
|
|
|
Mod Name
|
Baseline
|
Instructions
|
15-Gameplay-Skills and Perks
- Mods that affect the player character's or NPC skills and perks or related leveling
|
|
|
|
|
Mod Name
|
Baseline
|
Instructions
|
16-Interface
- Mods that affect any aspect of the user interface
|
|
|
|
|
Mod Name
|
Baseline
|
Instructions
|
|
|
|
|
|
High Res Local Maps 
|
|
Detailed Instructions available
|
- Download and install the main file.
- (Optional for even higher resolution) Double-click the mod in Mod Organizer and select [Ini-Files].
- Set iResScale to iResScale=2 and save the changes.
|
|
|
|
|
|
Item Icons Redux 
|
|
Download and install the mod. In the Bain installer tick 00 Core files and 02 Core files - Upscaled Icons only.
|
|
|
|
|
|
Unofficial DarNified UI Update FNV 
|
|
Detailed Instructions available
|
INSTALLATION - MOD FILES
- Download the main file. It is not on Nexus, so download manually.
- Once downloading is complete, open MO and find the Downloads tab.
- Drag and drop the files from your download location to MO's Downloads tab.
- Double-click on the main file to install.
FONTS INSTALLATION
In order to display any text in-game, DarNified UI - TTW requires the installation of custom fonts.
- Click the Tools (puzzle) icon on MO's toolbar and choose INI Editor from the drop-down menu.
- Open the falloutprefs.ini tab and search for a [Fonts] section. If one exists (in most cases it shouldn't), delete everything listed in it (the [Fonts] header included), then click Save.
- Open the fallout.ini tab and search for a [Fonts] section.
- If a [Fonts] section exists, change everything in it with the text below.
- If no [Fonts] section exist (this should be the case in the majority of cases, simply paste the whole text below to the very bottom of the ini (the [Fonts] header included):
[Fonts]
sFontFile_1=Textures\Fonts\DarN_FranKleinBold_14.fnt
sFontFile_2=Textures\Fonts\DarN_FranKleinBold_16.fnt
sFontFile_3=Textures\Fonts\Glow_Monofonto_Medium.fnt
sFontFile_4=Textures\Fonts\DarN_Sui_Generis_Otl_10.fnt
sFontFile_5=Textures\Fonts\Fixedsys_Comp_uniform_width.fnt
sFontFile_6=Textures\Fonts\DarN_Sui_Generis_Otl_13.fnt
sFontFile_7=Textures\Fonts\DarN_Libel_Suit_Otl_24.fnt
sFontFile_8=Textures\Fonts\Glow_Futura_Caps_Large.fnt
sFontFile_9=Textures\Fonts\NVFont_Test.fnt
4. Click Save when done.
|
|
|
|
|
|
One HUD - oHUD 
|
|
Detailed Instructions available
|
INSTALLATION
- Download and install the main file first.
- Download the "One HUD (oHUD) TTW Darnified Patch" optional file (NOT the One HUD (oHUD) - Gophers TTW Darnified Config optional file).
- Install the optional file. When the Mod exists warning appears, click [Merge].
BUGFIXING
- Right-click on oHUD on the left pane of MO and choose Open in Explorer.
- Open
menus\prefabs\ and rename hudtemplates.xml to hudtemplates_darn.xml
- Drag and drop the newly renamed file into
menus\prefabs\ahud.
- When the "File already exists" warning appears, confirm the overwrite.
- Go to
menus\main and open hud_main_menu.xml.
- Search for the following line
hudtemplates.xml (that is line # 80 for those using Notepad++).
- Change the text from
hudtemplates.xml to aHUD\hudtemplates_darn.xml.
- Search for the following line
<add src="io()" trait="_HUDRad_X" />
- Delete the text right beneath it (
<add src="screen()" trait="width" />) or comment it out. (that is line # 649 for those using Notepad++).
- Save your changes and exit.
|
|
|
|
|
|
Clean Vanilla Hud 
|
|
Detailed Instructions available
|
Installation
Download and install the main file. Tick only the options shown below:
FOMOD Instructions
Clean Vanilla HUD
|
- Clean Vanilla HUD
- Main Mod
- ☑ Main Files
- ☐ Clean Fonts
- ☑ Clean Map Icons
- ☐ Clean Radiation Bar
- ☑ Clean Shared Interface
- Clean Loading Roulette Wheel
- Patches
- ☐ Vanilla UI+ Patch
- ☑ I am not a Height Indicator User
- ☐ Alternative Just Hit Indicator
- ☑ Clean Fonts for DarnUI
|
Users who plan on using the Height Indicator from lStewieAl's Tweaks (disabled by default) can alternatively install the patch.
Crsor Patch
Download and install the Cursor Unilaterally Matched - Patch optional file. Select [Merge] when prompted.
|
17-Locations
- Mods that programmatically add new or alter vanilla locations
|
|
|
|
|
Mod Name
|
Baseline
|
Instructions
|
|
|
|
|
|
Lucky 38 Climate Restored (Scripted) 
|
|
Detailed Instructions available
|
- Download the main file. It is not on Nexus, so download manually.
- Once downloading is complete, open MO and find the Downloads tab.
- Drag and drop the file from your download location to MO's Downloads tab and double-click to install.
|
|
|
|
|
|
The N.V. Interiors Project 
|
|
Detailed Instructions available
|
INSTALLATION
- Download and install the NVInteriors Core v2.1.1 main file only.
- Double-click on the mod on the right pane of MO and go to the Optional ESPs tab.
- Move NVInteriors_Core.esm to the Optional ESPs tab.
- Download and install the NMC_NVInteriors Compatibility Patch Medium v2.0 optional file.
- When the Mod Exists warning appears, select Merge.
|
18-Lighting and Weather
- Mods that affect lighting and/or weather systems **installation is optional** except for High Resolution Bloom NVSE, which is mandatory for any setup.
|
|
|
|
|
Mod Name
|
Baseline
|
Instructions
|
|
|
|
|
|
Dusty Distance Redone 
|
|
Detailed Instructions available
|
| WARNING: Not compatible with ENB.
INSTALLATION
Download and install the main file. Then download and install the Dusty Distance Redone - 99k. Select [Merge] when prompted.
OPTIONAL .INI FILE EDITS
WARNING: These edits must be repeated every time the mod is updated.
- The .ini file that comes with the mod allows one to adjust the distance at which the fog is visible and potentially disable it during night/day.
STEP recommends the following settngs to allow slight variation of the distance at which the fog effect will appear, while keeping it subtle.
- Double-click the mod in Mod Organizer and select [Ini-Files].
- Find the following lines and change their values to the ones below (save and close the file when done):
iMinFarDusty = 90000
iMaxFarDusty = 99000
iMinFarDustyNight = 90000
iMaxFarDustyNight = 99000
- Guide users are encouraged to experiment with these values a bit to find what works best for them.
|
|
|
|
|
|
High Resolution Bloom NVSE 
|
|
Detailed Instructions available
|
INSTALLATION
Download and install the latest version.
OPTIONAL .INI FILE TWEAKS
WARNING: Increasing bloom resolution increases GPU usage and may lead to a slight performance loss.
The default settings are a good compromize between performance and quality and recommended by Step. However, those that feel adventurous can try tweaking the values a bit.
- Double-click the mod in Mod Organizer and select [Ini-Files].
- High-end PCs: Players are encouraged to set iResScale=1
- People taking perforfmance hit: Players are encouraged to set iResScale=3. This practically restores bloom options to vanilla and disables the mod.
|
19-Utilities
- Mods that generate derived mod output from load-order-specific assets
No mods defined.
20-Patches
- Mods that programmatically resolve load-order conflicts
|
|
|
|
|
Mod Name
|
Baseline
|
Instructions
|
Mod List Cleanup & Performance Check
Final Sorting and Cleaning
Before moving on, run LOOT from MO, then sort, and accept the default load order provided. Review the mod list in LOOT looking for any plugins reported as needing to be cleaned. Keep in mind that LOOT tends to lag behind on the report information, so it will not always be accurate. Make sure that the following mod(s) are not cleaned:
Ignore any reported missing compatibility patches or other warnings. These are either handled by the Step Patches or not of any concern. Perform the standard cleaning procedures on the mods requiring cleaning.
Be aware the Step Patches are designed to work with a default, LOOT-sorted plugin order. This eliminates the need to set rules on the load order. From this point on:
- Ensure all applicable mods are ticked in the left pane of MO.
- Ensure all plugins are ticked in the right pane of MO.
- Sort the load order using LOOT whenever plugins are added/removed.
- Update LOOT (the program and masterlist) whenever updates are available.
- Open
Tools->INI Editor in MO and select the falloutcustom.ini tab. Make sure that the ini file is empty. Edits made within falloutcustom.ini will overwrite all other ini tweaks and can break Archive Invalidation, resulting in texture issues.
FPS Management

NOTE
Step recommends to cap your maximum FPS for
Fallout New Vegas on all configurations in order to avoid collision-related glitches that appear when the framerate exceeds 60 Hz.
The goal at this point is to have at least 55 FPS in exteriors on average. Fallout New Vegas uses Havok software to simulate physics in-game. The software is perfectly attuned to work on FPS up to 60 Hz, but causes all manner of collision glitches once that limit is exceeded. For this reason Step recommends to limit the game's frame rate to 60 Hz through your video card's software. There are plenty of guides online on how to do it based on the user's video card model.
Alternatively, one can set their FPS at a value higher than 60 Hz (and up to the monitor's native refresh rate), provided they tweak NVTF's settings as explained on the respective mod's Wiki page.
Another consideration is that One Tweak works in fake fullscreen mod, which itself works only under capped FPS. While disabling One Tweak will not have any adverse effects on gameplay itself, it prevents crashes when minimizing the game to the Windows taskbar and turning additional monitors on a multi-monitor configuration on/off.
In case ini changes in One Tweak should be reversed, simply follow the steps on the mod page and set bFull Screen=1 in FalloutPrefs.ini after which One Tweak should be disabled alltogether.
Performance Tuning
It's recommended to use either third-party applications like FRAPS or driver software. Optional instructions are provided to assist.
➕ [Click to show]➖ [Click to hide] Steps - Benchmarking Instructions
Take a moment to configure the chosen FPS overlay as described above. If FRAPS are used, install into e.g., C:/Modding/Tools/FRAPS.
- Launch Fallout New Vegas, and start a NEW game to verify that it loads without issue.
- Ensure that the FPS overlay is working.
- NOTE: If the game crashes at any point, there is a problem with load order, enabled mods, or any number of things missed in the above instructions. Please troubleshoot by validating that all instructions have been followed. If custom mods have been installed and enabled, disable them.
- Create a character to test initial frame rates. Complete the initial quest in Doc Mitchell's House and exit it through the front door.
- Take a walk around Goodsprings and measure the FPS.
Performance/Quality Optimization
There are many things that can be modified to improve performance and quality, depending on the performance headroom available. Following are some suggestions listed in descending priority:
- Consider revisiting the BethINI Setup to set the [Low], [Medium], [High], or [Ultra] preset until FPS is close to or greater than targeted.
- Consider tweaking the ini settings of High Resolution Bloom NVSE.
- In case of poor performance disable the following mods and then regenerate lod.:
STEP 5
Post-Processing
Notes on ENB Series
As ENB was designed and optimized specifically with Skyrim in mind, it does not work as flawlessly with Fallout New Vegas. In recent years New Vegas Tick Fix (NVTF) does a much better job at memory management, performance and stability than ENBoost. Since the author of NVTF advise against the use of ENBoost or ENB (see the sticky post), this guide also recommends not to use any of them.
In addition guide users can refer to this forum post by Audley in which he discusses how the software AA provided by ENBoost/ENB presets is inferior to the hardware AA applied by Fallout New Vegas.
ReShade
All things considered, Step suggested using ReShade as the post-processing injector of choice for Fallout: New Vegas. It has three distinct advantages over ENB:
- It does not disable native hardware AA, but works in conjunction with it;
- It does not conflict with NVTF;
- It is much easier to install and utilize, requiring significantly less tweaking in the process.
Should ReShade be desired, start by installing the Preset listed below first and then proceed with the Reshade Injector.

NOTE
Installing ReShade is purely
optional . Installation and usage should come last in the set-up, after all other mods have been installed and tests have prtoven that the game runs smoothly.
21-Post-Processing
- Mods that affect post-processing graphics **installation is optional** Please check the screenshot comparison on the Nexus to decide whether to use ReShade.
|
|
|
|
|
Mod Name
|
Baseline
|
Instructions
|
|
|
|
|
|
Vanilla Plus ReShade Preset 
|
|
Detailed Instructions available
|
- Download the arhcive to a location of choice.
- Extract the contents to
Fallout New Vegas folder (not the data directory!), usually found at <.../Steam/steamapps/common/Fallout New Vegas>.
|
Other ReShade presets just as well, as long as they were created for the weather mod of choice.
After installing the preset, proceed with ReShade's installation with the following options:
➕ [Click to show]➖ [Click to hide] Steps - Show installation instructions
- On the "Select a game" screen choose
FalloutNV.exe, then [Next];
- On the "Select the rendering API" screen tick Dircet X 9, then [Next];
- On the next screen click [Browse], navigate to the game's folder where the preset was installed and select
ReShade Vanilla Plus.ini, then [Next];
- Reshade will choose the packages based on the preset, so click [Next] without modifying anything on the list.
STEP 6
Level of Detail (LOD)
Now that all the mods and patches have been installed/sorted and performance margins are acceptable, the next step is to generate custom LOD data for the mod list. Recommended settings correspond to rendered game resolutions that can benefit. Using 'higher' settings will otherwise be a waste of PC resources that may be necessary to keep frame rates above 50 FPS. Use 'lower' settings as a compromise if necessary.
NOTE:
Any time a mod providing LOD assets is added, removed, or changed, LOD should be regenerated. Examples include --but are not limited to-- most of the '04-Foundation' mods, Wasteland Flora and Terrain Overhaul, any mod that has LOD in the title, etc.
Before moving on, create an empty mod for the LOD output:
- Click on the
 button and select, [Create empty mod].
- Name it
Step FalloutNV - xLODGen Output (this will only be used as a resource for xLODGen).
- This places a new, empty mod at the bottom of the mod list.
- Find the FNVLODGen mod from the 04-Foundation mod group and ensure it is enabled.
xLODGen
xLODGen is run to generate updated LOD terrain textures and meshes so that landscape LOD is updated with mod changes:
Preparation
➕ [Click to show]➖ [Click to hide] Steps - Sort Plugins
- Sort your mod order with LOOT.
- Ensure that FNVLODGen.esp and tmzLODadditions.esp are last in your load order on the right-hand side of MO.
Generation
➕ [Click to show]➖ [Click to hide] Steps - Terrain and objects LOD generation
- Run xLODGen from the MO executable drop-down list.
- On the left pane, select all worldspaces.
- On the right pane, make sure that only Terrain LOD and Objects LOD are checked.
- Under the Objects LOD section, change the Atlas size option to 8192 x 8192
- Click [Generate] to run the process, which will require upwards of 15 minutes, depending on the PC.
- Once the "LOD generation complete" message has appeared, close xLODGen.
Wrap Up
➕ [Click to show]➖ [Click to hide] Steps - Terrain and objects LOD wrap up
- Navigate to the xLODGen output folder (e.g.
..Modding/Tools/xLODGen/xLODGen_Output).
- Back on MO, open the Step FalloutNV - xLODGen Output mod in an Explorer window (Ctrl+double click).
- Cut and paste the files from the LOD generation to the Step FalloutNV - xLODGen Output folder. Close both folders.
- Enable Step FalloutNV - xLODGen Output mod.
When to Regenerate LOD
- xLODGen
- Whenever there are changes to the mod list that affect the underlying landscape: height, shape, textures, etc.
STEP 7
Final INI Configuration
Step Fallout New Vegas is fully installed and working at this point, but if FPS are bellow 60, some adjustments may be beneficial to performance or quality. A final consideration is customizing BethINI (under "Performance/Quality Optimization).
STEP 8
First Launch
To run the game, select the New Vegas (not the Launcher) executable from the drop-down list and click the Run button. Keep the following in mind when first launching from a fresh Guide installation:
- A new game is required!
- In other words, don't load from a save when first launching after a fresh guide install to avoid issues. Review the changelog before upgrading from a previous version of this Guide to determine whether or not a new game is advisable.
- When launching the game for the first time after a Guide install, the load could take significantly longer than normal. This will only be a one-time wait as all the installed mods are being initialized. Subsequent load times should be shorter.
- Once the main menu loads, Vault Boy's head icon should appear in the bottom left corner of the screen. Move the mouse cursor over it. It should dispay your current version of NVSE, JIP LN Plugin and Johnny Guitar NVSE. If the text appers, the extenders installation has been successful.
Failure to launch/Crash to Desktop
As reported in the Feedback Form thread, the game might crash to desktop when launched for the first time. The cause was tracked to the lStewieAl's Tweaks' configuration file that comes with the Step Conflict Resolution Patch.The author of this guide could not replicate the issue, but here's a solution for those that experience CTD:
- In the left pane of MO, double-click on Step Patch - Conflict Resolution to open the menu.
- Navigate to the INI Files tab and click Open in Explorer, then open
nvse_stewie_tweaks.ini.
- Open the Search menu (Ctrl+F) and search for
bRestore2Hotkey.
- Once the string is found, change the value from 1 to 0, like this:
bRestore2Hotkey = 0.
- Save the changes and close the text file. The game should now launch on the next attempt.
Once the game launches successfully, users might attempt to re-enable this function from the in-game menu (under Settings -> Tweaks).
Start a New Game
In order to configure in-game and settings, the player should start a new game. Once the intro movie finishes, the player wakes up in Doc Mitchell's house and is prompted to modify main character's appearance and to choose a name. Once that's done, press Esc to open the Pause Game menu.
Disable Auto Saving
Before you do anything, go to Settings and then Gamplay and disable all manners of autosaving. Fallout New Vegas sadly has unresolved bugs in its vanilla saving scripts than can lead to broken savegames and you may lose your progress. To prevent loss of savegames, Step uses the Savegame Manager function of lStewieAl's Tweaks (already preconfigured in the ini file included in the Step Patch - Conflict Resolution) which will automatically save the game every 30 minutes.
Control Key Settings
To set up the controls, simply go to Settings and then Controls. Initially Step recommends to change only the following keybinds:
- Run: R-Shift (Right Shift)
- Block: set it to the right mouse button
- Ammo Swap: -
Gaming Mouse Support
Remapping hotkeys to mouse buttons in Fallout New Vegas is not very intuitive. Basically users have to navigate to Settings, Controls
and then look for a Device option appearing in the bottom-right corner of screen, as shown on the picture:
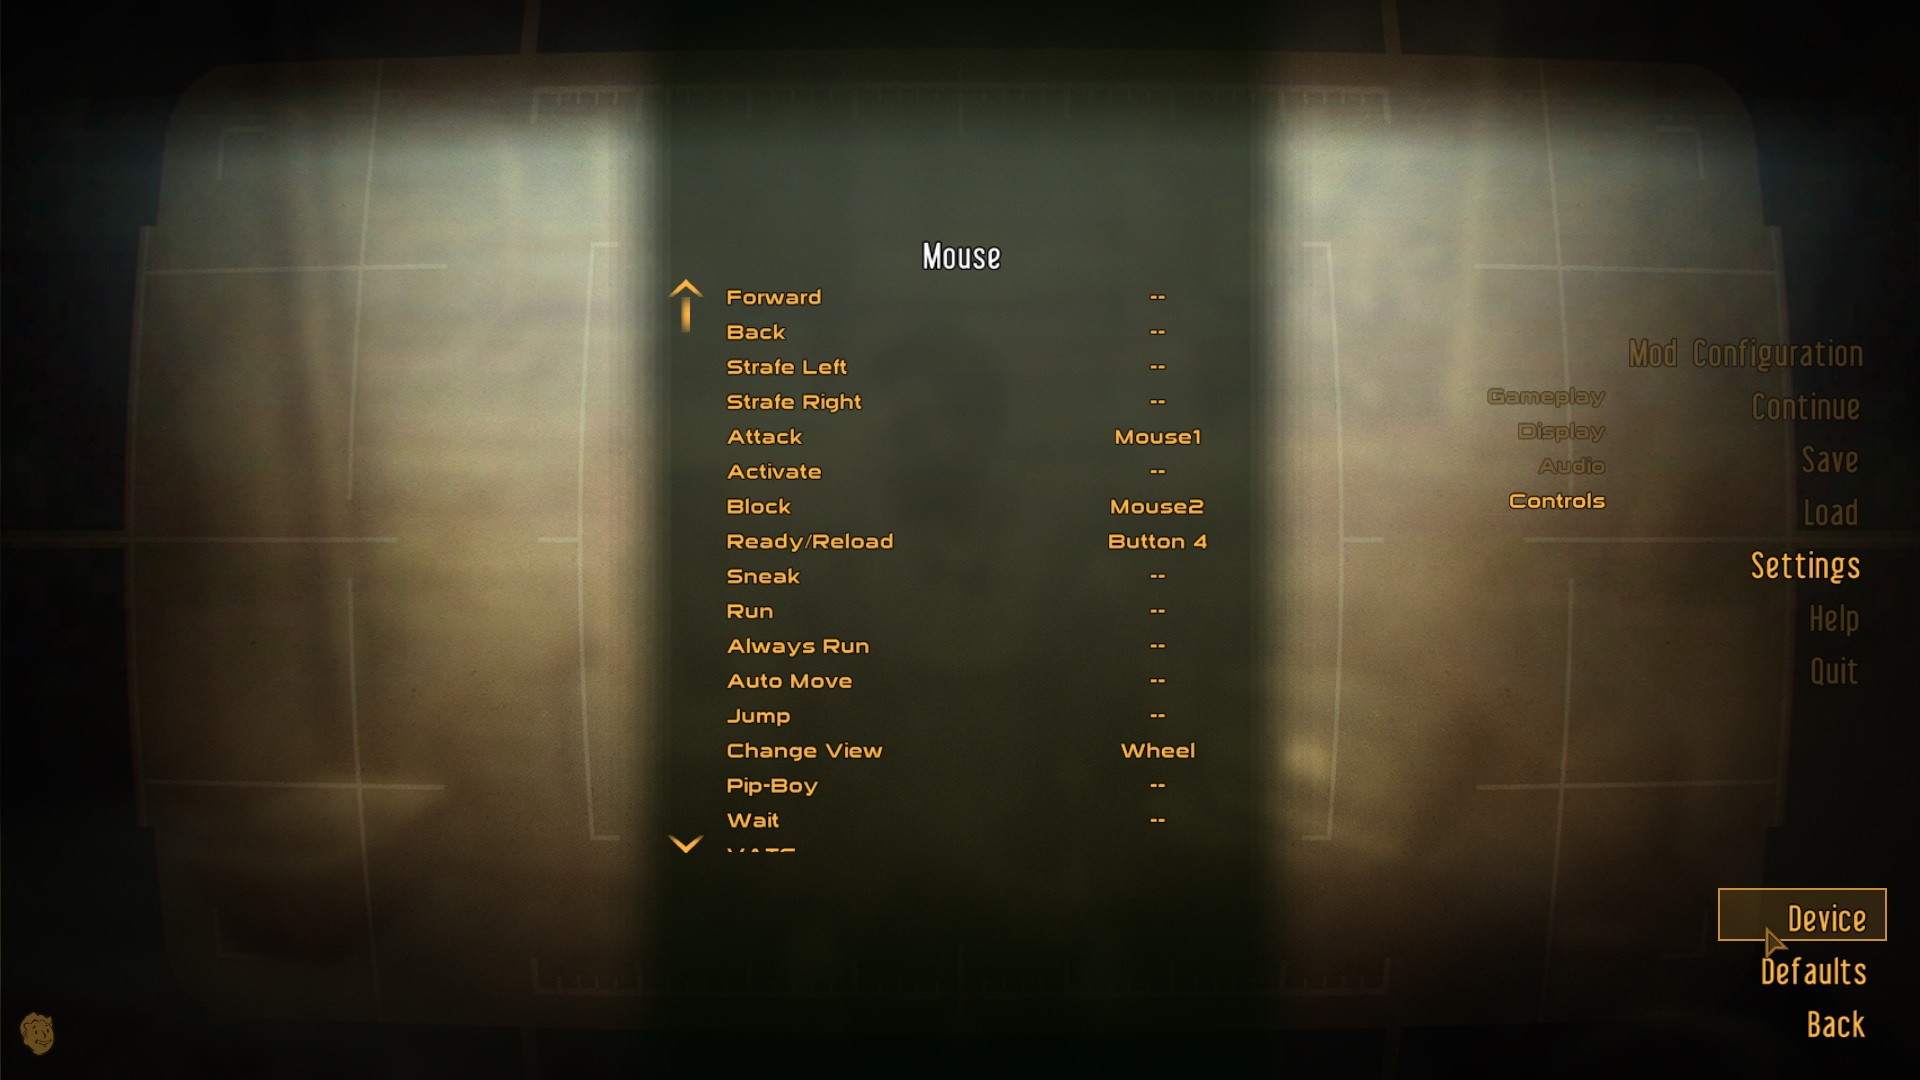
The "Device" option is highlighted
lStewieAl's Tweaks Hotkeys
The following keys are bound to specific functions activated via lStewieAl's Tweaks. They can be changed by navigating to Settings -> Tweaks menu (recommended option) or within the the NVSE_stewie_tweaks.ini file which comes with Step Patch - Conflict Resolution:
- Toggle Night-Vision scope On/Off: N
- Search Inventory: Ctrl+F. (obviously the inventory has to be opened first)
- Full Save Hotkey: F6
- Incremental Save Hotkey: F7
STEP recommends using the Incremental Save function from lStewieAl's Tweaks instead of the Quick Save function of the base game.
Step 9
Mod Configuration Menu (MCM)
The game is now ready to be loaded to configure mods in the Mod Configuration Menu (MCM). The MCM a mod that allows mod authors to provide custom, game-accessible settings for their mods. Recommendations are provided below for select mods. The remainder are user preference.
| ⟡ ExtraHud ⟡Click to show/hide
|
ExtraHUD is one of the components of OneHUD - oHUD and allows the player to add extra additional elements to the in-game HUD. This guide highly recommends players to activate the optional "Hardcore Mode", so they will need to visualize the needs meter.
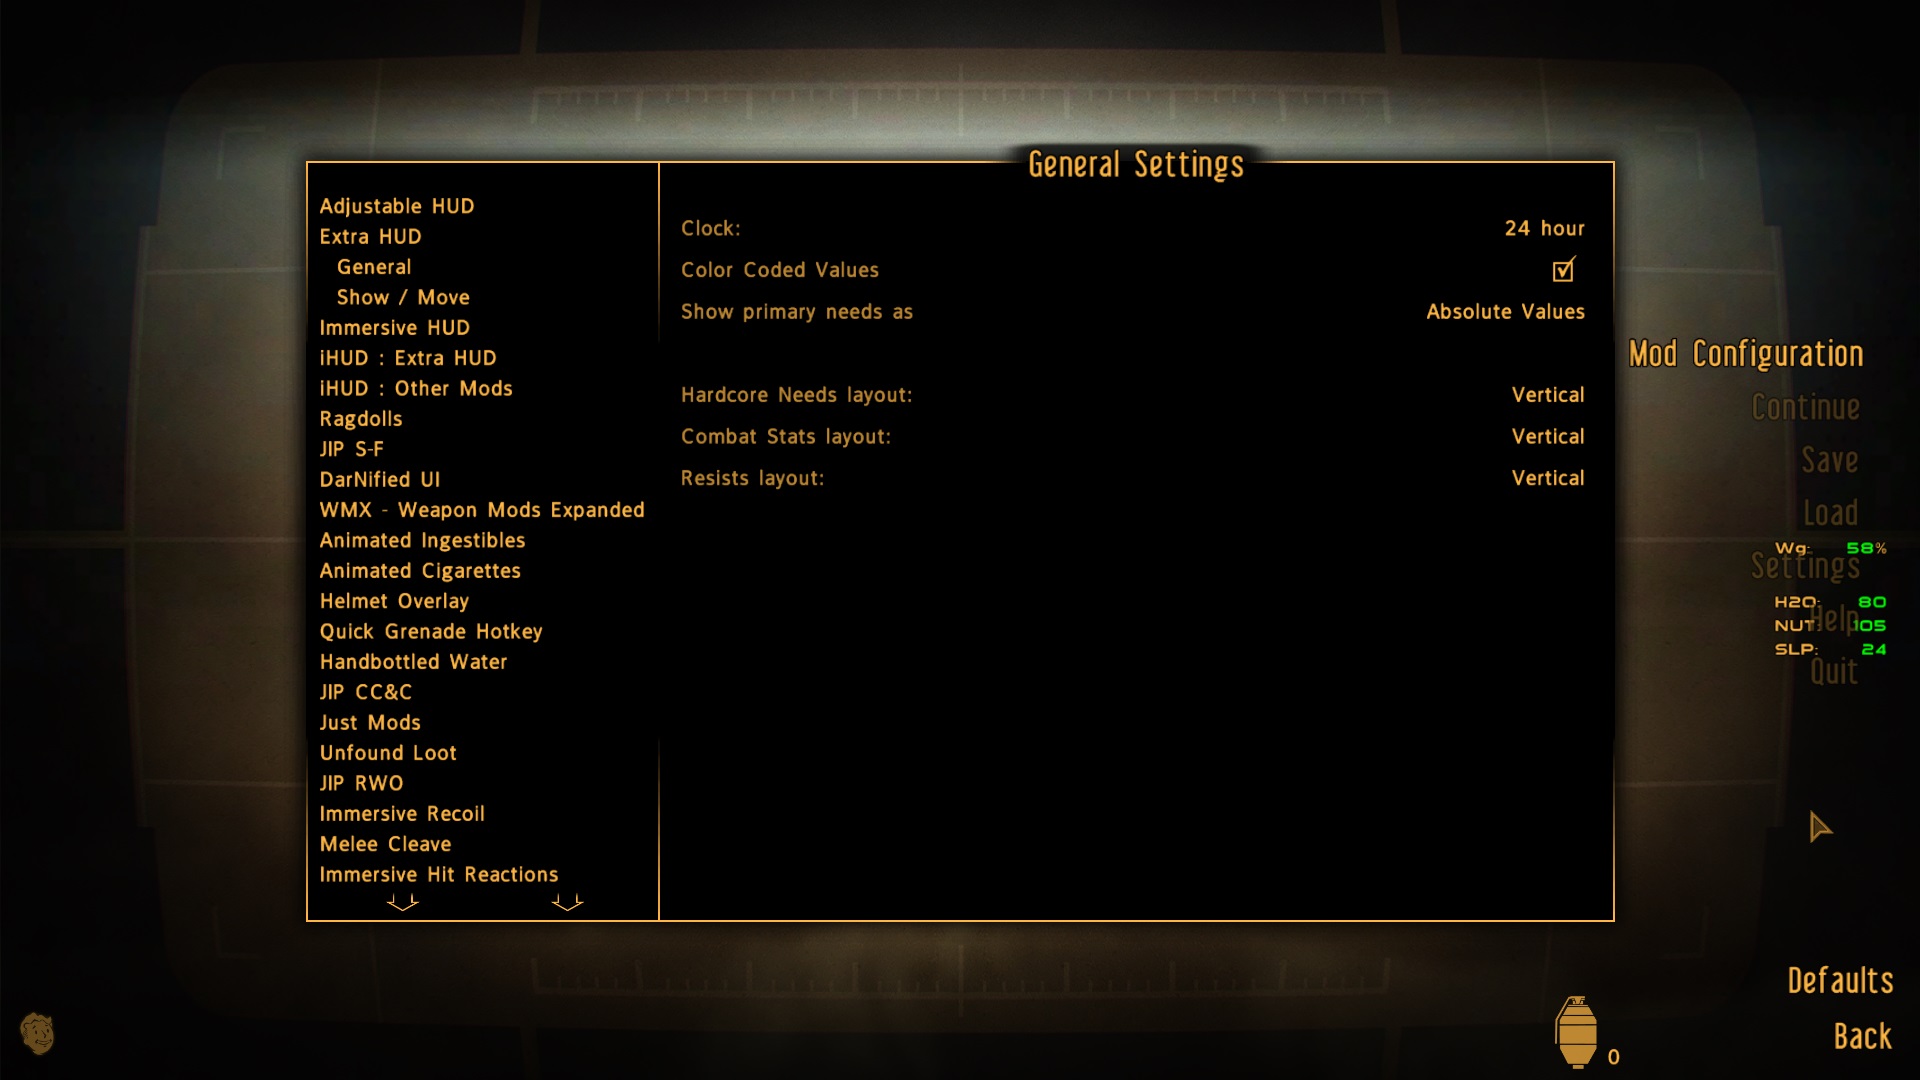 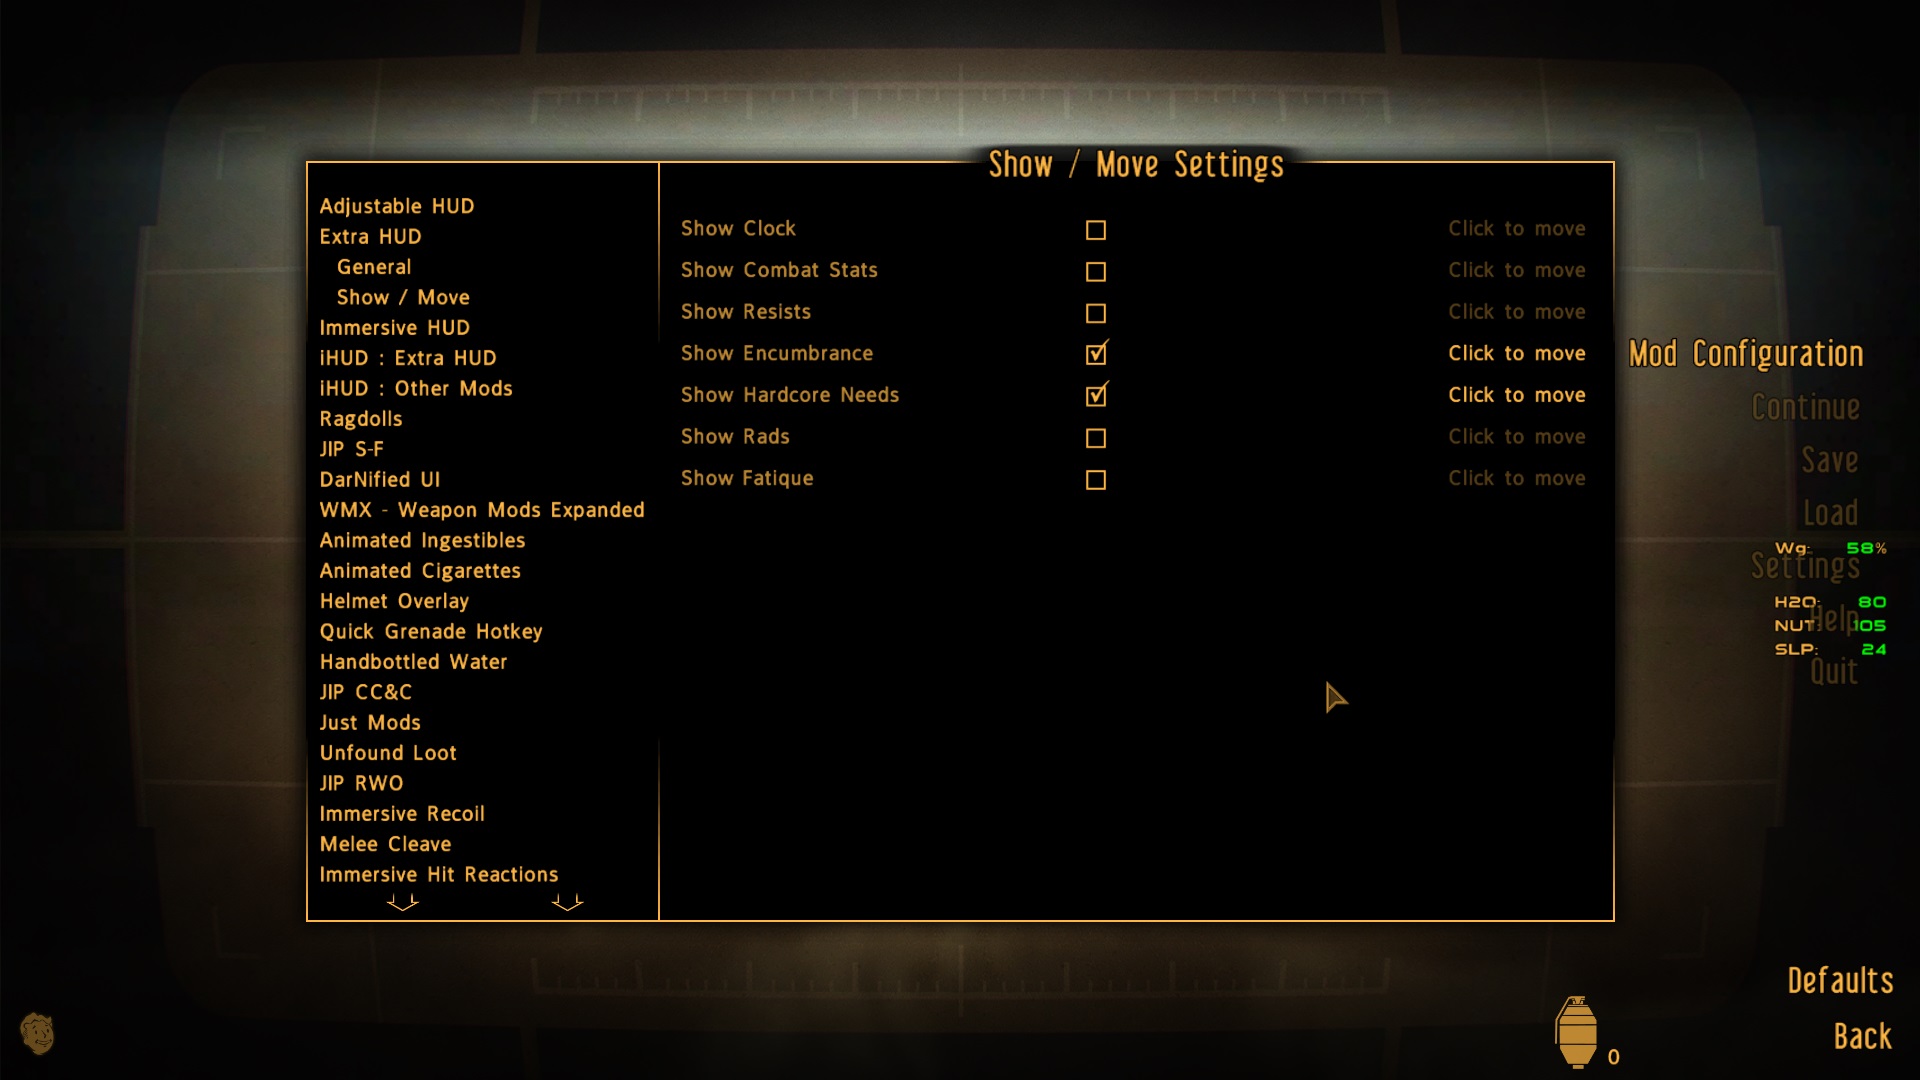 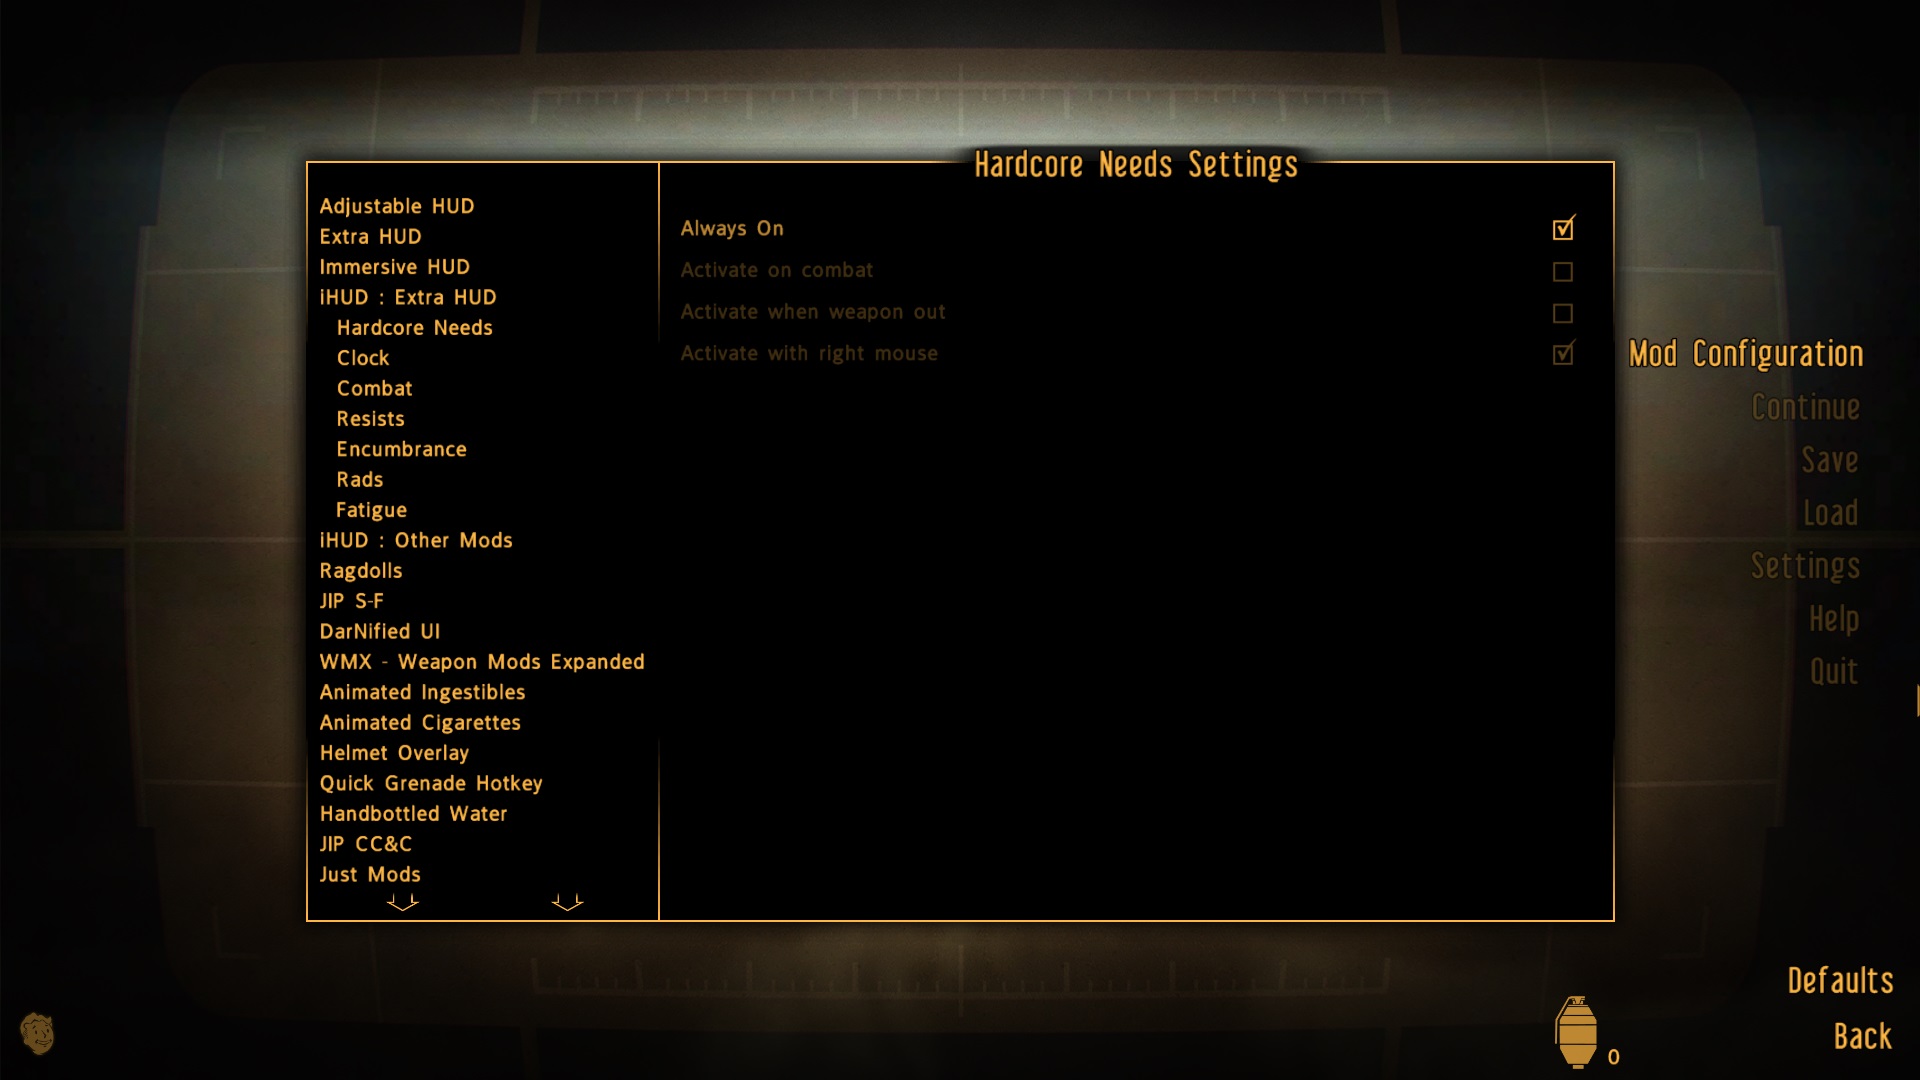 
|
| ⟡ DarnUI ⟡Click to show/hide
|
The latest version of Darnified UI adds extra HUD elements similarly to the ExtraHUD module of OneHUD - oHUD, so the player has to choose the extra HUD elements of one mod over the other. The Step Guide recommends to use OneHUD, as all its HUD elements are dynamic (meaning they can be hidden under certain conditions, de-cluttering the UI) whereas elements added by Darnified UI are static and cannot be hidden.
Open Meter Settings, Statistic Settings and Extra Settings and disable everything. All extra UI elements will be genearated by OneHUD as explained above.
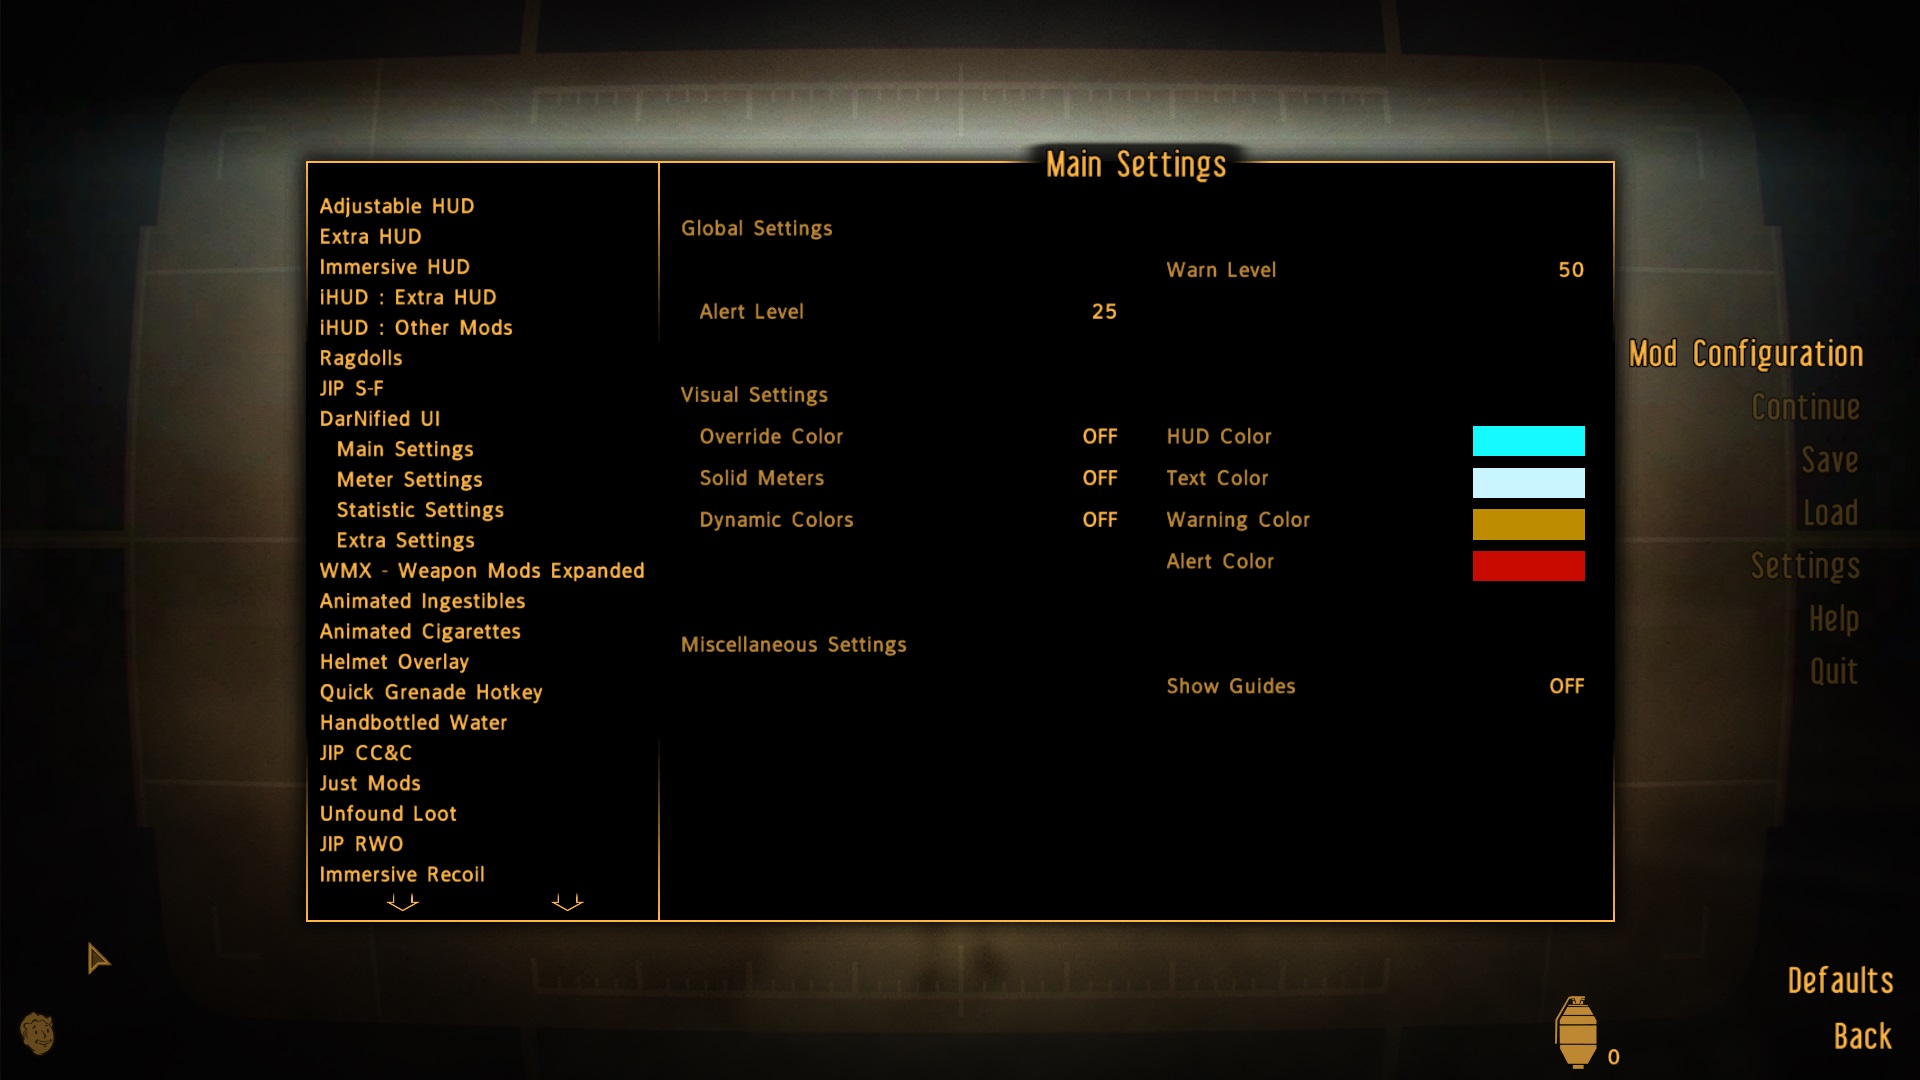
|
| ⟡ Immersive HUD ⟡Click to show/hide
|
Another component of OneHUD - oHUD, it allows the player to configure the conditions under which HUD elements will hide and appear. Refer to the picture below to configure the Main Settings, setting the hide conditions for each HUD element is user preference.
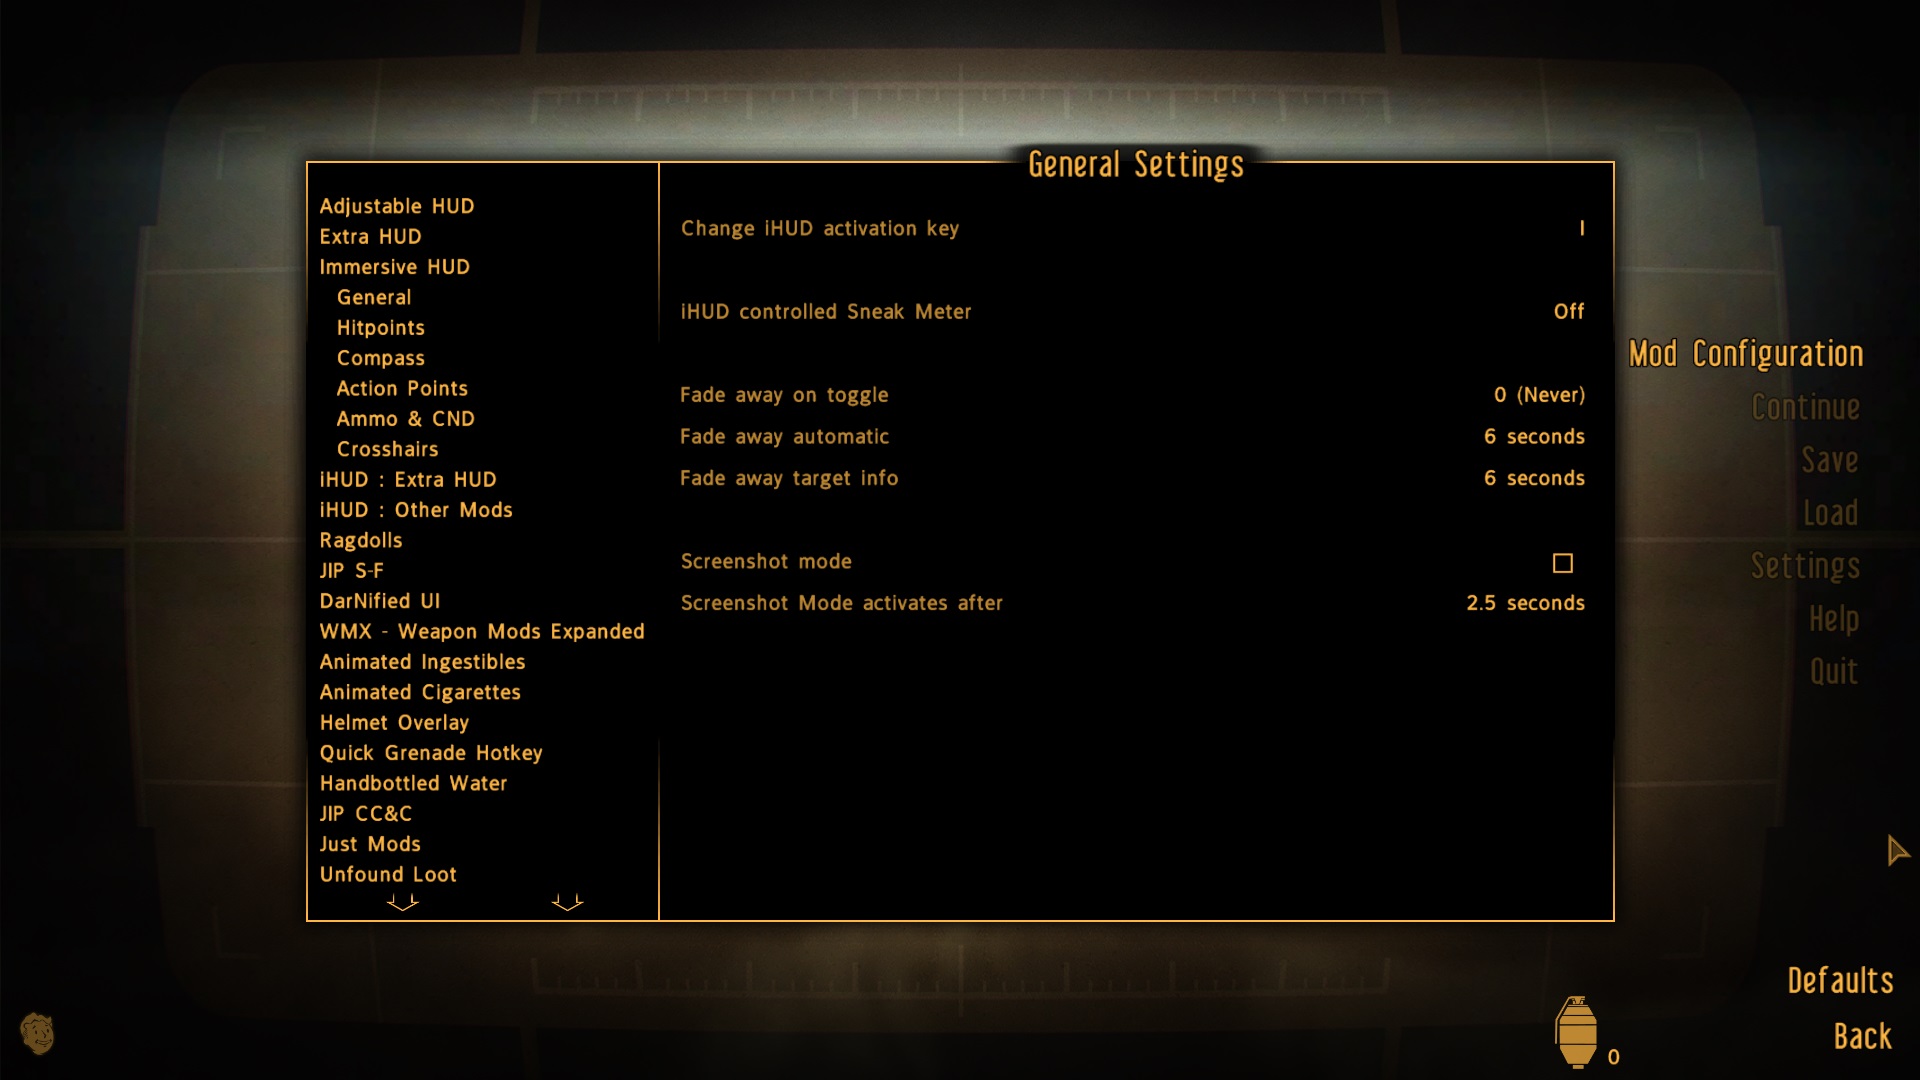
|
| ⟡ JIP Companions Command and Control ⟡Click to show/hide
|
The following keybinding is recommended.
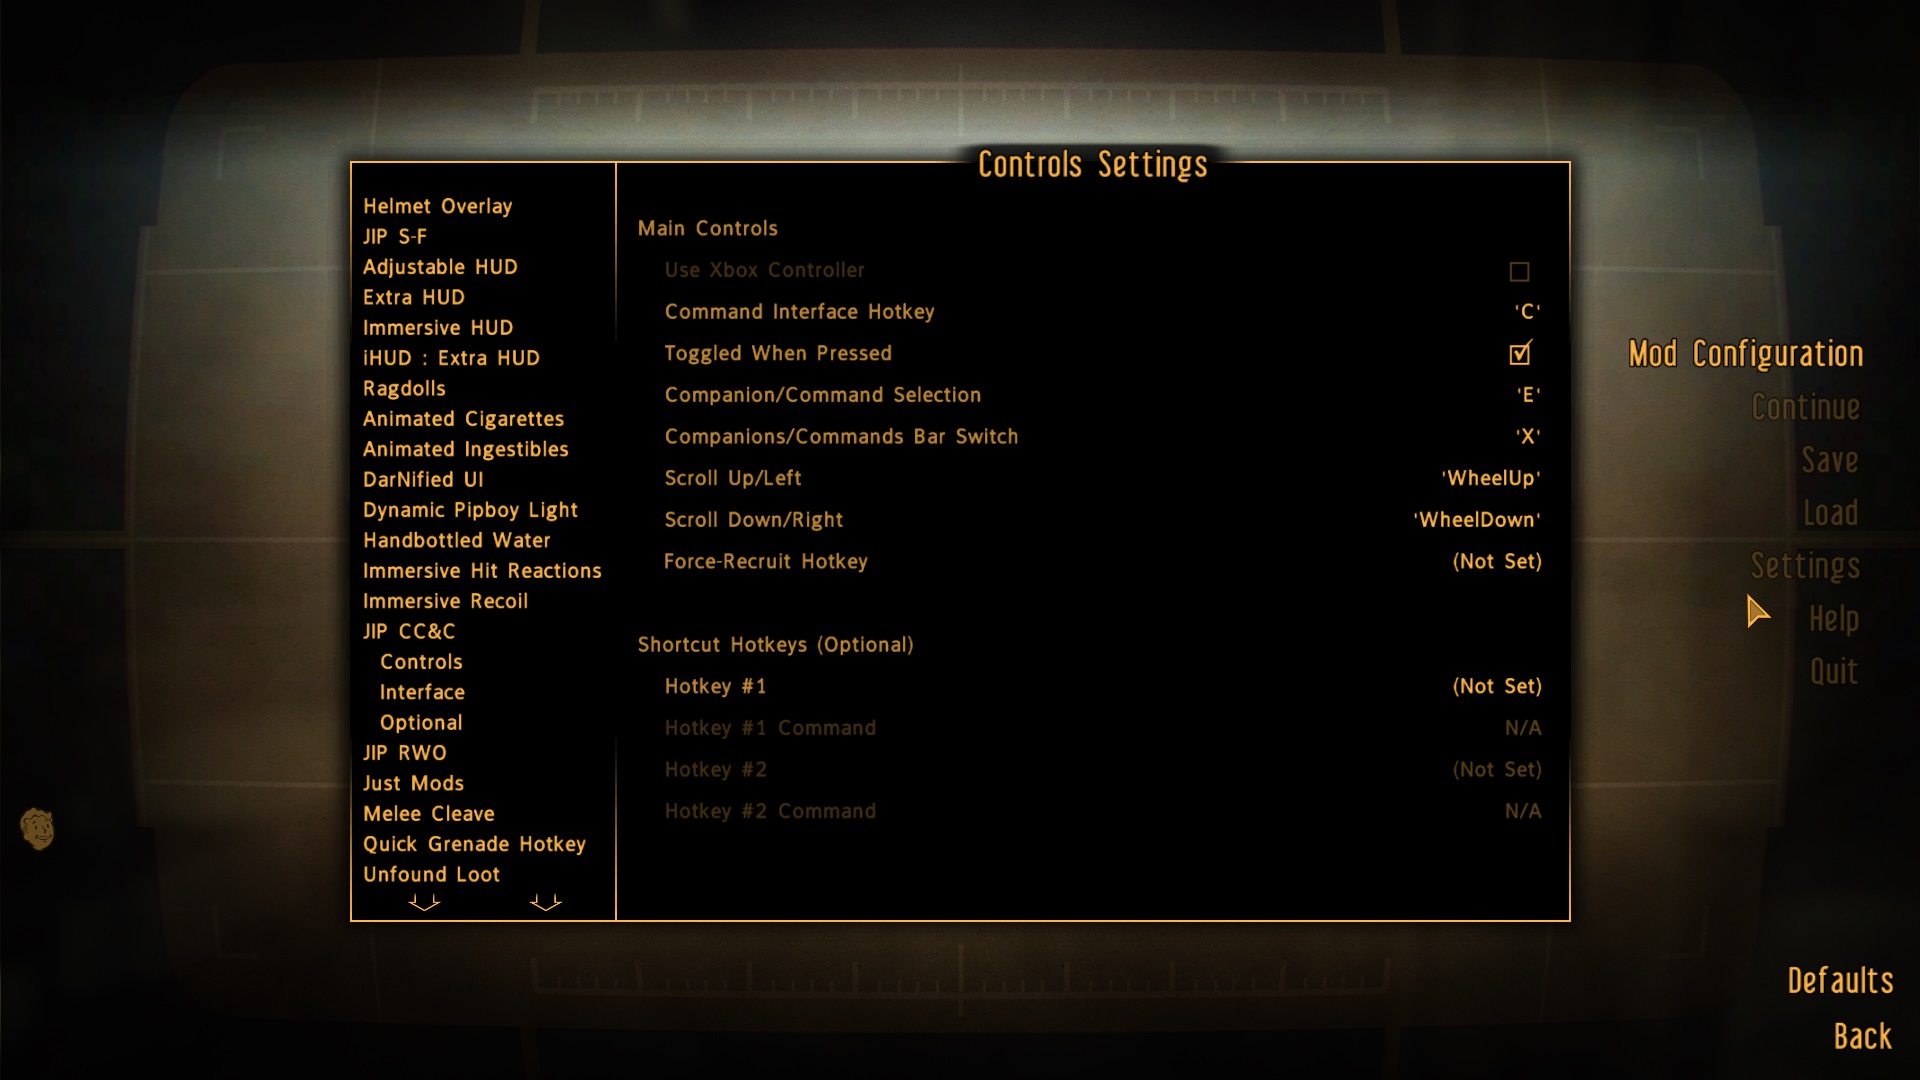
|
| ⟡ Just Assorted Mods ⟡Click to show/hide
|
- The following keybinding is recommended (first image below).
- The settings of most of Just Assorted Mods' components is up to user preferences, except ...
- Weapon Hwheel (second image below)
- Just Vanilla Sprint (third image below)
- The hotkey suggested for Just Vanilla Sprint might conflict with the vanilla hotkey for walking/running. Users should reconfigure the "Walk/Run" hotkey in game settings, or change the Just Vanilla Sprint Hotkey.
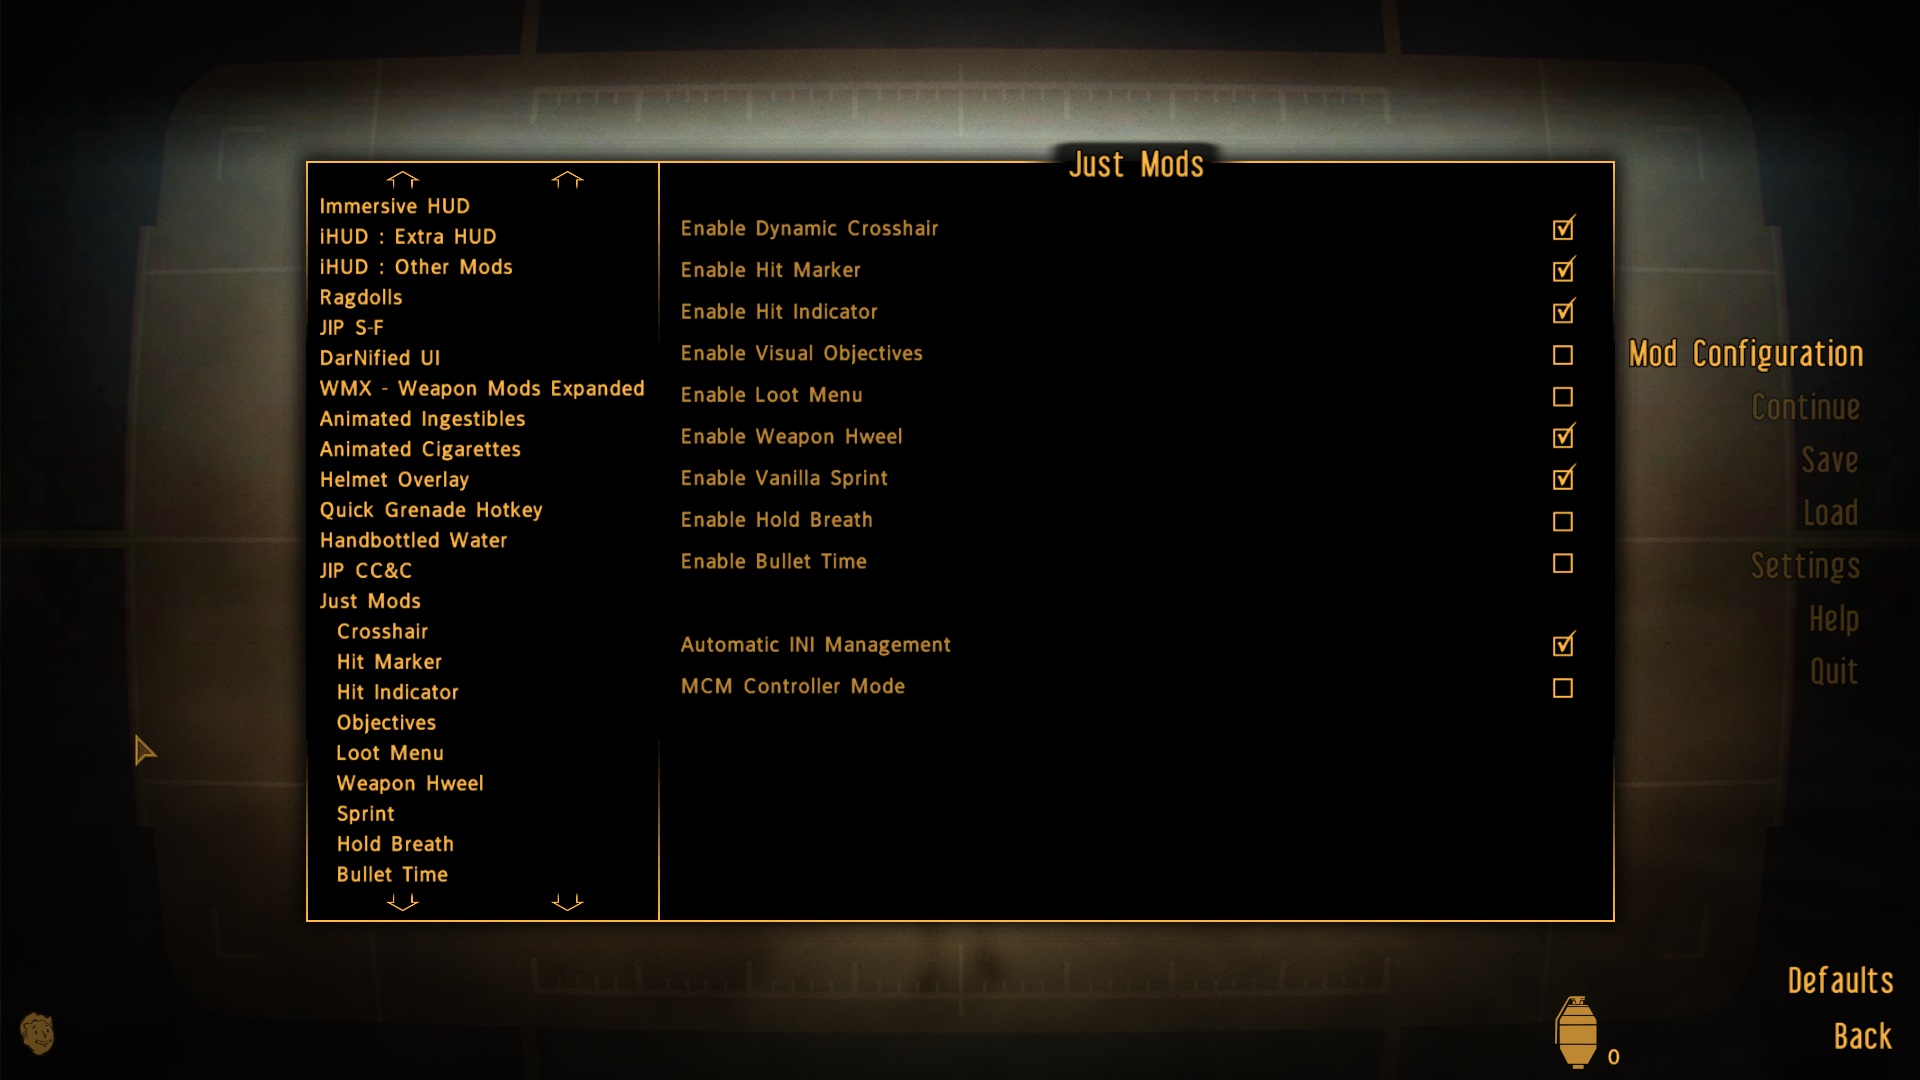 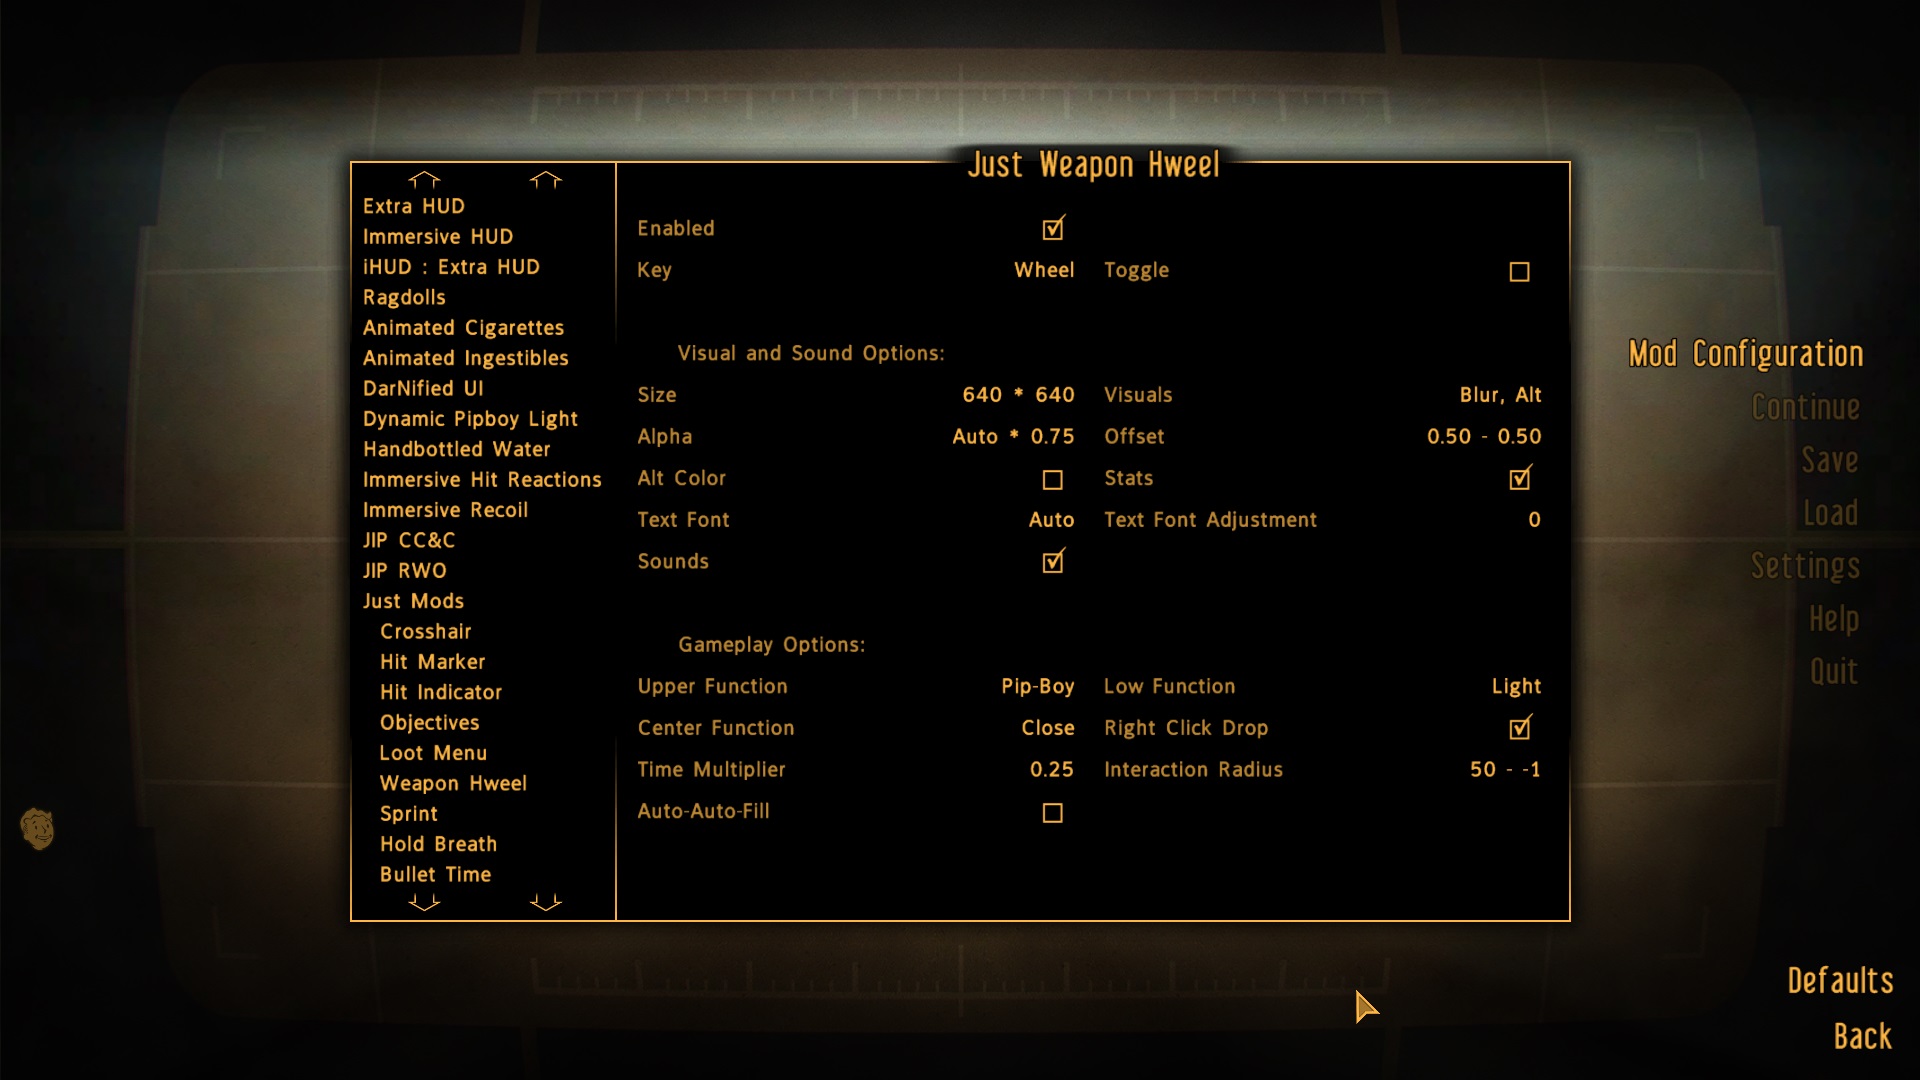 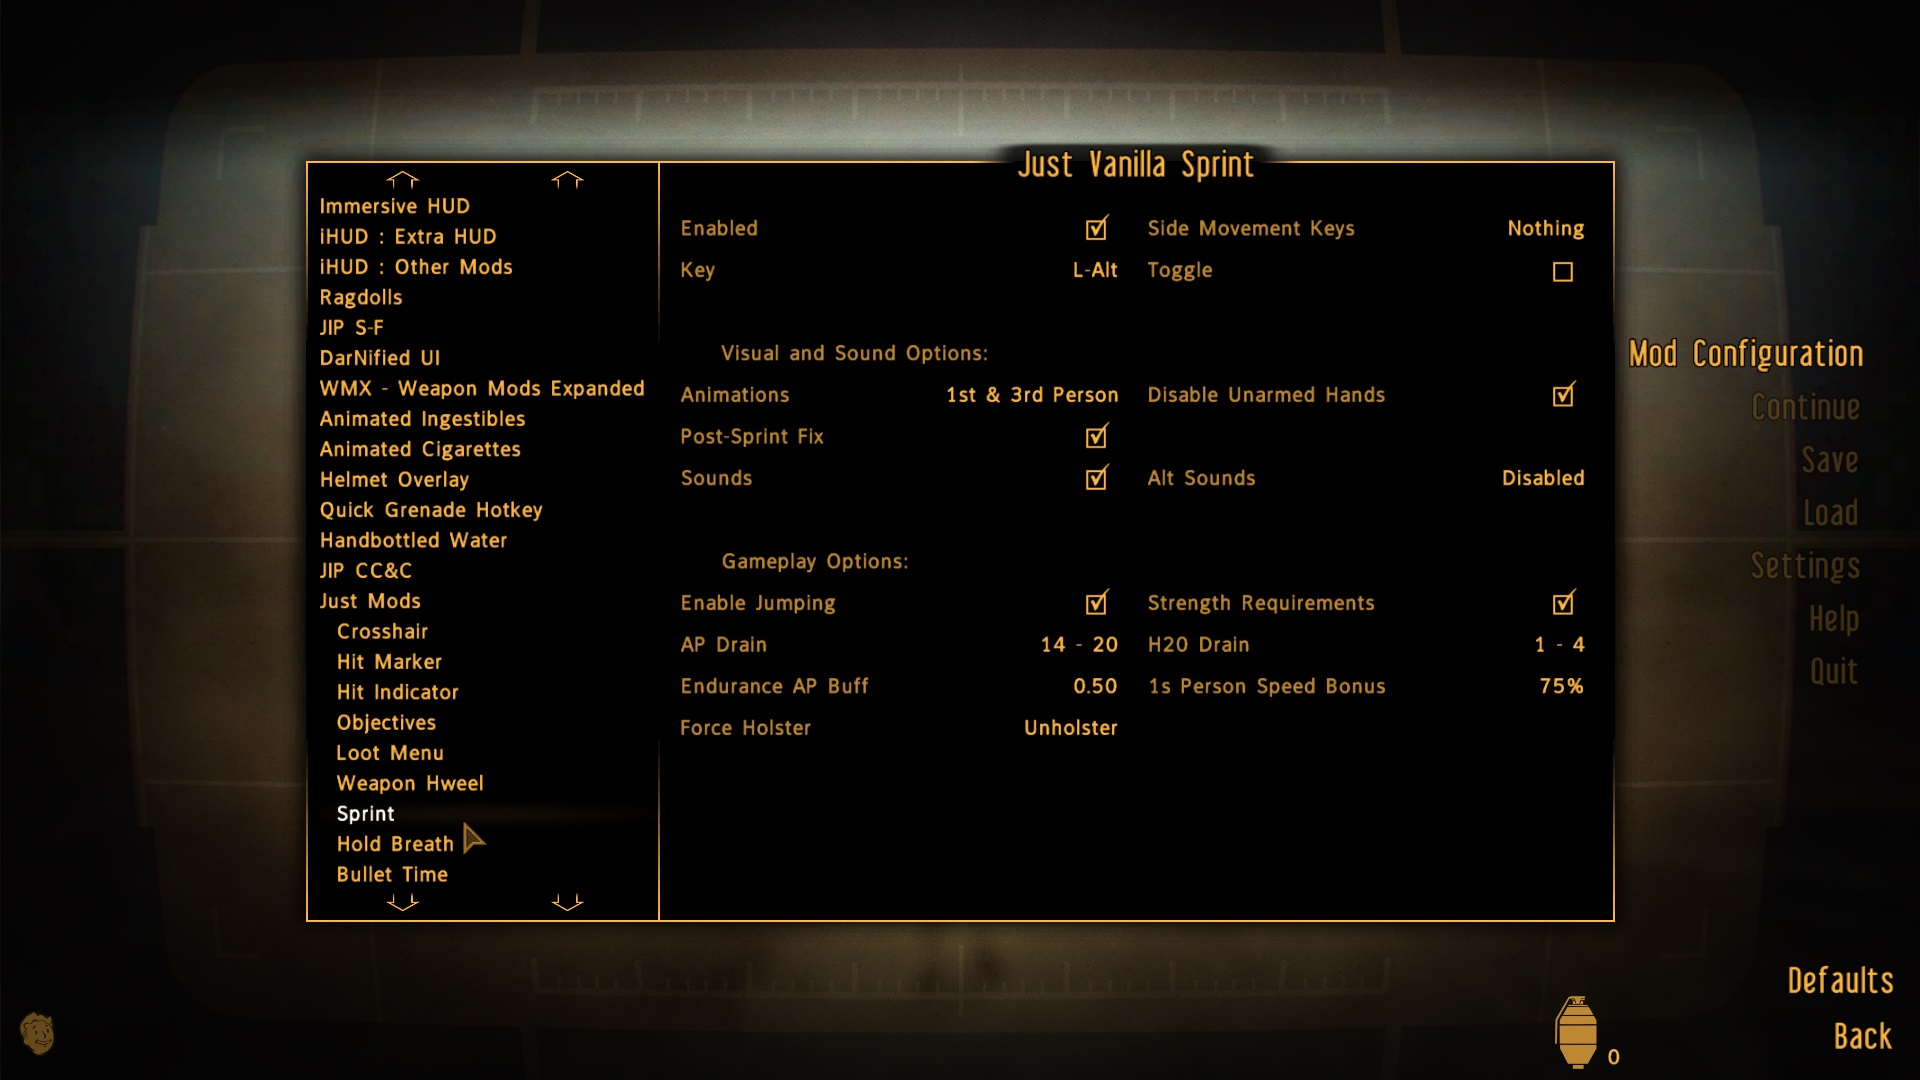
|
| ⟡ Animated Cigarettes ⟡Click to show/hide
|
It is recommended to disable the Bonus Effect of smoking (as shown on the picture) provided by this mod, as the bonus is too powerful.
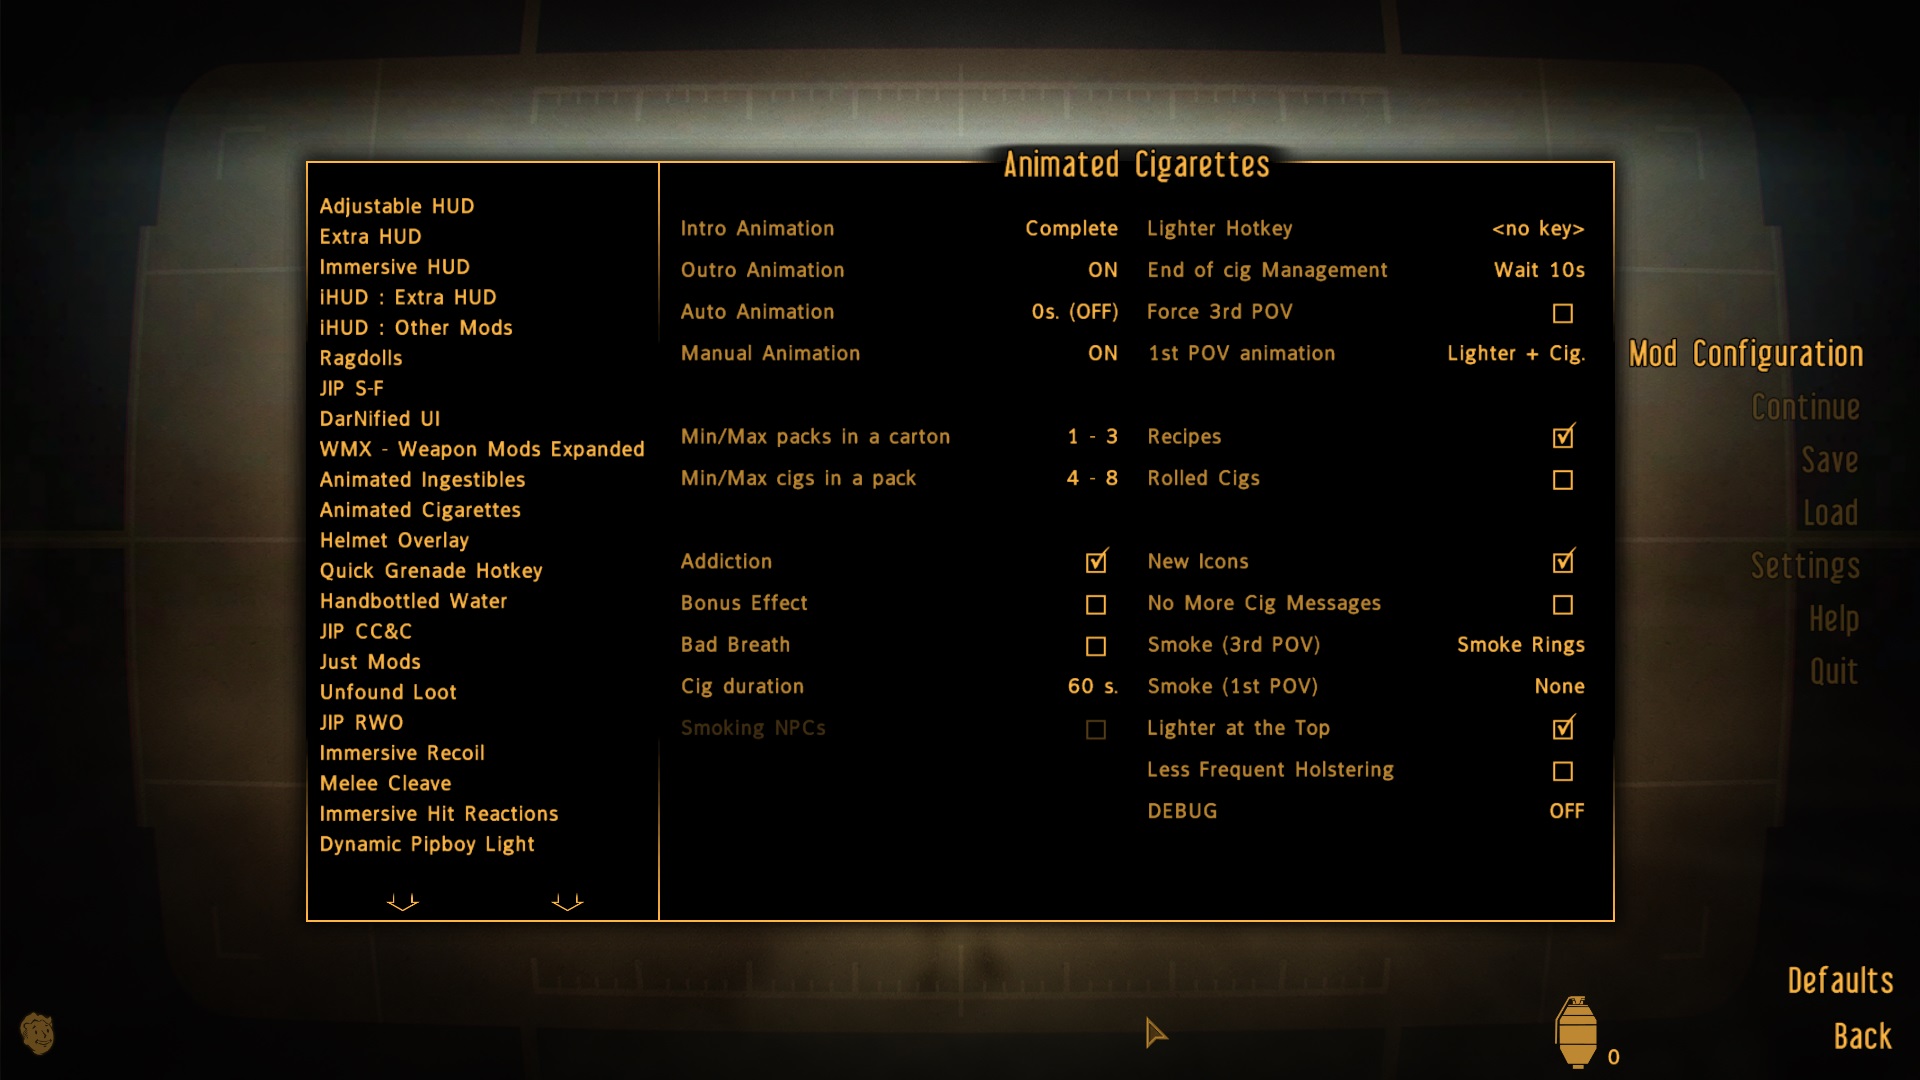
|
| ⟡ Animated Indigestible ⟡Click to show/hide
|
Adds animations for eating and taking chems, which is great for realism, but be careful when taking chems in battle - the animations take time, so the effects aren't instant.
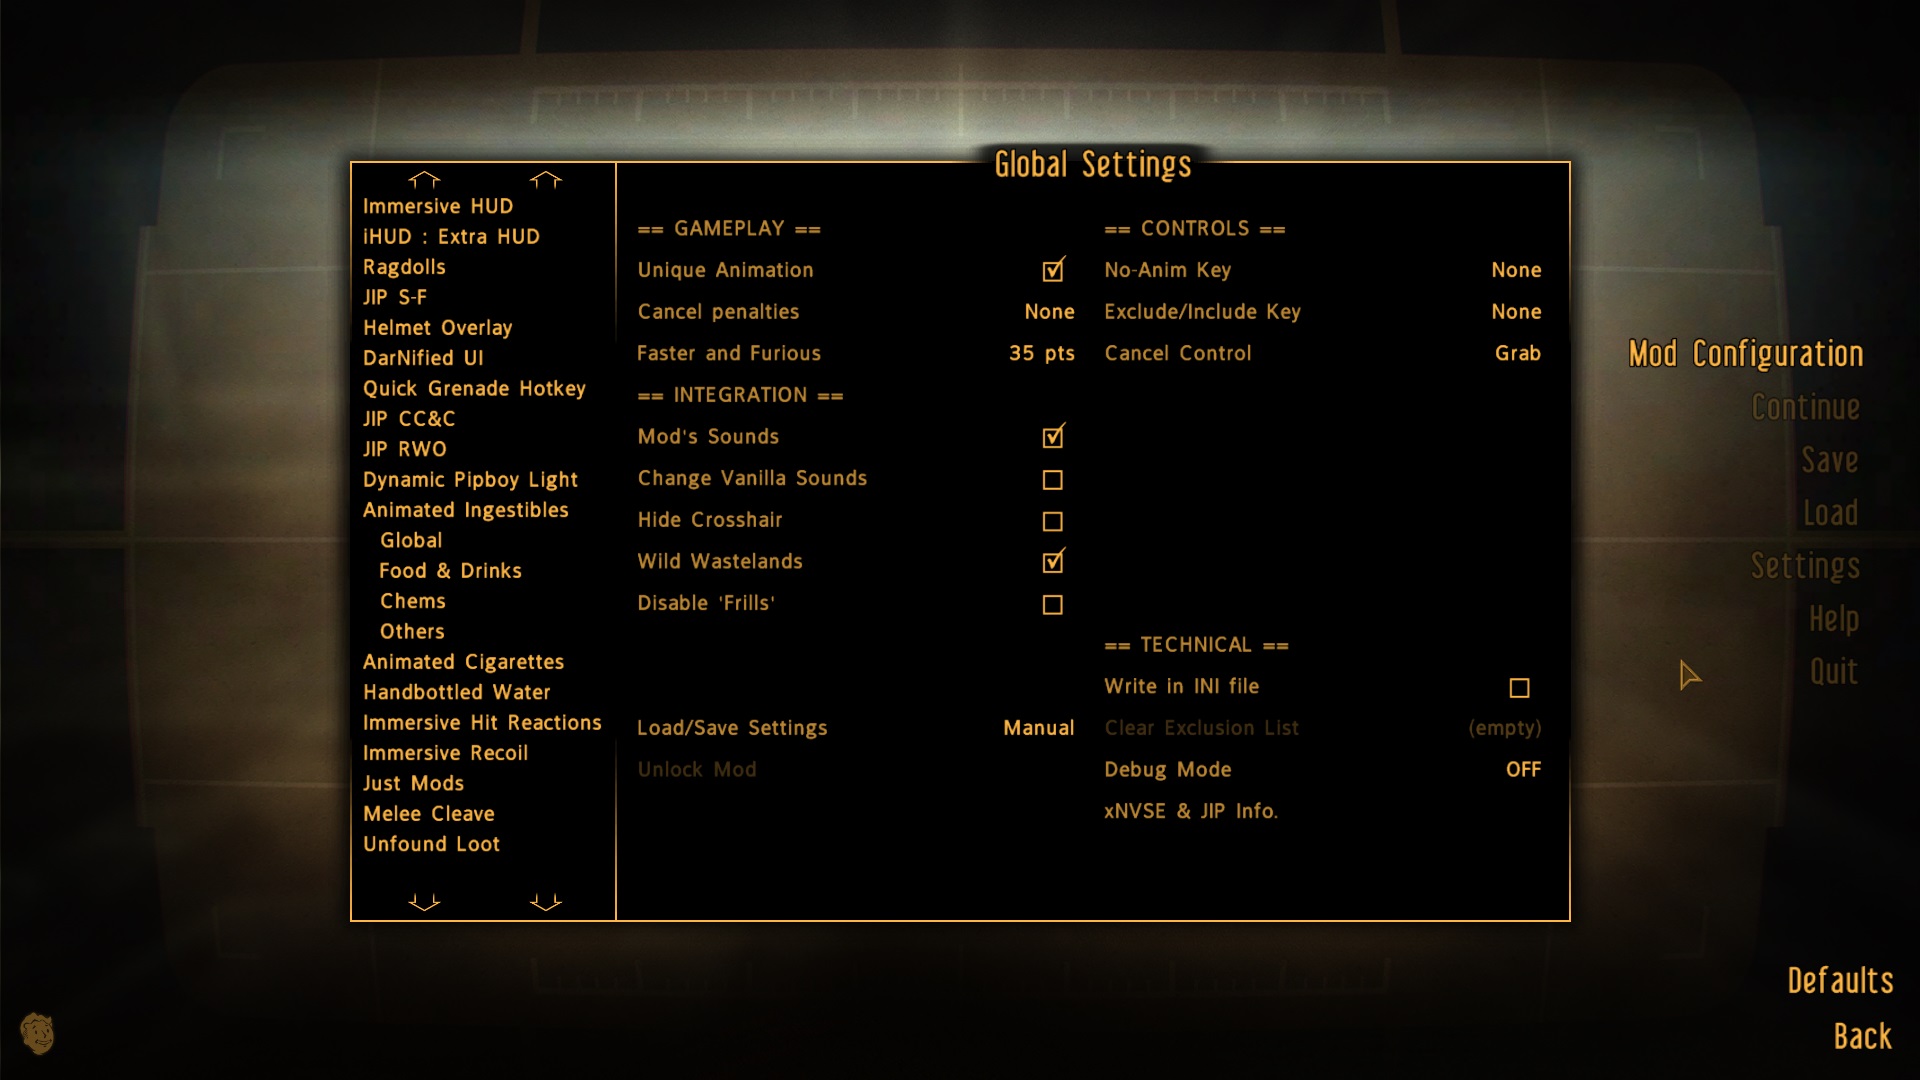 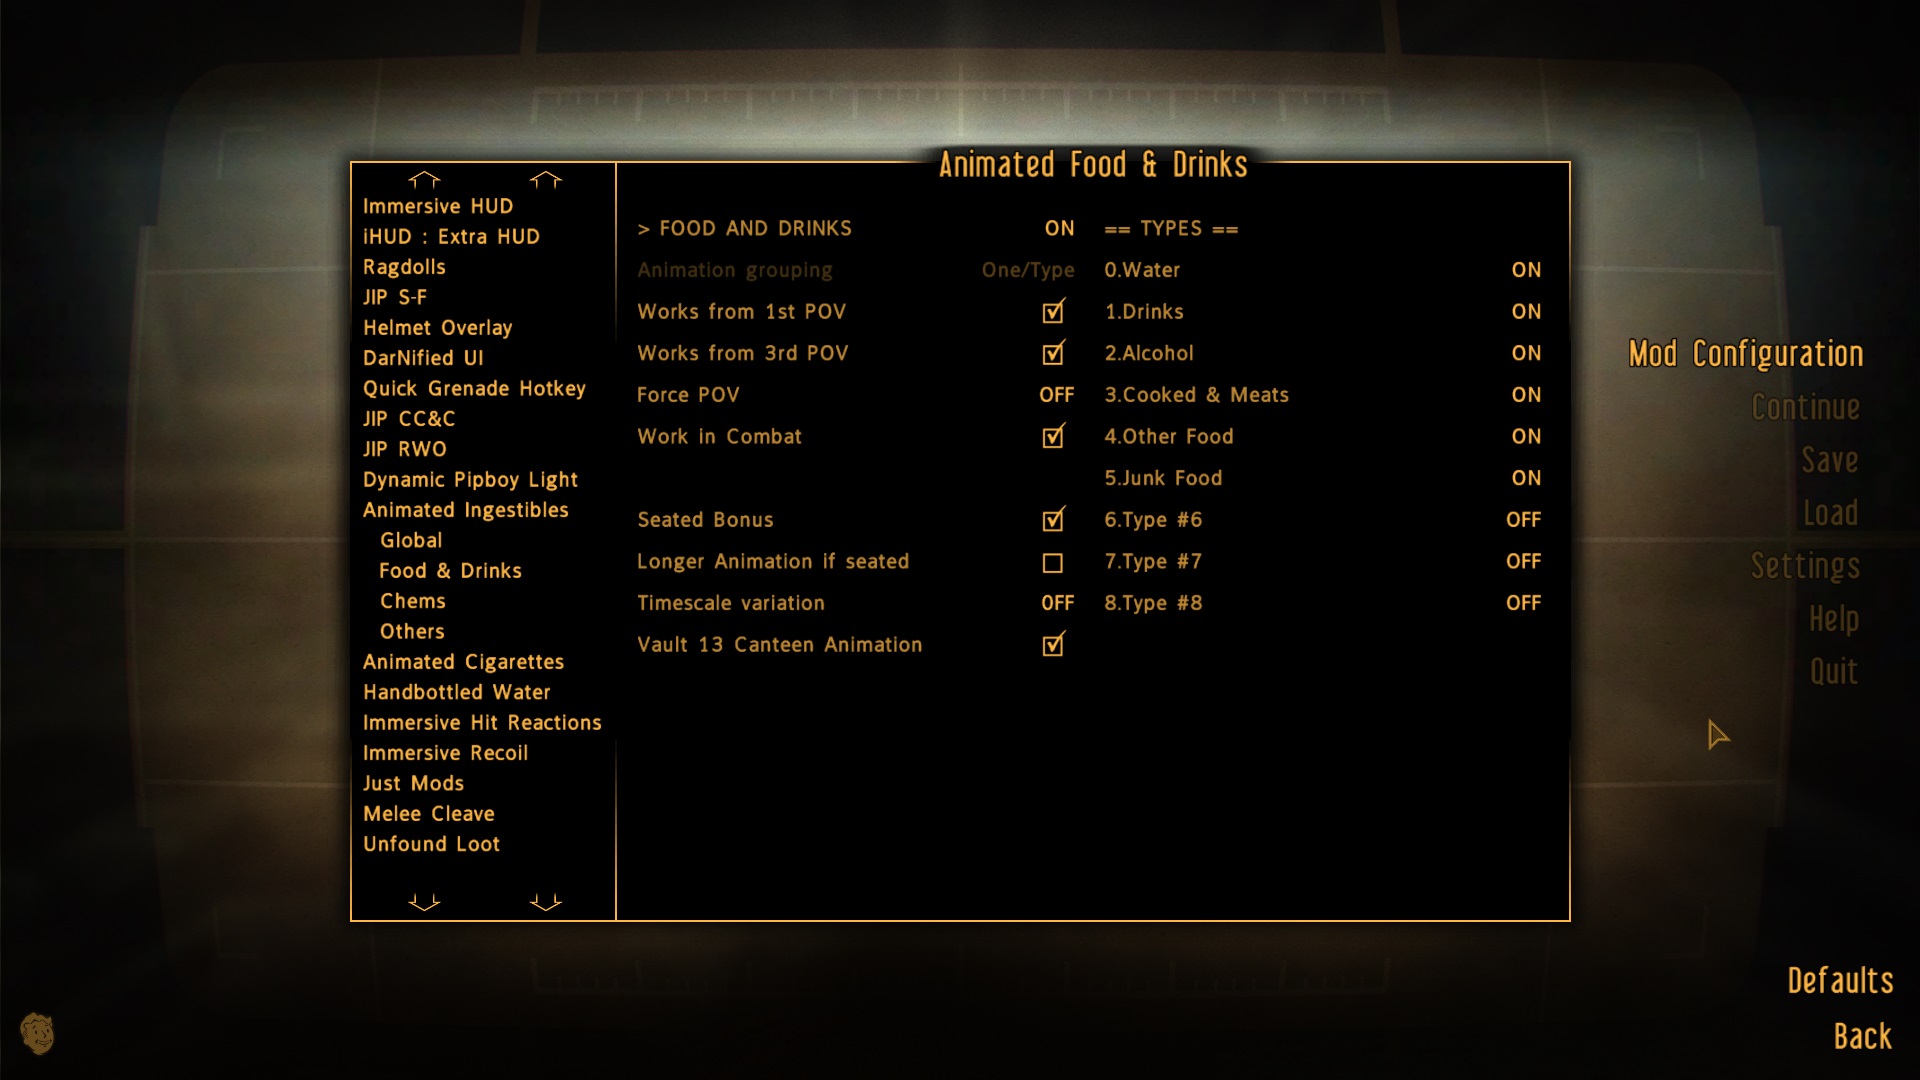 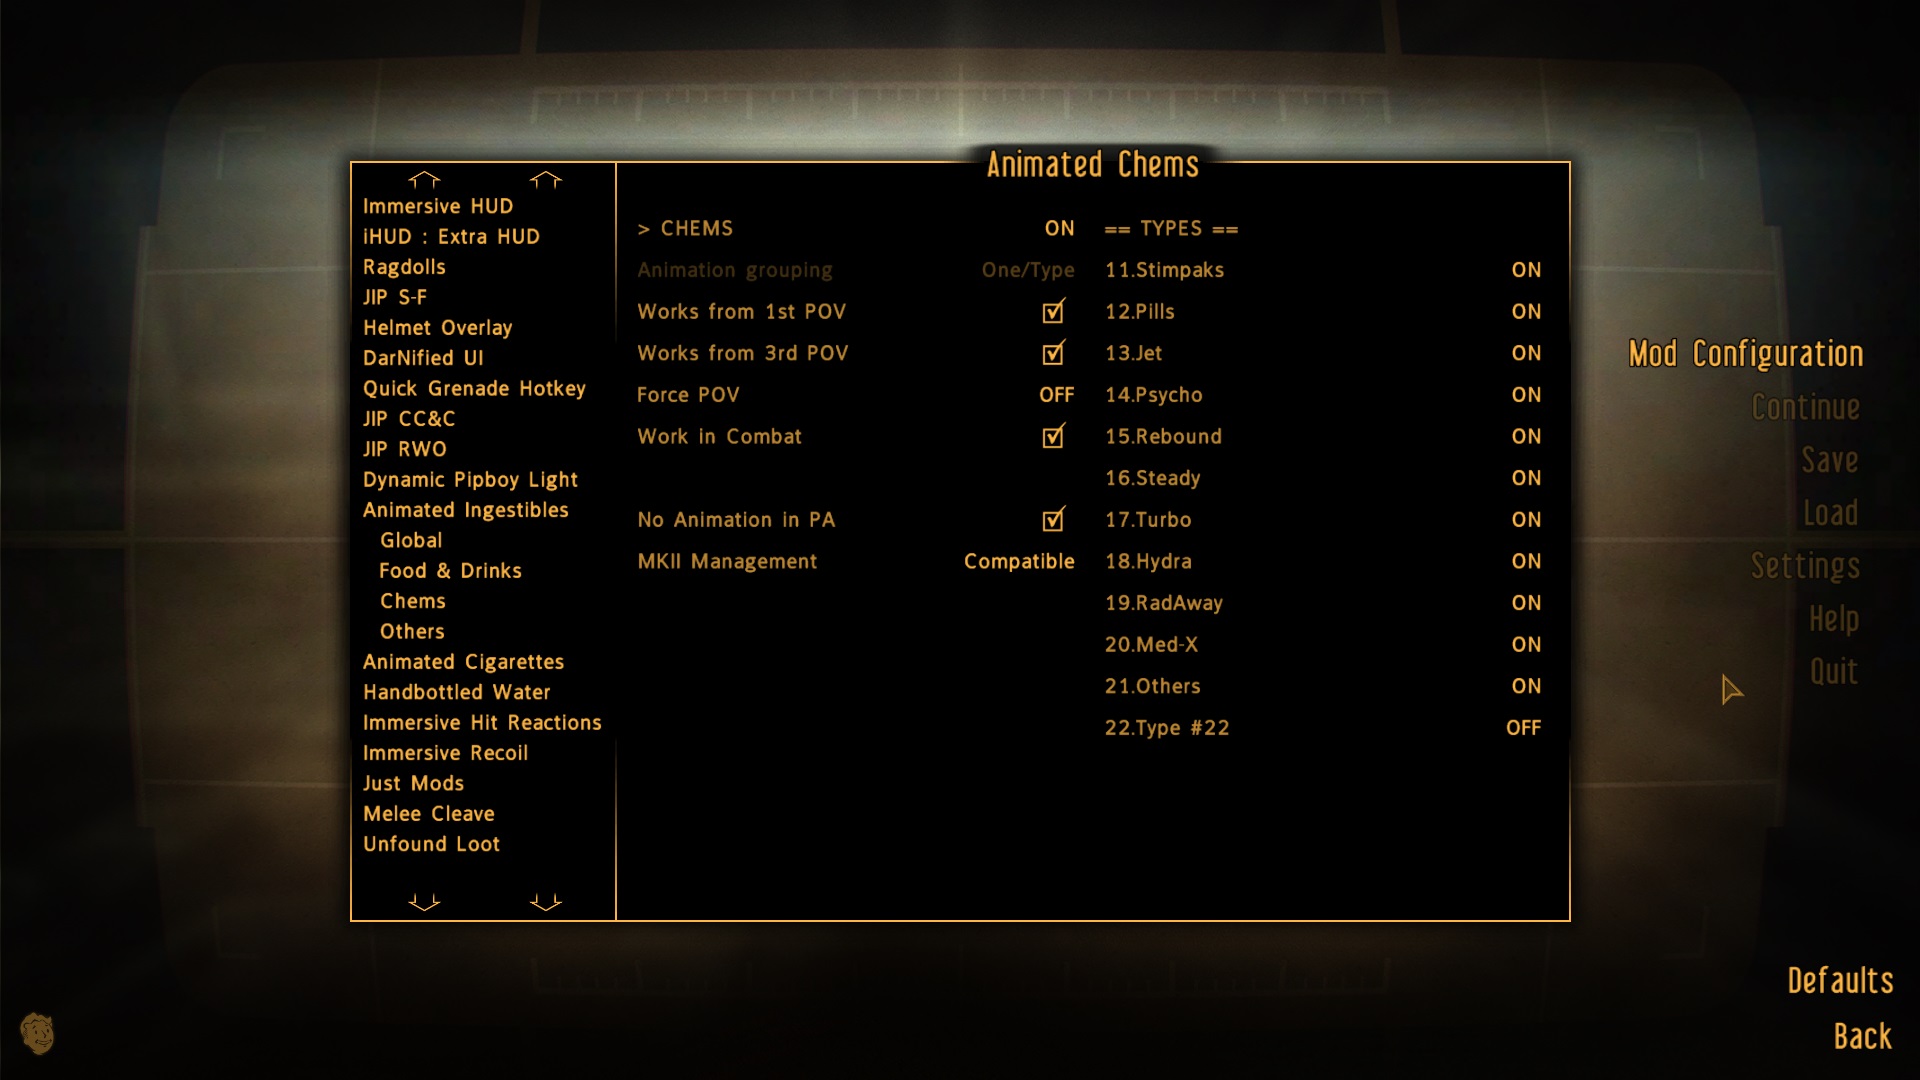
|
| ⟡ Handbottled Water ⟡Click to show/hide
|
The author of this mod is not a native speaker, so keep in mind that "Capsule" on the image bellow stands for a bottle cap.
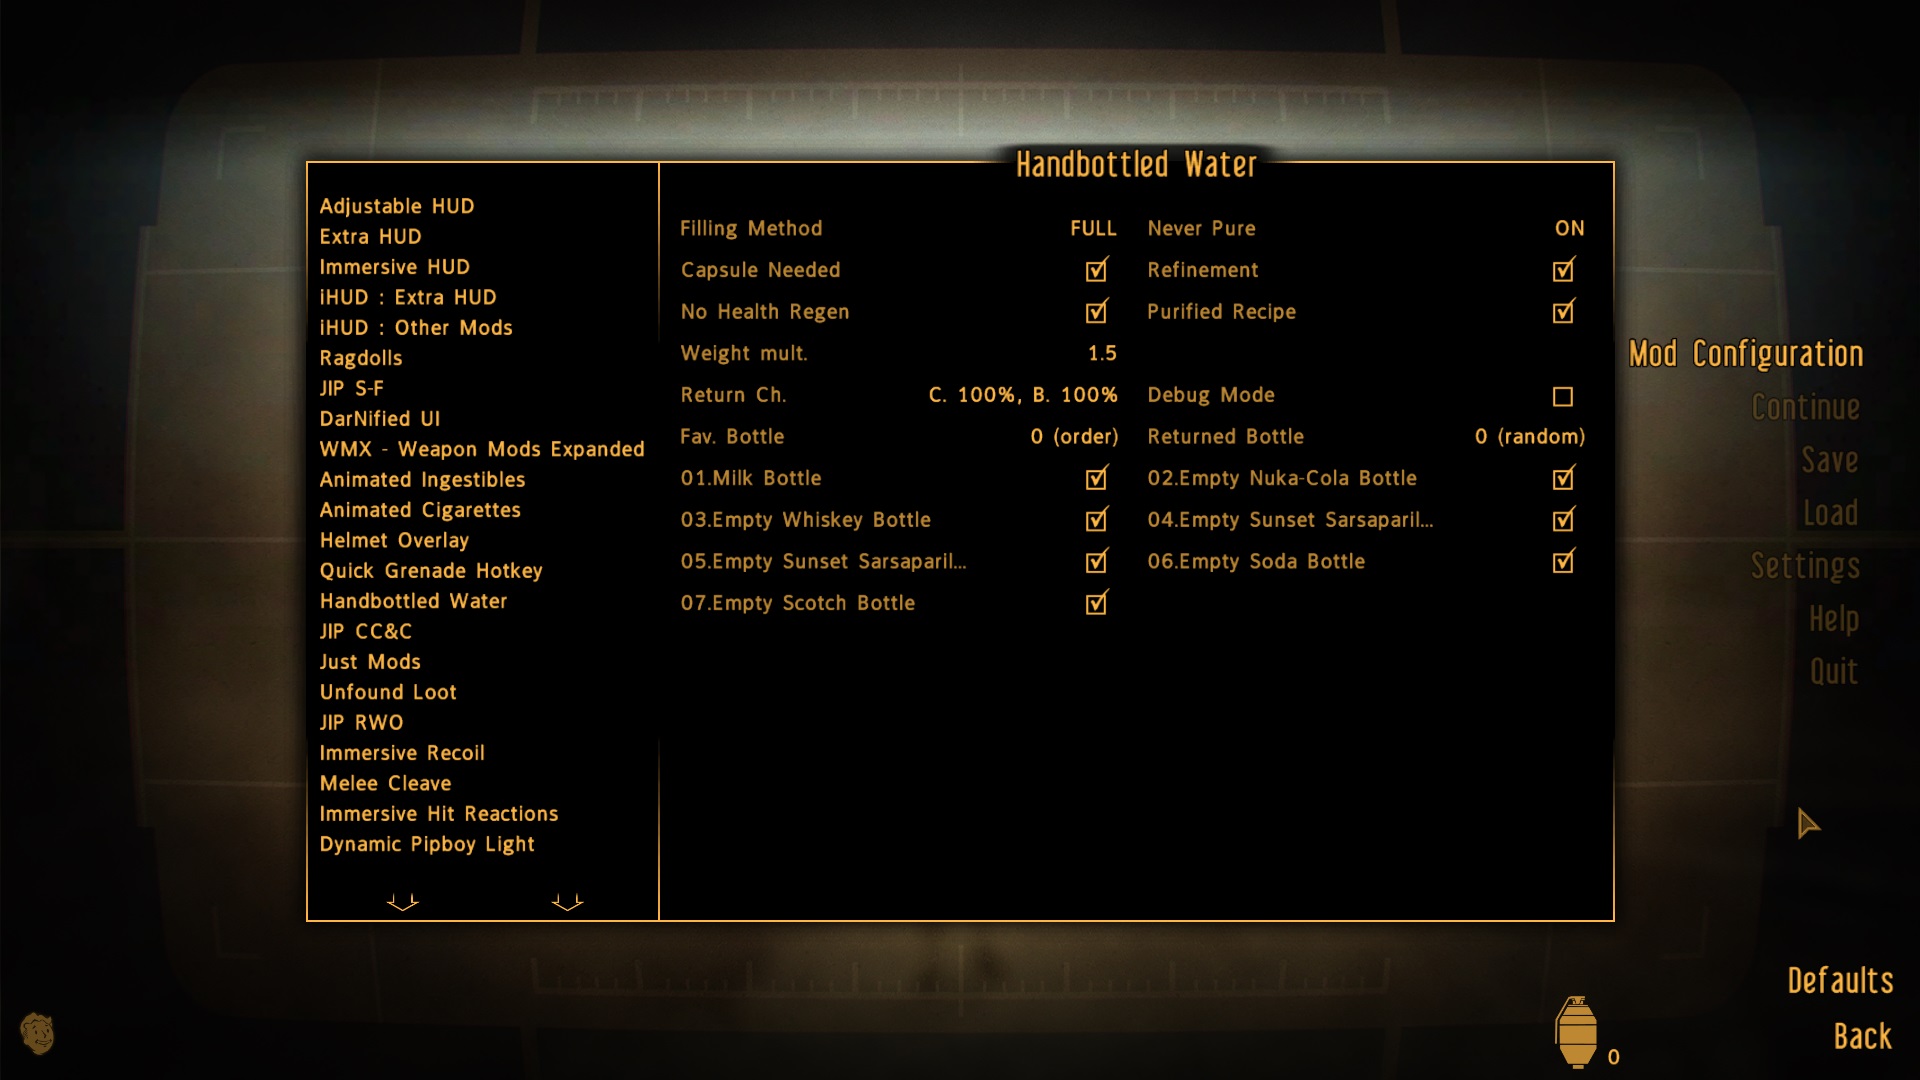
|
| ⟡ Handbottled Water ⟡Click to show/hide
|
The Recommended options are on the image:
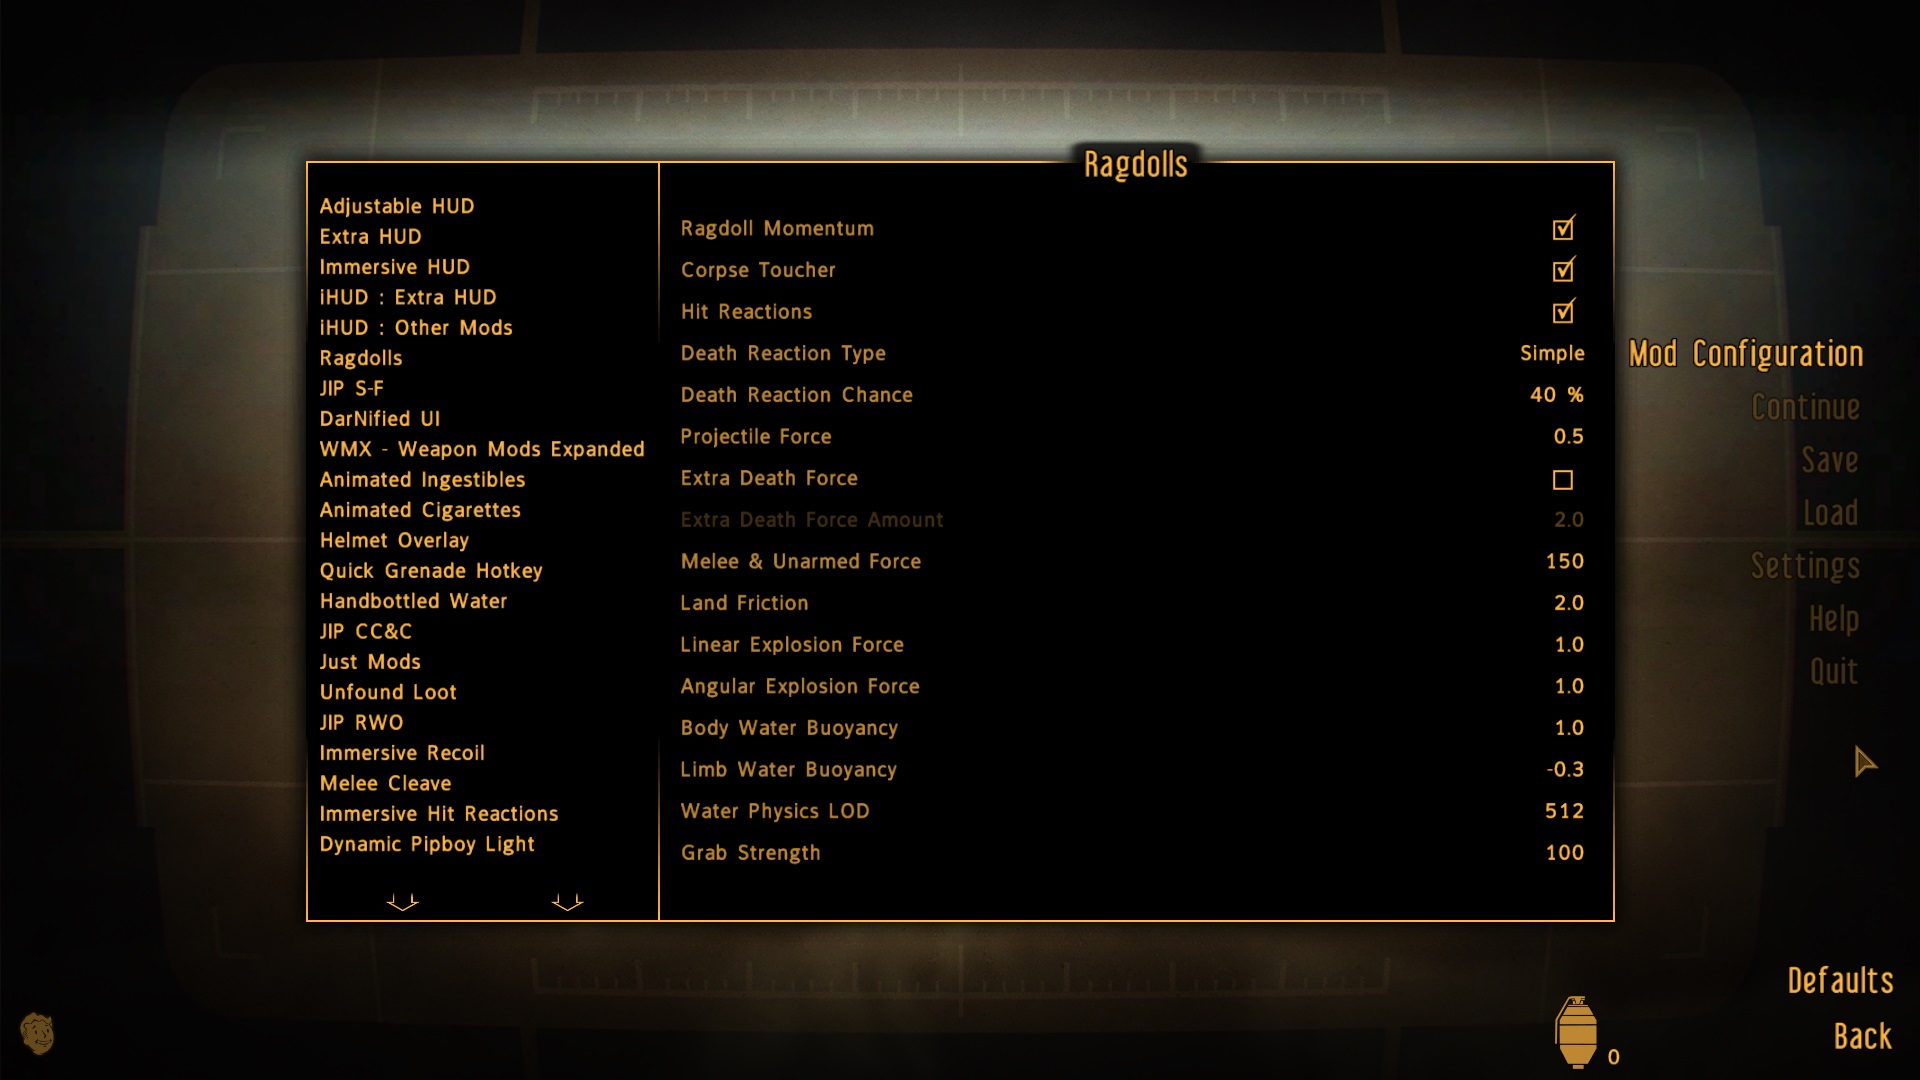
|
| ⟡ Unfound Loot ⟡Click to show/hide
|
The Recommended options are on the images:
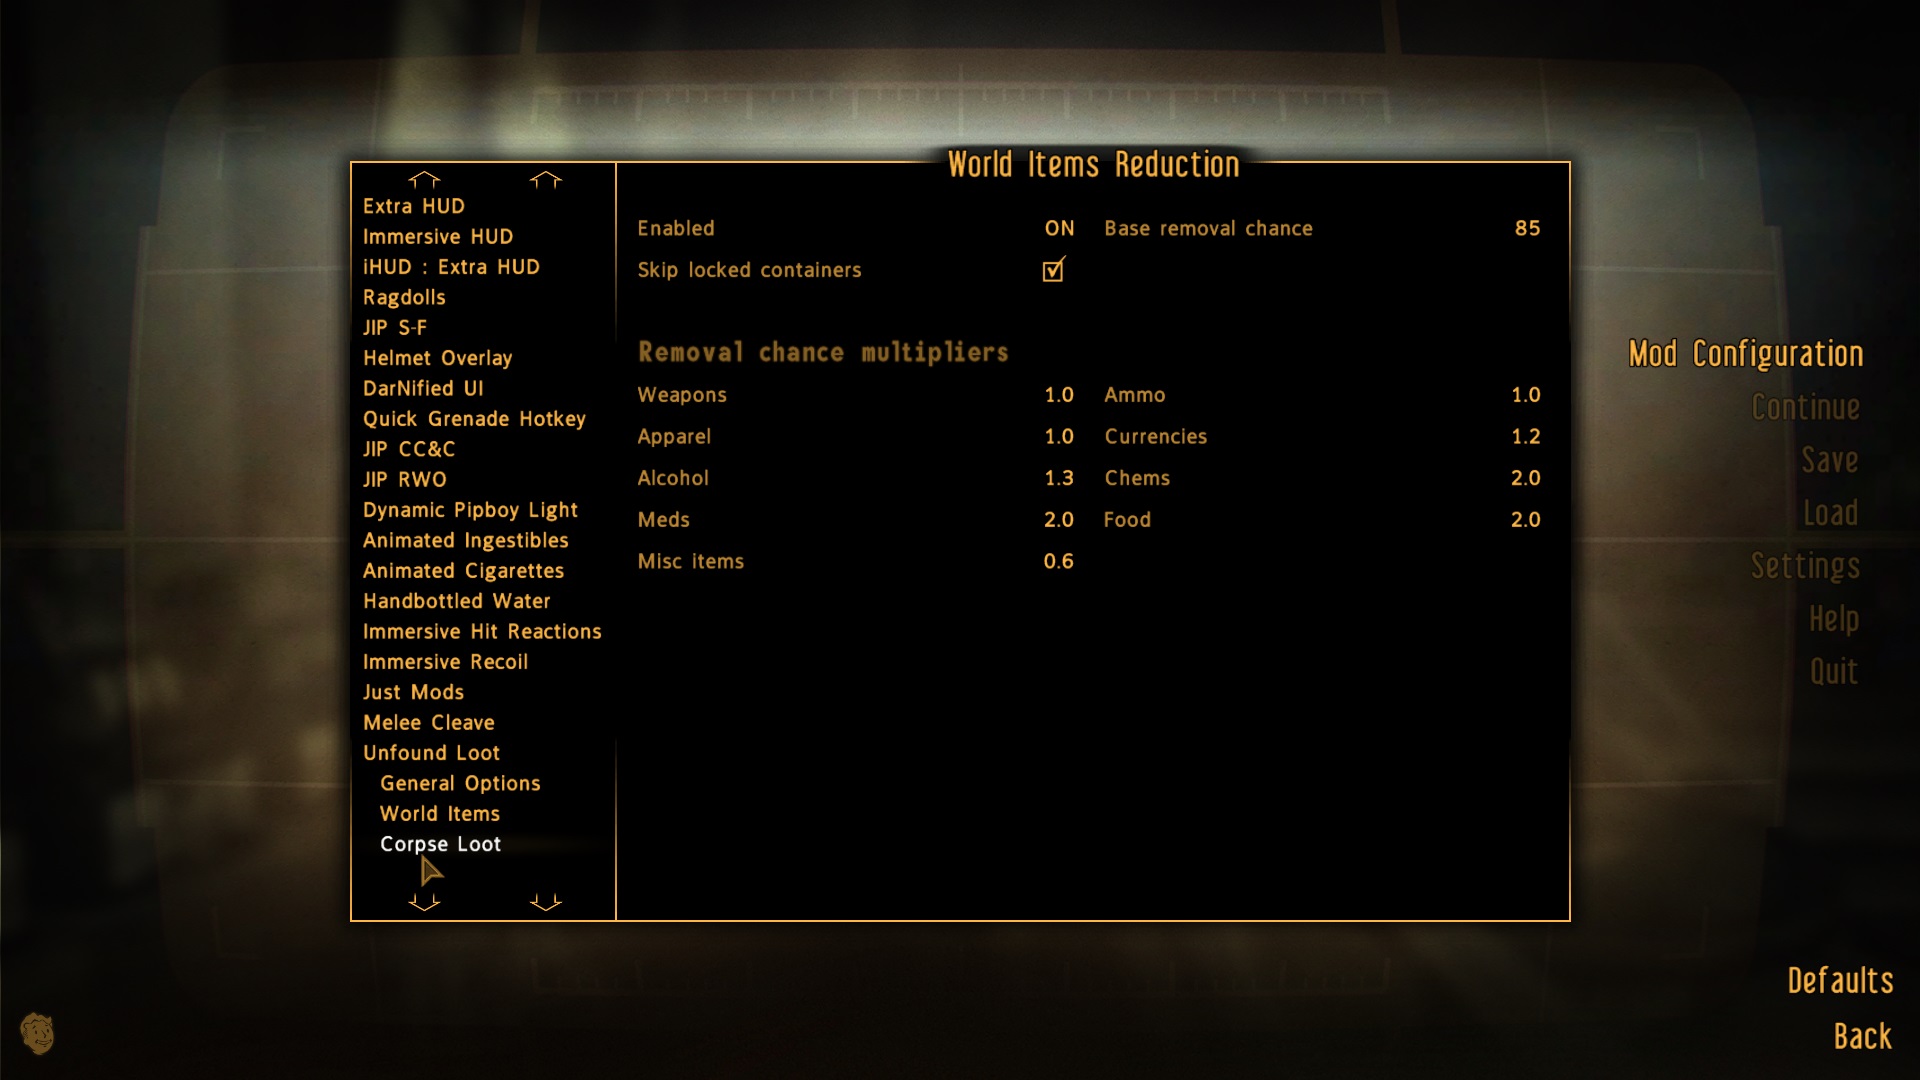 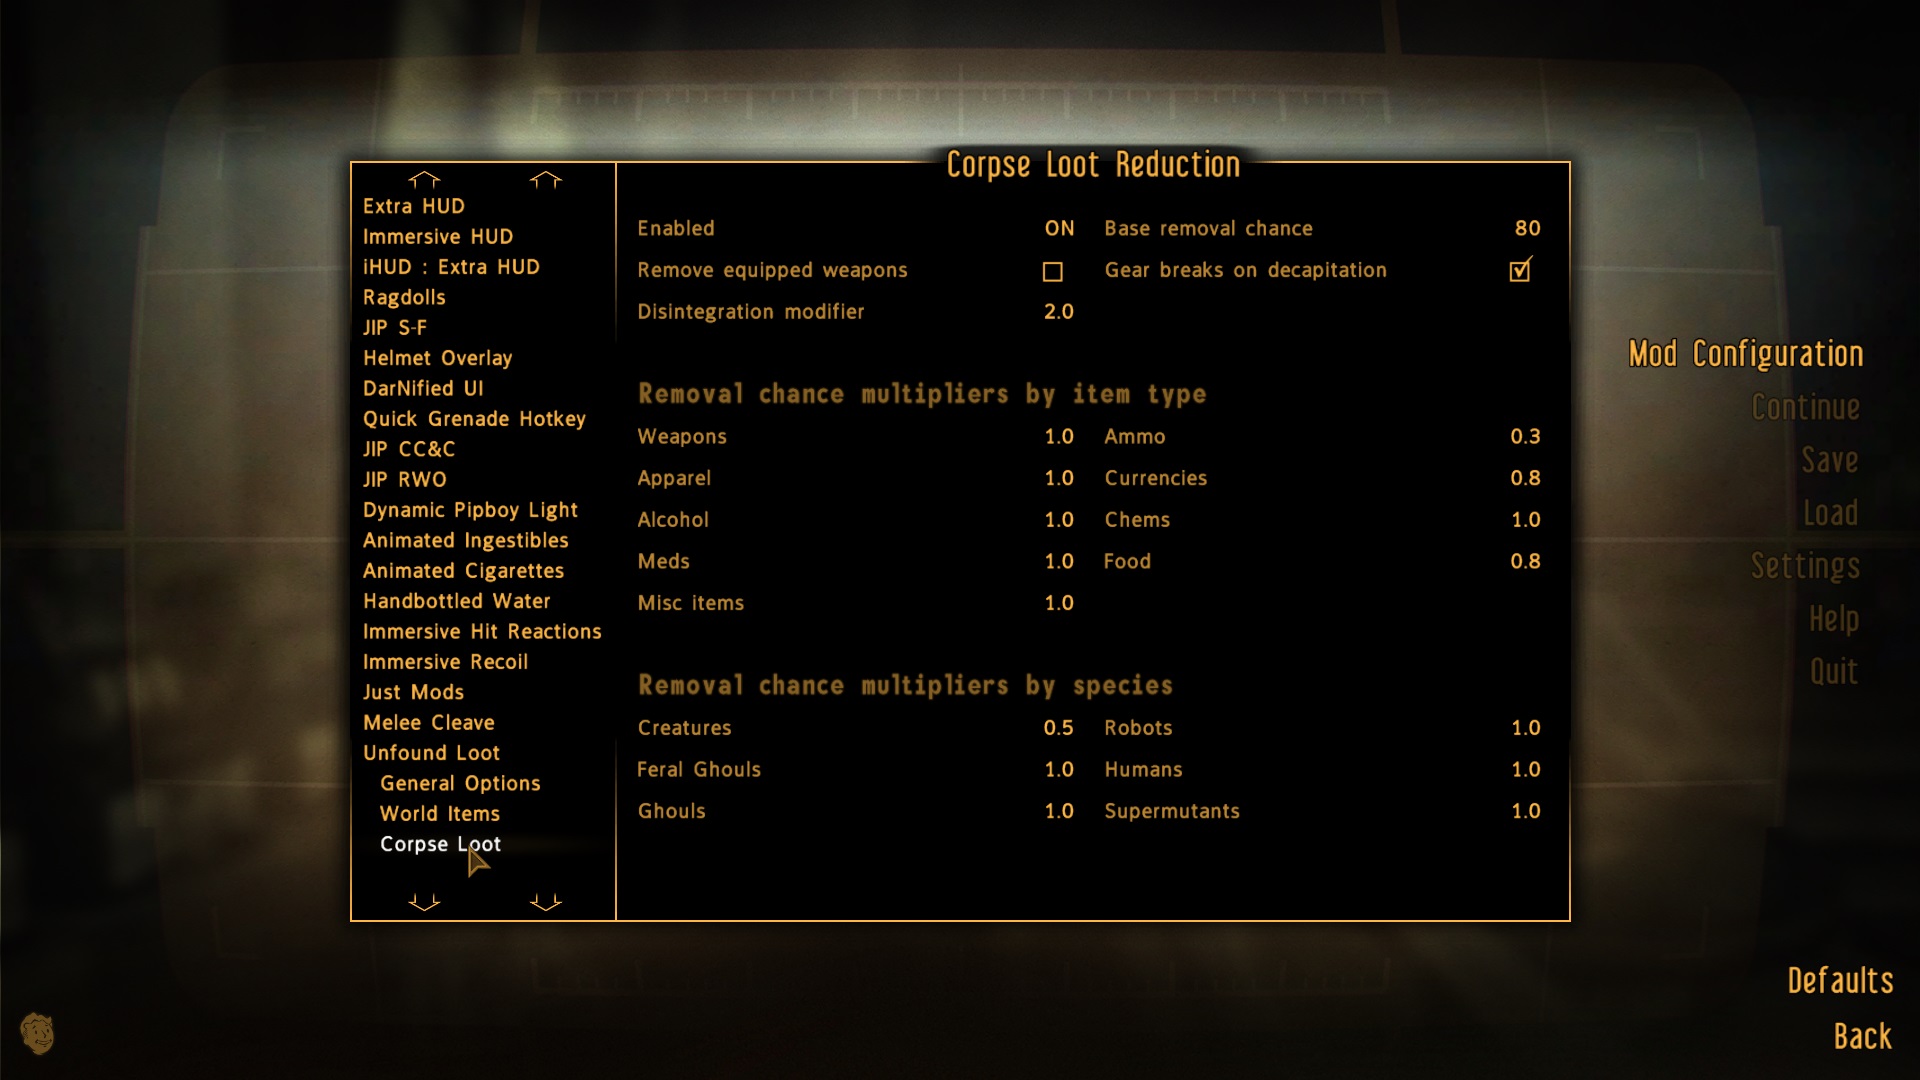
|
Remaining Mod Configurations
The remaining mod configurations are recommended to be left at their defaults for the closest to vanilla experience. However, users may adjust the settings for these mods to their preference.
Become a part of the Step Team
About Step
Created by TheCompiler (Daniele Ferraro), Step is a collaborative project with input from the modding community, technical volunteers, and project administrators. The goal is to provide tested and validated methods for establishing and maintaining an enhanced, modded game. Thus, the Step Guides provide detailed, well-tested build instructions for a solid, modded game that achieves an enhanced, vanilla experience.
The Step team collects information from the modding community through extensive mod testing, detailed reviews, feedback, and suggestions exchanged on the Step Community Forums. Posting rules apply, so be sure to read and follow them. Engage and enjoy a warm welcome and plenty of high-quality support from a large community of experienced members.
Step Modifications can only get better with contributions and help from the community. It is very time consuming for the Step team to ensure that Step's Game Guides are consistently maintained at the highest quality possible. As such, we rely on the community. Whether a regular user or a knowledgeable modder, below are some ways to contribute in maintaining Step as a reliable, high-quality resource:
All members of the community can help build the Guides they love and utilize for their own games. Step relies on the community (e.g., you) to help identify mods that improve the vanilla game while adhering to our Mandate through mod suggestions. We also need ongoing bug reports, feedback, reviews, and updates on included mods that may cause problems or that stray from the Mandate. This help can be as simple as reporting an encountered bug or as extensive as providing a one-off review of a mod based from personal experience with it.
In order to suggest a mod for inclusion in this Guide, visit the Mods section of the forums and use the Create Mod Topic button on the editor toolbar.
Staff Roles
There are official staff roles that are almost always open for new candidates.
Community members interested in becoming a member of the Step staff, please contact any Administrator or Step Staff member on the forums. Please include some idea of the role desired and include strengths and weaknesses within that role! For example, if applying for a Curator include the game desired to curate, strengths (xEdit, conflict resolution, texture editing), and weaknesses (mesh work, CK, scripting). This gives Step some initial idea of the candidate's skill sets.
Forum Moderators
Most of the moderation work for our Moderators is simply to keep topics on track and do general forum maintenance; such as moving topics to the correct forum and handling spammers. Very rarely does moderation on the Step forums end up in warnings and bannings (and we all like it that way). To be effective Moderators, community members who desire this role are expected to be familiar with the Step community and actively involved. As such, Moderator criteria is be based upon level and quality of activity within our community. Moderators will be expected to be more familiar with the Community Guidelines than the average member and be able to remain unbiased in their moderating.
Guide Curators
Guide Curators are the super-stars of the staff at Step Modifications. They are those who curate the Guides for members. Guide creation, growth, and maintenance takes a lot of time, effort, and skill. As such, Curators are generally required to be of a higher skill-level than the average modder. In an ideal world there would be 2-4 Curators per Guide. However, Curators are often working alone on Guides; thus, they require the knowledge and skills to be able to follow Mandate while building mod lists, patches, and writing all Guide and ancillary content in a way members can easily follow. This is no small feat for a single staff member to do! For more information about Guide Curation, see Game Guide Curation.
Testers
Generally, Testers are required to maintain a non-deviated Guide installation from which to install and test mods that are tagged for testing on the forums, as well as, general testing of Guides as a whole with the goal of finding bugs, issues, possible improvements, etc. Testers will be given access to Staff forums that house useful information on the Guides they test for. For more information about our testing process, read through the Mod Testing Guide to get a sense of what's involved.
Thank you for reading and enjoy the game!
Credits
The STEP administrators would sincerely like to thank (from the bottoms of our fuzzy little hearts):
- The authors of mods and tools recommended within our Guides
- The core Community for feedback, suggestions and input
- Step staff for their altruistic and for keeping this website alive for so many years
- EssArrBee for his awesome "Fear and Loathing in New Vegas Guide"
- The Beta and Mod Testers for their good humor and rigorous analyses
- The Nexus community
- Bethesda Softworks for their games
- Obsidian Entertainment for their work on Fallout: New Vegas
- Tannin for the gift that is Mod Organizer
- All the developers that keep MO going
Personnel
Guide Curator
Step Administrators
- DoubleYou
- Greg
- TechAngel85
- z929669
Retired Staff
- Aiyen
- Bealdwine
- deathneko11
- EisDrache
- EssArrBee
|
- Farlo
- frihyland
- GrantSP
- hishutup
- Kelmych
|
- MontyMM
- Nebulous112
- oqhansoloqo
- phazer11
- rootsrat
|
- stoppingby4now
- TheCompiler
- torminater
- Uhuru
- WilliamImm
|
|

 .
. button on the menu bar.
 button and select [Create empty mod].
 at the top of the main Mod Organizer window.
 at the top of the mod list pane.
 button and select, [Create empty mod].


