Fallout4:1.0: Difference between revisions
m (→About Step) |
|||
| Line 37: | Line 37: | ||
[[File:ModTable_Expand.jpg|700px]] | [[File:ModTable_Expand.jpg|700px]] | ||
== | == System Requirements == | ||
{{GameAbbrTag|{{NAMESPACE}}}} should be run on a relatively modern '''Windows 10/11 64-bit''' desktop or laptop, gaming capable PC. While CPU specs and performance are important factors, they matter only to a point beyond which is diminishing return on investment. Smooth gameplay, LODGen-related tools, and ENBSeries post-processing are most limited by the GPU performance coupled to the resolution at which the game is run. | |||
* The ''minimum'' specs assume that the recommended 'baseline' mod options will be installed, which are biased towards 'performance' options when available. | |||
* The ''recommended'' specs assume a bias toward 'quality' and assume higher quality mod options will be installed when available. | |||
* CPU/GPU Marks should be within the ranges listed below. Refer to the links for examples. | |||
{| class="wikitable" style="width:55%; float:left;" | {| class="wikitable" style="width:55%; float:left;" | ||
| Line 47: | Line 48: | ||
! Recommended | ! Recommended | ||
|- | |- | ||
! style="color:#ccc; text-align:left;"| | ! style="color:#ccc; text-align:left;"| CPU [https://www.cpubenchmark.net/CPU_mega_page.html CPU Mark] Range | ||
| style="text-align:left;"| | | style="text-align:left;"| 4,000 - 7,000 | ||
| style="text-align:left;"| | | style="text-align:left;"| > 7,000 | ||
|- | |- | ||
! style="color:#ccc; text-align:left;"| | ! style="color:#ccc; text-align:left;"| System RAM | ||
| style="text-align:left;"| | | style="text-align:left;"| 8GB | ||
| style="text-align:left;"| | | style="text-align:left;"| 16GB | ||
|- | |- | ||
! style="color:#ccc; text-align:left;"| | ! style="color:#ccc; text-align:left;"| GPU [https://www.videocardbenchmark.net/GPU_mega_page.html G3D Mark] Range | ||
| style="text-align:left;"| | | style="text-align:left;"| 8,000 - 10,000 | ||
| style="text-align:left;"| | | style="text-align:left;"| > 10,000 | ||
|- | |- | ||
! style="color:#ccc; text-align:left;"| | ! style="color:#ccc; text-align:left;"| Video RAM | ||
| style="text-align:left;"| | | style="text-align:left;"| at least 4GBs | ||
| style="text-align:left;"| | | style="text-align:left;"| 8GBs or higher | ||
|- | |- | ||
! style="color:#ccc; text-align:left;"| Drive | ! style="color:#ccc; text-align:left;"| Game Drive | ||
| style="text-align:left;"| | | style="text-align:left;"| HDD | ||
| style="text-align:left;"| | | style="text-align:left;"| SSD | ||
|- | |- | ||
! style="color:#ccc; text-align:left;"| | ! style="color:#ccc; text-align:left;"| Resolution | ||
| style="text-align:left;"| | | style="text-align:left;"| 1080p (HD) | ||
| style="text-align:left;"| | | style="text-align:left;"| 1440p (QHD) | ||
|} | |} | ||
{{clear|left}} | {{clear|left}} | ||
Revision as of 01:36, February 4, 2023
NOTE
This is the current version of the Step Fallout4 Guide. Don't forget to endorse Step on the Nexus if you like the guide. Please report any problems or confusing instructions on the latest Feedback & Bug Reports pinned forum topic.
Initial Release
This is our initial release of the Step Fallout 4 (Fallout4, FO4) guide. This Guide requires Fallout 4 GOTY edition (or all DLC).
- Visit the forums to learn more or contribute.
- Also follow Step Modifications on Facebook.
- To support hosting and maintenance of the Step Community Project, consider donating to the project.
About Step
Created by TheCompiler (Daniele Ferraro), Step is a collaborative project with input from the modding community, technical volunteers, and project administrators. The goal is to provide tested and validated methods for establishing and maintaining an enhanced Fallout4 mod build. Our guides provide detailed, well-tested build instructions for a very stable game with an enhanced, vanilla experience.
The Step team collects information from the modding community through extensive mod testing, detailed reviews, feedback, and suggestions exchanged on the Forums. Posting rules apply, so be sure to read and follow them.
New to Modding?
We recommend that you review this entire guide before attempting installation, especially if this is your first exposure to a Step mod-build guide. We and the community, have consolidated a lot of information into our guides for use as a free resource for all. New and experienced modders alike will find many answers within these guides and linked resources. This guide is written in such a way that it expects users to know the basics of modding and related tools (e.g. mod managers, LOD optimizers, configuration utilities, etc.). However our support forums are always available for Q&A.
Nomenclature and Instructions
The following nomenclature is used throughout this guide and should be understood before proceeding.
- 'tick' means 'check': Frequently, the word 'check' or 'checked' can mean 'ensure' in addition to "check mark", so 'check' is not used where it is synonymous with 'tick' to avoid any mistakes that can (and have) happened from this conflation.
- Baseline: The recommended install option is shown within the Baseline column of the mod tables below.
- Step Patches: Custom patches created for the respective Step Guides. Always use them!
Expand Instructions!
Click the heading below to expand detailed instructions that are collapsed by default for readability:
Expand mod table detailed instructions:

System Requirements
Fallout4 should be run on a relatively modern Windows 10/11 64-bit desktop or laptop, gaming capable PC. While CPU specs and performance are important factors, they matter only to a point beyond which is diminishing return on investment. Smooth gameplay, LODGen-related tools, and ENBSeries post-processing are most limited by the GPU performance coupled to the resolution at which the game is run.
- The minimum specs assume that the recommended 'baseline' mod options will be installed, which are biased towards 'performance' options when available.
- The recommended specs assume a bias toward 'quality' and assume higher quality mod options will be installed when available.
- CPU/GPU Marks should be within the ranges listed below. Refer to the links for examples.
| Hardware | Minimum | Recommended |
|---|---|---|
| CPU CPU Mark Range | 4,000 - 7,000 | > 7,000 |
| System RAM | 8GB | 16GB |
| GPU G3D Mark Range | 8,000 - 10,000 | > 10,000 |
| Video RAM | at least 4GBs | 8GBs or higher |
| Game Drive | HDD | SSD |
| Resolution | 1080p (HD) | 1440p (QHD) |
Time Commitment
Be aware that it will usually take anywhere from several hours to a several days to complete this build from start to finish. Following are cumulative time estimates (upwards of 24 hours for a novice user, first-time build):
- 6 hours : Steps 1 - 3 (modding-environment setup)
- 8 hours : Step 4 (mod download, installation)
- 2 hours : Steps 5 - 7 (running utilities, post-build configuration, and fine-tuning the build)
STEP 1
Follow the System Setup Guide!
WARNING
It is not recommended to install or use the official High Resolution Texture Pack DLC as it has significant issues that are not worth fixing for the few textures that would be used from it. If it is already installed, remove it by unchecking the DLC in the Steam library.Those who have not completed the System Setup Guide should STOP and do so now BEFORE beginning Step 2! This is a perquisite for completing this guide.
STEP 2
Mod Organizer - Fallout4 Initialization
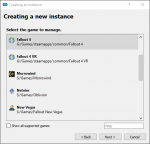
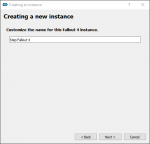
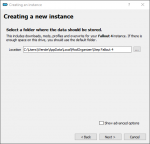
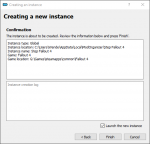
FIRST, follow the System Setup Guide. The below instructions describe how to initialize a Fallout4 instance in Mod Organizer (MO). If MO was installed as a Portable application, the instructions below will need to be interpreted accordingly. If a Fallout 4 instance was created in Step 1 or otherwise, simply select the instance and skip the following:
Profile Setup
MO's profile feature allows the creation of multiple mod builds that rely on the same mod list and mod-level configurations. In other words, if a mod was installed with option 'A', then that mod is only available in this configuration for all profiles under an instance. Profiles can have different mods enabled, separate save games, and game INIs, but the mod configuration is identical among each profile. Different MO-game instances must be used for different mod configurations. For the purpose of this guide, a single mod configuration is all that's needed, so profiles are sufficient. Begin by creating/editing two profiles:
Tool Setup
All tools installed in the System Setup Guide should already be configured in MO. Some tools will have been auto-detected and added; nevertheless, ensure the settings below are set correctly for all tools. xEdit is used in this example:
| Application Title | Executable | Argument(s) |
|---|---|---|
| xEdit | xEdit.exe | -FO4 -IKnowWhatImDoing -AllowMasterFilesEditTick the Create files in mod instead of overwrite box and select the xEdit Output mod from the drop-down. |
| xEditQuickAutoClean | xEditQuickAutoClean.exe | -FO4Tick the Create files in mod instead of overwrite box and select the xEdit Output mod from the drop-down. |
| LOOT | LOOT.exe | --game="Fallout4"
|
| xLODGen | xLODGenx64.exe | -lodgen -FO4 -o:"DriveLetter:\Modding\Tools\xLODGen\xLODGen_Output"Replace DriveLetter: with the drive letter of the 'Modding' folder. |
Tools can be arranged in any order using the up and down buttons above the list. This will dictate the order they are listed in the MO "Run" dropdown menu. When complete, close the window by clicking the [OK] button.
BethINI Setup
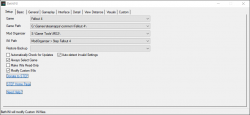
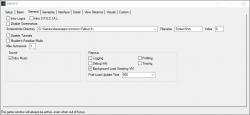
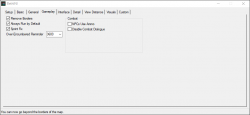
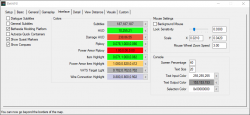
BethINI needs to be run for the current MO profile to establish the configuration files before beginning mod installation. This ensures that all users share a common configuration during the modding process. As such, please do not deviate from the instructions below. Once the guide is complete and things are confirmed to be working, BethINI will be revisited towards the end of this guide to finalize the optimal configuration.
BethINI Initialization
BethINI Baseline Configuration
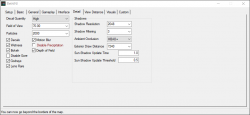
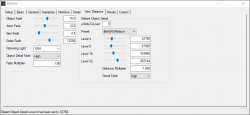
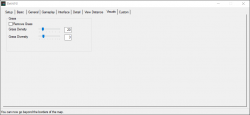
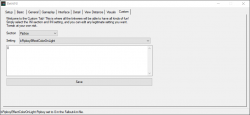
Configure BethINI as described in the steps below, which are reflected in the images where applicable. Please do no deviate from these instructions at this time:
STEP 3
Sorting Plugins With LOOT
At any time during the mod installation process, LOOT should be used to sort plugins before running the game. This is necessary to ensure proper plugin priority (load order), which can have a dramatic impact on the game:
Up to this point, only the following plugins should be listed in the MO right pane in the order listed. (If not, run LOOT again):
- Fallout4.esm
- DLCRobot.esm
- DLCworkshop01.esm
- DLCCoast.esm
- DLCworkshop02.esm
- DLCworkshop03.esm
- DLCNukaWorld.esm
If the plugins are not in the order listed, run LOOT now.
Standard Cleaning Procedures
WARNING
The vanilla masters for Fallout 4 should NOT be cleaned with xEdit. Yes, LOOT will offer warnings informing the users to clean these. These warnings should be ignored. This guide assumes that the user has untouched vanilla masters, so if you have cleaned them, it is recommended to restore them to their uncleaned state. This applies to the following plugins:
- Fallout4.esm
- DLCRobot.esm
- DLCworkshop01.esm
- DLCCoast.esm
- DLCworkshop02.esm
- DLCworkshop03.esm
- DLCNukaWorld.esm
LOOT will often provide yellow 'warning' blocks for 'dirty' plugins that require cleaning with xEdit, which should be performed by following the instructions below, unless otherwise noted.
STEP 4
At this point, the PC modding environment should be fully set up and ready for mod installation.
IMPORTANT: Please read ALL of the following carefully BEFORE requesting support on the forums!
- This guide can be installed in one of two (2) ways:
- All mods from all ModGroups (mod tables) installed. This installs our recommended lighting and weather setup.
- All mods from all ModGroups EXCEPT for the optional ModGroup, 18-Lighting & Weather. Use this option if you want to configure a different lighting and/or weather setup.
Understanding the Step Patches
A “conflict resolution” patch is a plugin that resolves conflicts between various active plugins. They allow using various mods together that would otherwise be incompatible. The Step Patches are built exclusively for the Step mod build. They are required and are dependent on specific mods as noted by indicators in the mod tables in Step 4. They will not resolve conflicts with any conflicting mod pluginss that are not in this guide.
Step Patches
- Step Patch - Conflict Resolution - required
- Patches all conflicting plugins except for mods in the optional 18-Lighting & Weather ModGroup.
- Step Patch - Lighting and Weather - optional
- Patches the 18-Lighting & Weather ModGroup
Mod Table Reference
Below is the legend and reference for the mod tables used in this guide.
Mod Table Legend
Quick Reference
| Mod Name | Baseline | Instructions | ||||
|---|---|---|---|---|---|---|
| Master to NO patches with NO ENB option |
Baseline | Notes | ||||
| Master to all patches with ENB option |
Baseline | Notes |
Mod Installation Considerations
- Do not extract BA2 files unless specifically instructed to do so.
- Consider installing additional mod files separately to keep better track of installed options rather than merging all files from the mod together. This is not required, but a recommendation, as it generally helps with maintenance of the mod list in regards to mod updates, and provides a more visible reminder of the installed options. See the discussion here and more instructional information about this here for more details.
- If no Notes or Step recommendations are provided for a particular mod, all options are valid.
- After installing a mod, ALWAYS enable the mod and any related plugins in MO unless otherwise instructed.
- Mods are listed in alphabetical order within each ModGroup and any deviations from this are purposeful to achieve the desired outcome.
- Mods should be arranged in MO in the order that they are listed to ensure other mods further down the list overwrite/override those occurring before them.
- Always install plugins (ESLs/ESMs/ESPs), unless otherwise noted. When there is a choice to use an ESL, always choose that UNLESS continuing a playthrough using a previously-existing savegame (ESL-flagged plugins can 'break' a save that relies on a ESP or ESM version of the same plugin!).
- Always follow LOOT's advice in regards to mod cleaning and sorting unless otherwise noted.
ModGroup Separators
Mod Organizer features the ability to create separators within the mod list to group mods for easier visual reference. Step recommends using these separators for each ModGroup below:
01-Tools
- Standalone applications that aid in the management of the modding process
| Mod Name | Baseline | Instructions |
|---|
| Cathedral Assets Optimizer |
ExpandDetailed Instructions available |
02-Extenders
- Mods that expand on the inherent functionality of a game or another mod without themselves affecting content
| Mod Name | Baseline | Instructions |
|---|
| F4SE |
ExpandDetailed Instructions available |
| Address Library for F4SE Plugins |
| Baka Framework |
Install only the 1.10.0 main file. |
| Base Object Swapper |
Install the version 1.1.0 file. |
| Buffout 4 |
ExpandDetailed Instructions available |
| Canary Save File Monitor |
| Console Commands Extender |
| RobCo Patcher |
| Shadow Boost FO4 |
ExpandDetailed Instructions available |
| Workshop Framework |
Install the main file and the Old-Gen Replacers optional file. |
| XSE PluginPreloader F4 |
ExpandDetailed Instructions available |
Game Launch Test
At this stage, the preliminary build should be tested to confirm that there are no issues with the modding environment or engine-level mod configurations:
- Start the game by running the F4SE launcher from Mod Organizer. The game should load to the main menu without issue.
- Open the console (~), type in coc RedRocketExt, and press Enter/Return. The game should load at the Red Rocket Truck Stop without issue.
- Exit the game using the
qqqconsole command or the standard menu options.
If the game launched and loaded as expected, continue forward. Otherwise, all instructions were not followed, and something was missed. Revisit the installation steps above starting with the System Setup Guide in Step 1. If a careful review of the previous instructions does not resolve the issue, post on the guide support forums for help.
WARNING
Beyond this point, DO NOT launch the game again until instructed to do so.Many of the following mods are interdependent, and launching the game prematurely will most likely result in issues or failures. Please DO NOT post on the forums for support of non-issues relating to a failure to RTFM.
03-Resources
- Mods solely providing assets intended specifically for use by other mods without themselves affecting content
| Mod Name | Baseline | Instructions |
|---|
| HUDFramework |
| Mod Configuration Menu |
Install the version 1.39 main file. |
| Settlement Menu Manager |
04-Foundation
- Baseline mods that should be overridden by other mods AND/OR that make widely-accepted programmatic changes expected by other mods
| Mod Name | Baseline | Instructions |
|---|
| Fallout 4 HD Overhaul 2k |
ExpandDetailed Instructions available |
| FO4LODGen Resources |
ExpandDetailed Instructions available |
| HD LOD Textures |
ExpandDetailed Instructions available |
| Far Object LOD Improvement Project |
ExpandDetailed Instructions available |
| High Resolution Texture Pack |
2k | ExpandDetailed Instructions available |
| Jesters Better Destroyed Vehicles |
ExpandDetailed Instructions available |
| Langleys HD Textures Workshop |
ExpandDetailed Instructions available |
| FlaconOils Complete Retexture Project |
2k | ExpandDetailed Instructions available |
| Unofficial Fallout 4 Patch |
05-Animation and Physics
- Mods that affect animations or physics
No mods defined.
06-Models and Textures
- Mods that replace existing models or textures
No mods defined.
07-Sounds and Music
- Mods that affect sounds or music
No mods defined.
08-Character Appearance
- Mods that affect the appearance of the player character or NPCs
| Mod Name | Baseline | Instructions |
|---|
| DeLuxe Makeup |
Install only the Eye Liner Masks main file. |
| Enhanced Vanilla Bodies |
ExpandDetailed Instructions available |
| The Eyes Of Beauty Fallout Edition |
ExpandDetailed Instructions available |
| WX Hair Colors |
ExpandDetailed Instructions available |
09-Fixes
- Mods have a programmatic component that fixes various bugs and/or inconsistencies
| Mod Name | Baseline | Instructions |
|---|
| Better Landscape Grass |
| Bullet Counted Reload System |
Install the main file and the BCR- Lever Action Rifle v1.02 optional file. |
| Car Physics Death bug fix |
Install the version 1.0 main file (the third one). |
| Crafting Highlight Fix |
Install the Crafting Highlight Fix 1.8.8 Old Version file. |
| Diamond City Billboards |
| F4z Ro D-oh - Silent Voice |
Install the old version 1.1 file. |
| Goodneighbor View |
| High FPS Physics Fix |
ExpandDetailed Instructions available |
| Im Talking to You |
| Long Range Bullet Holes |
ExpandDetailed Instructions available |
| Long Save Bug Fix |
| Moddable Robot Settlers Compilation |
| Newton's Regards - No More Falling Cars |
| Perception Bug Fix Redux |
| Piezonucleic Lining Fix |
Install the Piezonucleic Fix 2nd var. main file. |
| Pip-Boy Flashlight |
ExpandDetailed Instructions available |
| Place Everywhere |
Install the Place (Fallout4 1.10.163 - latest release) old file. |
| Power Armor Ownership Fix |
Install only the PA Ownership Fix (with No PA Battery Pathing) optional file. |
| Previsibines Repair Pack |
ExpandDetailed Instructions available |
| Radio Tower Transparency Fix |
Install the Radio_Tower_Fix_Loose main file. |
| RAW INPUT - The Ultimate Mouse Sensitivity Fix |
ExpandDetailed Instructions available |
| Sanctuary - No Dead Dog and Raider |
Install the No Dead Dog ESL main file. |
| Search and Destroy - Fixed |
| Settlement Dead Zone Fixes |
Install only the Settlement Dead Zone Fixes - Max Compatibility main file. |
| Settler Sandbox Expansion |
| Sprint Stuttering Fix |
| Thaylar's Settlement Lighting Fixes |
ExpandDetailed Instructions available |
| The Missing Nukalurk Recipe Book |
| Vault Door Announce Warning for Vaults 81 88 114 and 118 |
ExpandDetailed Instructions available |
| Weapon Debris Crash Fix |
Only install if you have an NVidia graphics card. |
| Weston Water LOD Fix |
10-Gameplay-General
- Mods that affect general or multiple gameplay mechanics
| Mod Name | Baseline | Instructions |
|---|
| Equipment and Crafting Overhaul Redux |
ExpandDetailed Instructions available |
| Fixes and Tweaks by Aurelianis |
| New Equipment Overhaul |
ExpandDetailed Instructions available |
| Vault 88 Essentials |
Install only the main file. |
| VaultTec Workshop Overhaul Redux |
11-Gameplay-AI and Combat
- Mods that affect AI, stats, or combat mechanics of NPCs
No mods defined.
12-Gameplay-Economy
- Mods that affect currency, rewards, values, rates, or any other economy-related mechanics
| Mod Name | Baseline | Instructions |
|---|
| Worthwhile Caps Stashes |
13-Gameplay-Immersion
- Mods that help to improve game immersion and role-playing scenarios
| Mod Name | Baseline | Instructions |
|---|
| Another Vault 81 Molerat Disease Cure |
| Classic Holstered Weapons System |
| Climbable Ladders for Settlements |
Install the Climbable Ladders 1.1 ESL - Workshop Framework main file. |
| Craftable Display Shelves |
Install only the Eli Display Shelves 1.2 DLC main file. |
| CVc Dead Wasteland |
ExpandDetailed Instructions available |
| Diamond City Auto Close Gate |
| Everyone's Best Friend |
| Handmade Turrets |
| Holotape Display Shelves |
Install the Holotape Display ESL main file. |
| Nuka Cola Swap |
| Realistic Conversations Fallout 4 |
Install only the main file. |
| Scrapping Machine |
| See Through Scopes |
ExpandDetailed Instructions available |
| This Settlement Does Not Need Your Help - BS Defence Redone |
| Toggleable Night Vision |
| Vault 81 Close Door |
| Vertibird Jump |
| Workshop Rearranged |
14-Gameplay-Quests
- Mods that alter aspects of quests and/or related lore
| Mod Name | Baseline | Instructions |
|---|
| DLC Timing |
Install only the DLC Timing ESL main file. |
| Keep Radiants in the Commonwealth UFO4P Version |
| Nuka-World Collectable Quest Markers |
| Piper Interview Restored |
| Random Encounter Framework |
| SKK Fast BOS |
| Who's The General - Minutemen Quest Cleanup |
ExpandDetailed Instructions available |
15-Gameplay-Skills and Perks
- Mods that affect the player character's or NPC skills and perks or related leveling
No mods defined.
16-Interface
- Mods that affect any aspect of the user interface
| Mod Name | Baseline | Instructions |
|---|
| Alternative Satellite World Maps |
8k | Install only the Angled Alternative Satellite World Maps 8k main file. |
| Better Console |
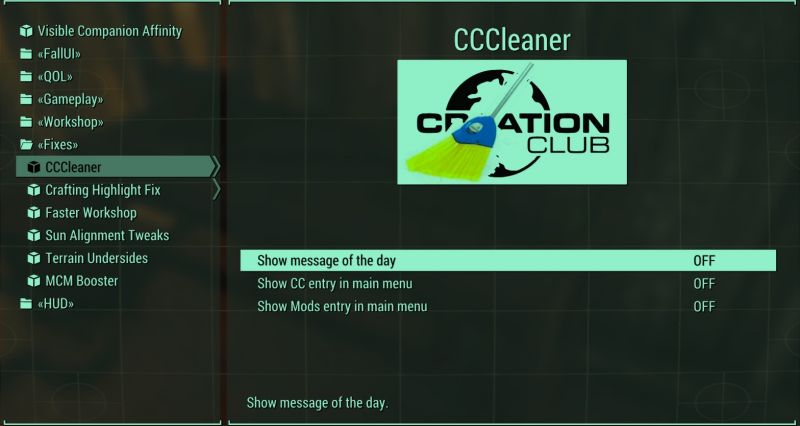
| CCCleaner |
Install the CCCleaner 1.10.163.0 old file. |
| Clock Widget - Show Real Time While Loading |
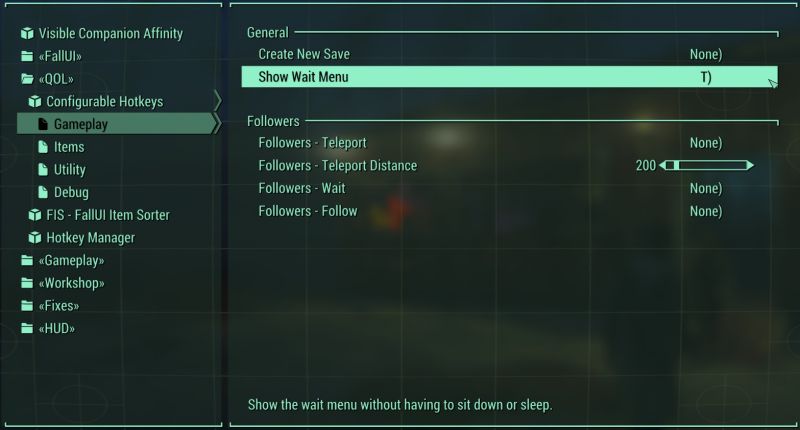
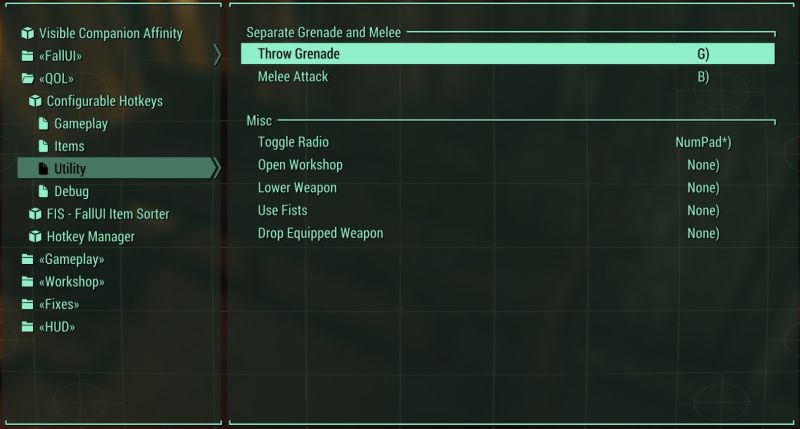
| Configurable Hotkeys |
ExpandDetailed Instructions available |
| Extended Dialogue Interface |
Install the version 1.3.6 main file. |
| FallUI - Confirm Boxes |
ExpandDetailed Instructions available |
| FallUI - HUD |
ExpandDetailed Instructions available |
| FallUI - Icon Library |
ExpandDetailed Instructions available |
| FallUI - Inventory |
ExpandDetailed Instructions available |
| FallUI - Map |
ExpandDetailed Instructions available |
| FallUI - Sleep and Wait |
ExpandDetailed Instructions available |
| FallUI - Workbench |
ExpandDetailed Instructions available |
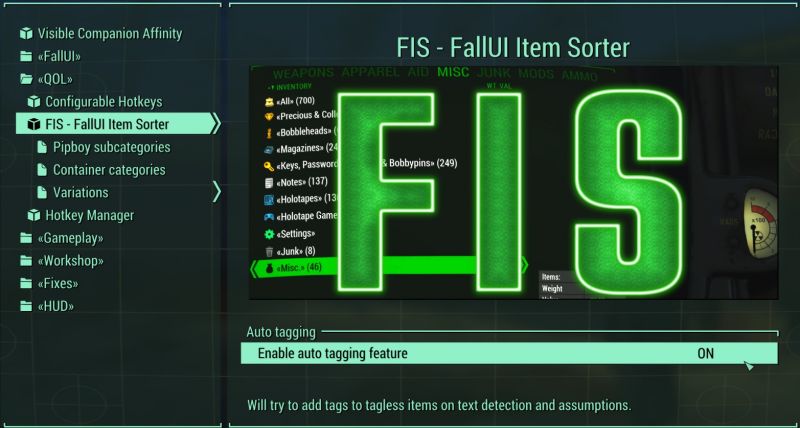
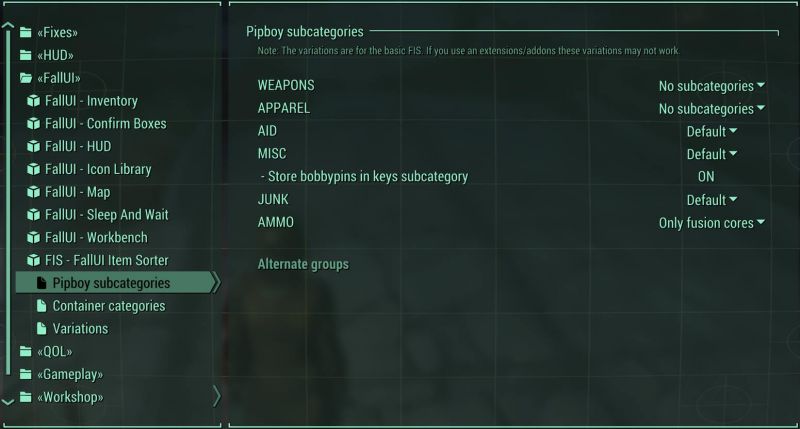
| FIS - The NEW FallUI Item Sorter |
ExpandDetailed Instructions available |
| FO4 Photo Mode |
At the manual installation prompt, right-click Data and select Set as directory. |
| Immersive HUD |
| Legendary Mutation Messages Fix - Cut Content Restored |
| LooksMenu |
ExpandDetailed Instructions available |
| MCM Booster |
| MCM Categorizer - Sorter Folder Categories |
| Organized Workbench Menu |
ExpandDetailed Instructions available |
| PA Rainbox HUD FIX |
Step Recommends: Improved Rainbox - PA HUD Rainbox fix |
| QuickTrade Redux |
| See region names on your save files |
ExpandDetailed Instructions available |
| See Through Scopes - MCM Settings Menu |
ExpandDetailed Instructions available |
| Visible Companion Affinity |
ExpandDetailed Instructions available |
| Visible Companion Affinity - MCM Settings Menu with Hotkey |
| Whose Quest Is It Anyway |
17-Locations
- Mods that programmatically add new or alter vanilla locations
| Mod Name | Baseline | Instructions |
|---|
| Boston Public Library Settlement |
ExpandDetailed Instructions available |
| Nuka-World Transit Center Settlement |
Install the Nuka-World Transit Center Settlement - PRP 74 optional file. |
| We Can Live In - Natick Substation |
Install the Natick Substation main file and the Previs - Previsibines Repair Pack (PRP) update file. |
18-Lighting and Weather
- Mods that affect lighting and/or weather systems **installation is optional**
No mods defined.
19-Utilities
- Mods that generate derived mod output from load-order-specific assets
| Mod Name | Baseline | Instructions |
|---|
| 4estGimp - M8r98a4f2's Complex Item Sorter Enhancements |
Install only the 4estGimp - M8r's Complex Item Sorter Enhancements main file. |
| M8r98a4f2's Complex Item Sorter |
ExpandDetailed Instructions available |
| Synthesis |
ExpandDetailed Instructions available |
| TexGen |
ExpandDetailed Instructions available |
20-Patches
- Mods that programmatically resolve load-order conflicts
| Mod Name | Baseline | Instructions |
|---|
| EBF UFO4P compatibility fix |
| Step Patch - Conflict Resolution |
Install the Step Patch - Conflict Resolution main file. |
| Step Patch - Lighting and Weather |
Install the Step Patch - Lighting and Weather optional file ONLY if the 18-Lighting and Weather ModGroup is installed. |
Mod List Cleanup
Final Sorting and Cleaning
If plugins have not been sorted this session, run LOOT again. Examine the plugins in LOOT for errors or warnings (ignoring the game's default masters at the top of the list). Ignore any reported missing compatibility patches or other warnings. These are either handled by the Step Patches or not of any concern. Perform the standard cleaning procedures on any mods requiring cleaning (except for the game's default masters).
Be aware that the Step Patches are designed to work with a default, LOOT-sorted plugin order. From this point on:
- Ensure all applicable mods are ticked in the left pane of MO.
- Ensure all plugins are ticked in the right pane of MO.
- Sort the load order using LOOT whenever plugins are added/removed.
- Update LOOT (the program and masterlist) whenever updates are available.
STEP 5
Now that the mod list has been installed, sorted, and finalized, the next step is to run the various utilities that will dynamically apply the finishing touches that wrap it all together.
Setup
It is recommended to make a new separator and call it STEP 5 - Dynamic Mods or similar and move the following empty mods we created into it:
- Step Fallout4 - Complex Sorter Output
- Step Fallout4 - Synthesis Output
Now create three more empty mods below them, naming them as follows:
- Step Fallout4 - TexGen Output
- Step Fallout4 - xLODGen Terrain Output
- Step Fallout4 - xLODGen Object Output
NOTE
Complete the following in order, and ensure that all mods and plugins are enabled and sorted before doing so.Complex Sorter
M8r98a4f2's Complex Item Sorter will add tags, patch food and drink for use with Immersive Animation Framework, and (if desired) modify item weight for miscellaneous items.
- Run Complex Sorter from the MO executable drop-down list.
- Click [OK] at the Module Selection prompt to load all plugins.
- Wait for the M8r Complex Item Sorter window to pop up.
- Ensure that it says Purge / New under Mode.
- Under CS plugins, configure as follows:
- ☑ Item Sorter Tags (FIS)
- ☑ FIS (NEW FallUI Item Sorter)
- ☑ Add Scrap Component Tags
- ☑ Add Tags To Basic Components
- ☑ Fix Missing Object Template
- ☑ Immersive Animation Fr. Patcher
- ☑ Perk Magazine Numbers
- ☐ Quest Tags
- ☑ Radio Tags
- ☑ Valueable Tag
- ☑ Weightless Items
- [Configure]
- Step Recommends:
- ☐ Ingestibles
- ☑ Ammunition
- ☑ Books/Magazines
- ☑ Keys/Passcards
- ☑ Notes/Holotapes
- ☑ Misc (Mods only)
- ☐ Misc (All)
- [✓ OK]
- Ensure that under Record types, all record types are selected.
- Click [✓ Generate Patch]
- Once the Processing window closes, and the log says "You can close this application now," close the application. There should be no warnings or errors.
The patch has been completed and save to the Step Fallout4 - Complex Sorter Output mod.
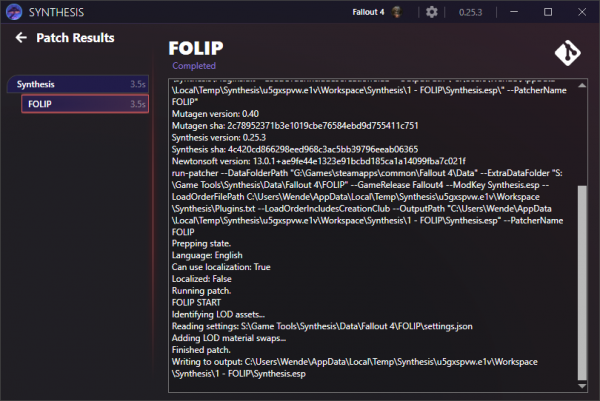
Synthesis FOLIP Patcher
We will use the Synthesis FOLIP patcher to add additional LOD information.
NOTE
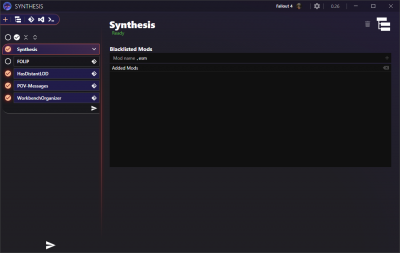
If any LOD plugins were disabled from following the Remove unnecessary LOD plugins step, please re-enable them now.- Run Synthesis from the MO executable drop-down list.
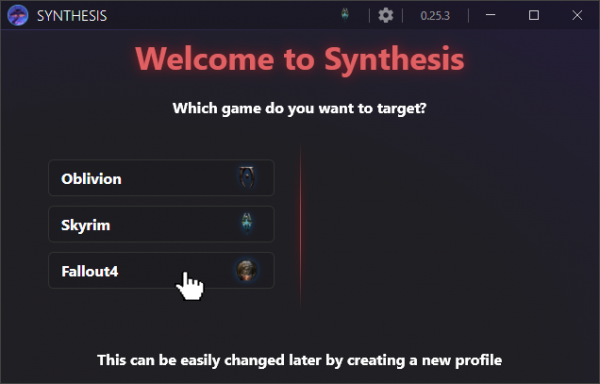
- Choose Fallout4 if prompted to choose the game to target.
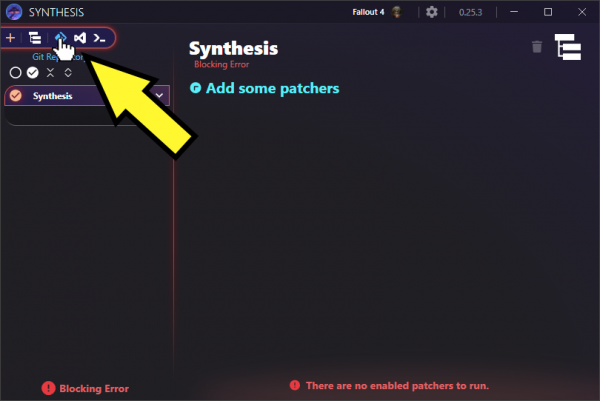
- Click the Git Repository button, third from top left.
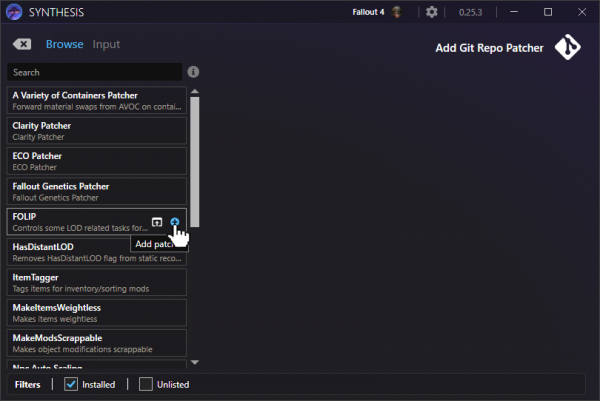
- Find FOLIP in the list, and click the [+] button that says Add patcher.
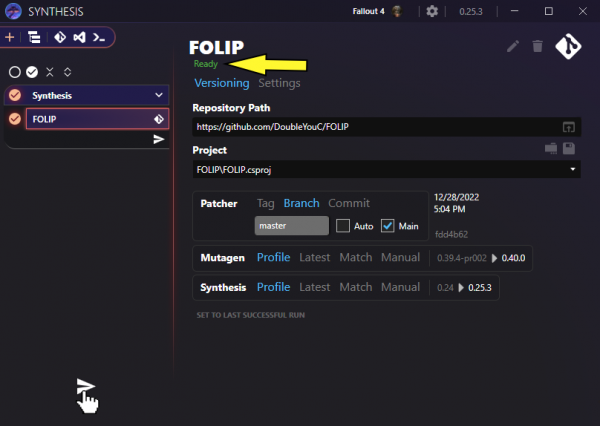
- Wait until it says Ready, then click the triangular [Run] button at bottom left.
- Once the patcher says it has Completed, close Synthesis.
The patch has been completed and saved to the Step Fallout4 - Synthesis Output mod that was set up during installation in Step 4.
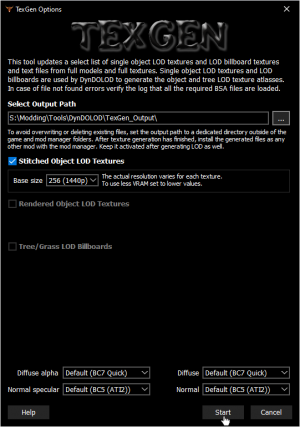
TexGen
TexGen will generate custom object LOD textures based on enabled mods.
WARNING
Using higher resolutions than recommended will result in a waste of PC resources with NO BENEFIT. It makes ZERO sense to impulsively increase the resolutions beyond the specifications indicated.- Run TexGen from the MO executable drop-down list.
- Use the setting corresponding to rendered game resolution: 1080p = HD, 1440p = QHD, 2160p = 4k. It should be automatically detected.
- Click [Start].
- Once the completed message has appeared (1-5 minutes, depending on the PC), click [Exit].
- NOTE: If the TexGen window closes itself, post in the DynDOLOD 3 Alpha topic and include
../Modding/Tools/DynDOLOD/bugreport.txtand any logs created.
- NOTE: If the TexGen window closes itself, post in the DynDOLOD 3 Alpha topic and include
- Navigate to the DynDOLOD TexGen_Output folder location (e.g.
../Modding/Tools/DynDOLOD/TexGen_Output). - Move the files from the TexGen_Output folder into the Step Fallout4 - TexGen Output mod:
- In MO, hold down the Ctrl key and double-click the Step Fallout4 - TexGen Output mod. Alternatively, right click the mod to open it in an Explorer window.
- Enable the Step Fallout4 - TexGen Output mod in MO.
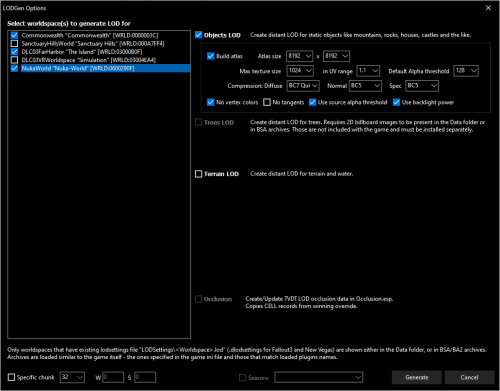
xLODGen
We will use xLODGen to generate terrain and object LOD. For this guide, we separate generation of terrain LOD from generation of object LOD, even though they can be generated at the same time. We have chosen to do this because:
- Terrain LOD rarely ever needs to be updated.
- Terrain LOD takes the most time to generate.
- Terrain LOD is less difficult to get right the first time.
- Object LOD is more likely to need updating.
- Object LOD is more difficult to get right the first time.
Terrain LOD
xLODGen is run first to generate updated LOD terrain textures and meshes so that landscape LOD is updated with mod changes:
- Ensure the xLODGen output folder (e.g.
..Modding/Tools/xLODGen/xLODGen_Output) is completely empty. - Run xLODGen from the MO executable drop-down list.
- Tick the following worldspaces in the left pane:
- Commonwealth
- DLC03FarHarbor
- NukaWorld
- Ensure that ONLY the Terrain LOD box is ticked in the right pane.
- Use the following settings:
- NOTE: Unless you are running FO4 at ≥ 4k resolution, resist the urge to wastefully increase the texture resolutions shown, which will only reduce FPS with NO BENEFIT. Those running ≥ 4k resolution WILL benefit by doubling the resolution for LOD4, LOD8, and LOD16 from 256 to 512.
- Click [Generate] to run the process, which will require upwards of 20 minutes, depending on the PC.
- Once the "LOD generation complete" message has appeared, close xLODGen.
- NOTE: If the xLODGen window closes itself, post in the xLODGen topic and include
../Modding/Tools/xLODGen/bugreport.txtand any logs created.
- NOTE: If the xLODGen window closes itself, post in the xLODGen topic and include
Terrain LOD Wrap-Up
- Browse to the xLODGen output folder (e.g.
..Modding/Tools/xLODGen/xLODGen_Output). - In MO, open the Step Fallout4 - xLODGen Terrain Output mod in Windows Explorer (Ctrl + double-click).
- Cut and paste the files from
../xLODGen_Outputinto the Step Fallout4 - xLODGen Terrain Output folder. - Copy the Step Fallout4 - xLODGen Terrain Output mod folder path to your clipboard.
- Follow the Cathedral Assets Optimizer Usage Instructions.
Object LOD
xLODGen is run again to generate updated LOD Object textures and meshes so that object LOD is updated with mod changes:
- Ensure the xLODGen output folder (e.g.
..Modding/Tools/xLODGen/xLODGen_Output) is completely empty. - Run xLODGen from the MO executable drop-down list.
- Tick the following worldspaces in the left pane:
- Commonwealth
- DLC03FarHarbor
- NukaWorld
- Ensure that ONLY the Object LOD box is ticked in the right pane.
- Use the following settings:
- NOTE: Resist the urge to blindly alter the texture resolutions shown, which will only reduce FPS and degrade texture fidelity. The resolution settings do NOT scale object LOD textures in any way, shape, or form, and are instead used to determine the maximum size of textures placed on the atlas for draw call optimization purposes.
- Click [Generate] to run the process, which will require upwards of 10 minutes, depending on the PC.
- Once the "LOD generation complete" message has appeared, close xLODGen.
- NOTE: If the xLODGen window closes itself, post in the xLODGen topic and include
../Modding/Tools/xLODGen/bugreport.txtand any logs created.
- NOTE: If the xLODGen window closes itself, post in the xLODGen topic and include
Object LOD Wrap-Up
- Browse to the xLODGen output folder (e.g.
..Modding/Tools/xLODGen/xLODGen_Output). - In MO, open the Step Fallout4 - xLODGen Object Output mod in Windows Explorer (Ctrl + double-click).
- Cut and paste the files from
../xLODGen_Outputinto the Step Fallout4 - xLODGen Object Output folder. - Copy the Step Fallout4 - xLODGen Object Output mod folder path to your clipboard.
- Follow the Cathedral Assets Optimizer Usage Instructions.
Remove unnecessary LOD plugins
The following plugins should be disabled following successful LOD generation with xLODGen, as they are no longer necessary.
NOTE
Please note that in future, if any LOD changes are required by any tool associated with LOD generation, these plugins must be re-enabled.Disable the following plugins (instructions for disabling plugins):
- FO4LODGen Resources
- FO4LODGen.esp
- FO4LODGen-DLCNukaWorld.esp
- FO4LODGen-DLCWorkshop03.esp
- Far Object LOD Improvement Project
- FOLIP - Raider Windmills.esp
- HD LOD Textures
- LOD Fixes and Additons.esp
- Far Harbor 3D Tree LODs
- Far Harbor 3d Tree LODs.esp
- Optimized Vanilla Tree LODs
- Optimized Vanilla Tree LODs.esp
Synthesis Final
We will run Synthesis again for final setup.
- Open the Step Fallout4 - Synthesis Output mod and delete the previous Synthesis.esp file.
- Run Synthesis from the MO executable drop-down list.
- Un-tick FOLIP.
- Click the Git Repository button, third from top left.
- Find HasDistantLOD in the list, and click the [+] button that says Add patcher.
- Wait until it says Ready, then click the triangular [Run] button at bottom left.
- Once the patcher says it has Completed, close Synthesis.
The patch has been completed and saved to the Step Fallout4 - Synthesis Output mod.
When to Regenerate
Dynamic mods will need to be regenerated following certain changes/updates to the mod list.
Complex Sorter
- Whenever there are changes/updates to plugins.
Synthesis
- FOLIP
- Only directly before generating Object LOD.
- Final
- Whenever there are changes/updates to plugins.
TexGen
- Whenever there are changes/updates that modify textures or LODs.
xLODGen
- Terrain LOD
- Whenever there are changes/updates that modify exterior landscapes or landscape textures.
- Object LOD
- Whenever there are changes/updates that modify textures, exterior objects, or LODs.
STEP 6
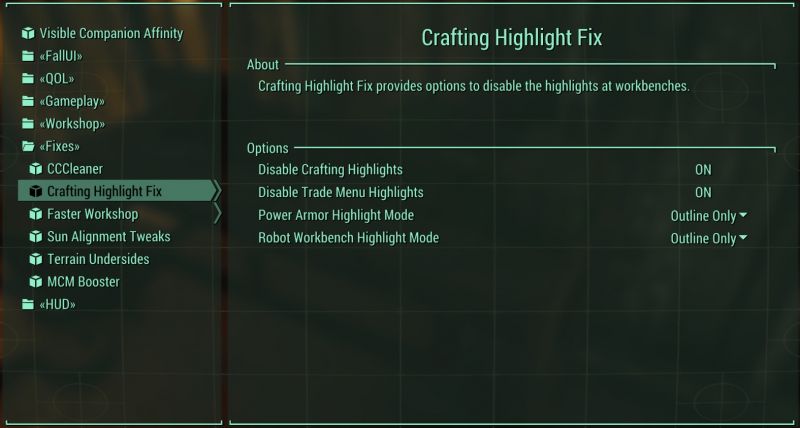
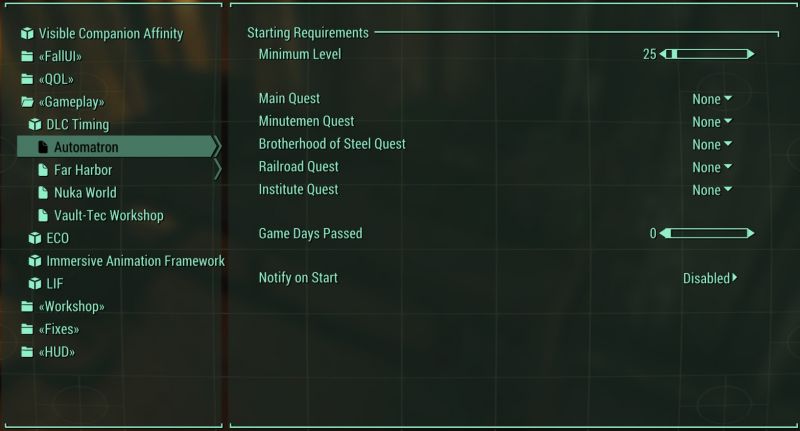
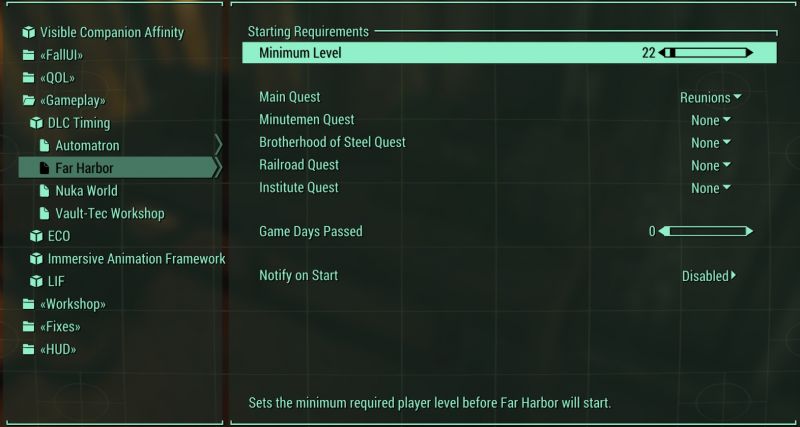
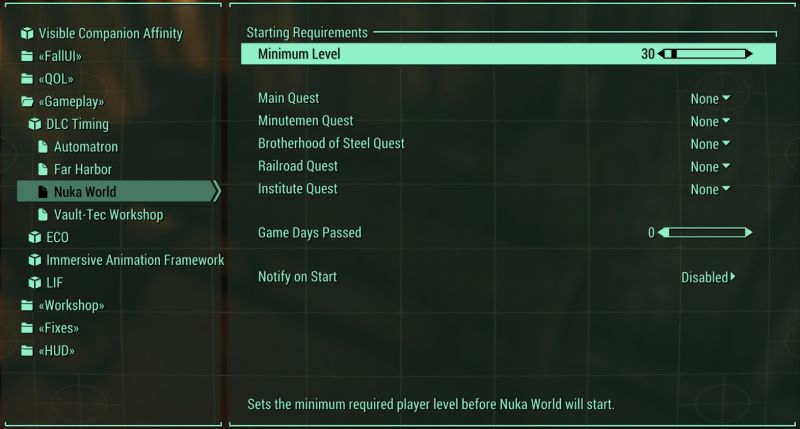
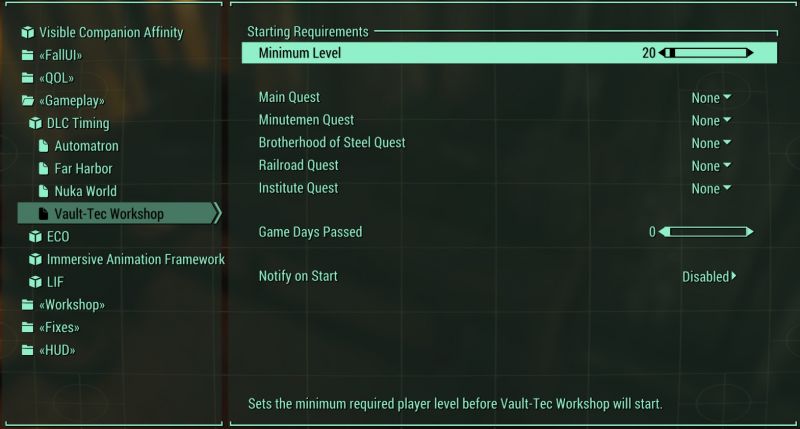
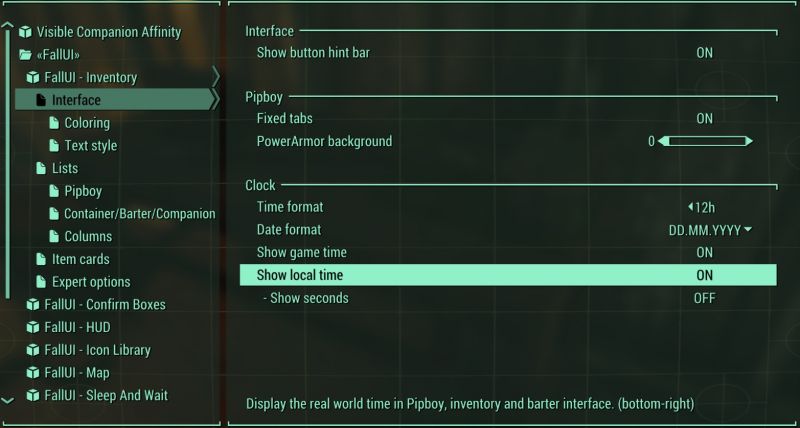
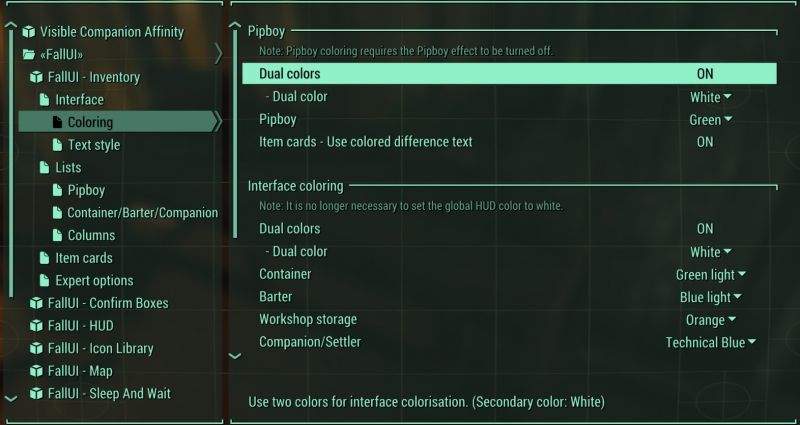
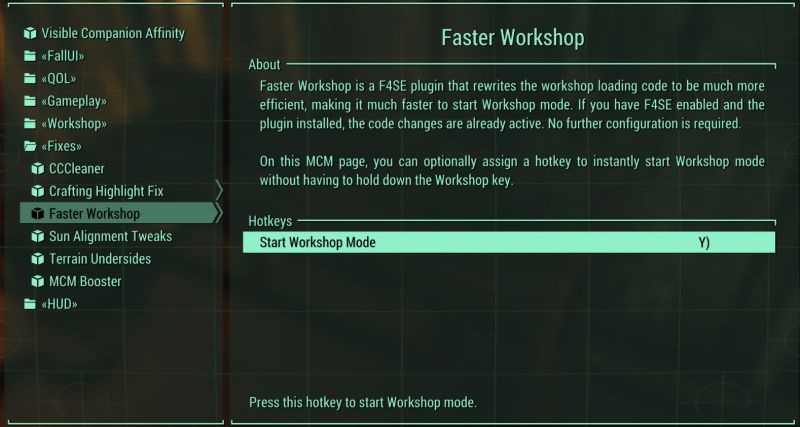
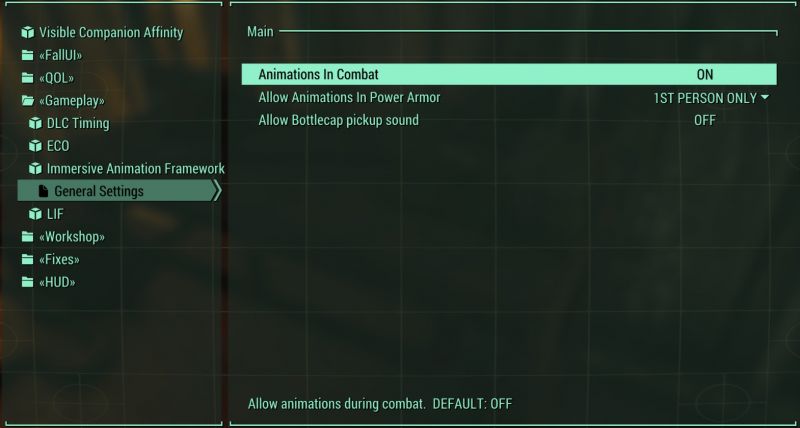
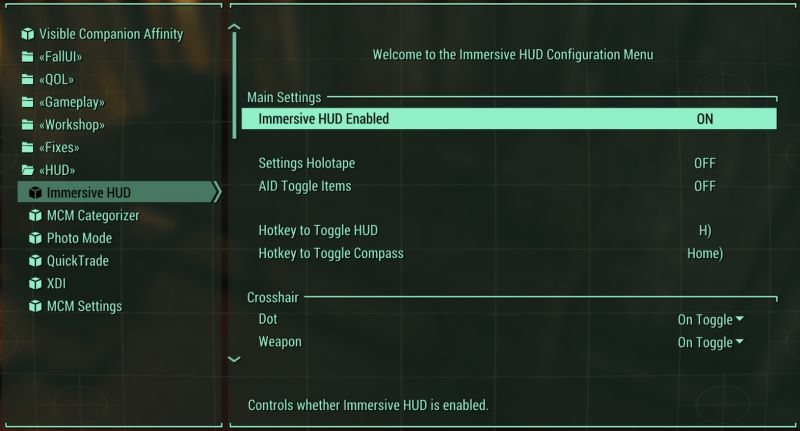
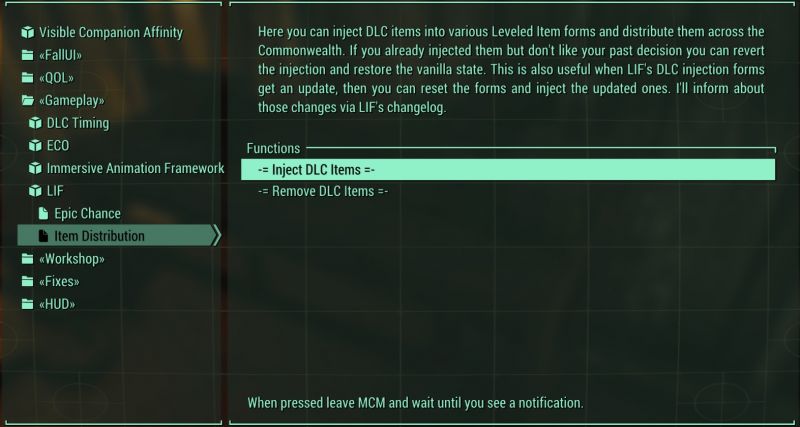
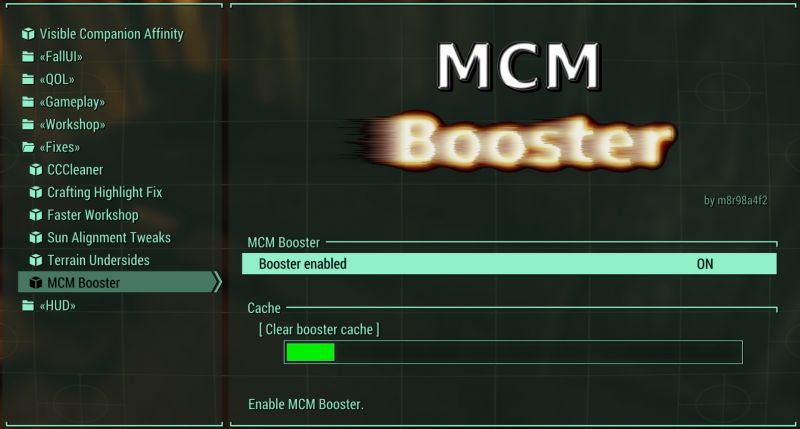
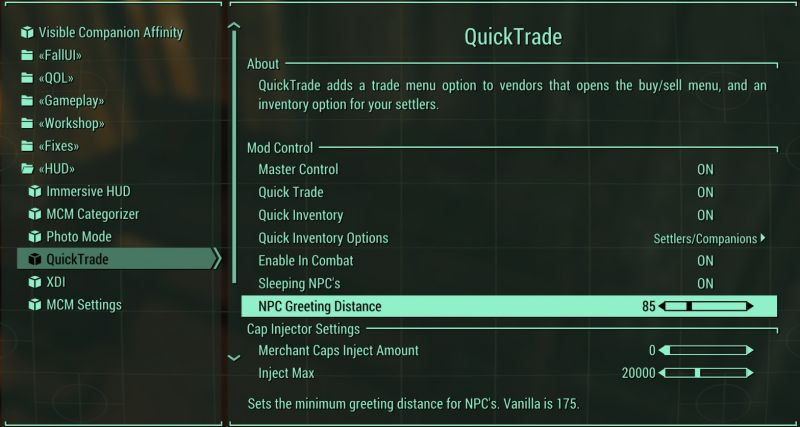
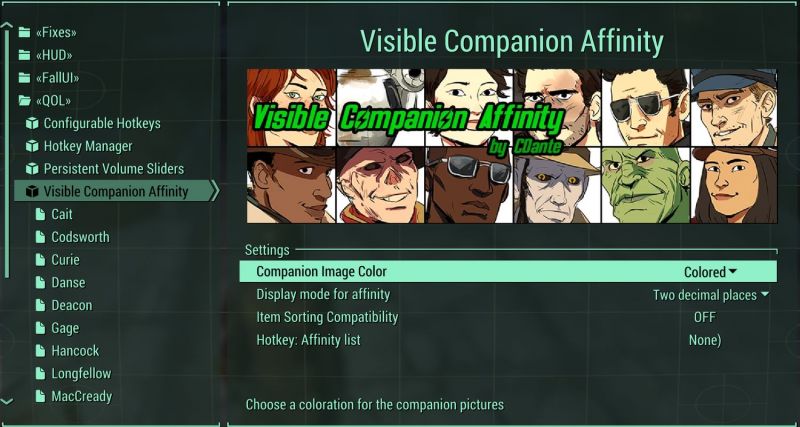
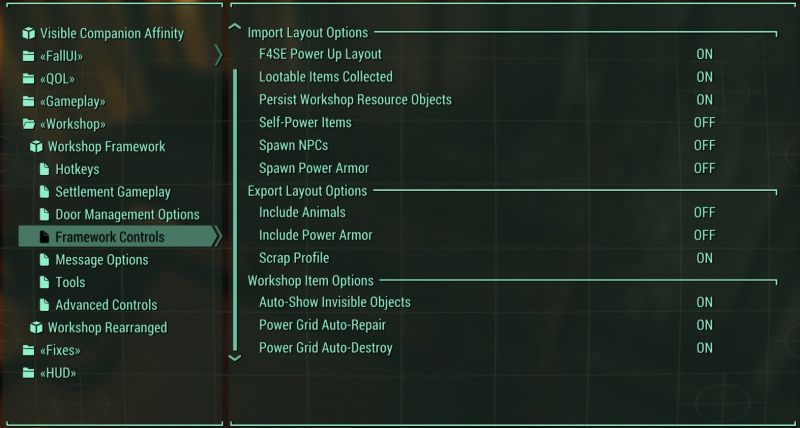
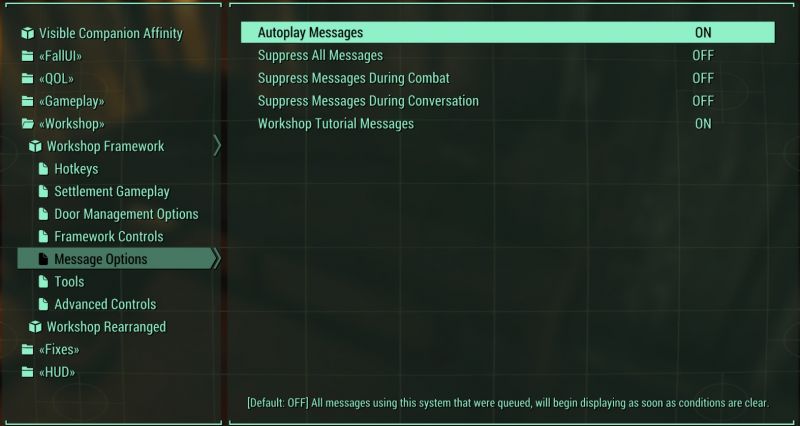
The game is now ready to be loaded to configure mods in the Mod Configuration Menu (MCM). The MCM allows mod authors to provide custom, game-accessible settings for their mods. Recommendations are provided below for select mods. The remainder are user preference.
First Launch
To run the game, select the F4SE executable from the drop-down list and click the Run button. Keep the following in mind when first launching from a fresh Guide installation:
- A new game is required!
- In other words, don't load from a save after a fresh Guide install to avoid issues. Review the changelog before upgrading from a previous version of this Guide to determine whether or not a new game is advisable.
- Finally, INI files may appear in the Overwrite folder after closing the game. It is recommended to move these files to their respective mod folders, respecting their folder structure during the move.
Mod Configuration Menu Settings
Mod configuration settings can be set according to user preference. The following are some recommendations.
COMMUNITY CONTRIBUTIONS
STEP can only get bigger and better with help from the community. It is very time consuming for the STEP team to ensure that the Guide is consistently maintained at the highest quality possible. We need people to help us identify mods that improve the vanilla game while adhering to our Mandate. We also need ongoing bug reports, reviews, and updates on mods that may cause problems or that stray from the Mandate.
In order to suggest a mod for inclusion, visit the Mods section of the Forums.
Call for Mod Testers
Community members interested in becoming Mod Testers, please contact TechAngel85 via PM on the forums. Once registered, Mod Testers will be given access to Staff forums that houses useful information. For more information about our mod testing process, read through the Mod Testing Guide to get a sense of what's involved.
Call for Forum Moderators
Regular community members interested in becoming moderators, please contact TechAngel85 via PM on the forums. Forum Moderators will be determined based upon level and quality of activity within our community.
Credits
The STEP administrators would sincerely like to thank (from the bottoms of our fuzzy little hearts):
- The authors of mods recommended within our guides
- The authors of mods who granted permission for their mods to be incorporated into the Step Patches
- The core Community for feedback, suggestions and input
- The Beta and Mod Testers for their good humor and rigorous analyses
- sheson for DynDOLOD and all things LODGen
- The Nexus community
- Bethesda Softworks for their games
- Tannin for the gift that is Mod Organizer
- All the developers that kept MO going
Personnel
Testers
- D1Z4STR
- Mercury71
- Mousetick
LODGen Support
- sheson
MO Support
- GSDfan
Step Administrators
- DoubleYou
- Greg
- TechAngel85
- z929669
Retired Staff
|
|
|
|
|


