
SkyrimLE:ModList/Polish/2.2.1: Difference between revisions
No edit summary |
m (Text replacement - "Models & Textures" to "Models and Textures") |
||
| (52 intermediate revisions by 3 users not shown) | |||
| Line 1: | Line 1: | ||
__NOTITLE__ | __NOTITLE__ | ||
{{ | {{VersionHeader}} | ||
{{#ifeq: {{#show: STEP:Main | ?DonationToggle#}} | True | {{DonationButton|Guide}} }} | |||
<div class="nonumtoc">{{TOC}}</div> | |||
<div class="nonumtoc">{{TOC | |||
= O projekcie STEP = | = O projekcie STEP = | ||
<div style="color:rgb(225,225,245); text-align:center; font-size:1.4em; font-weight:500; border-style:solid; border-bottom-width:3px; border-color:rgb(200,100,20); padding-bottom:10px; overflow:hidden;"> | <div style="color:rgb(225,225,245); text-align:center; font-size:1.4em; font-weight:500; border-style:solid; border-bottom-width:3px; border-color:rgb(200,100,20); padding-bottom:10px; overflow:hidden;">Tytulem wstepu</div> | ||
STEP jest | STEP jest wyczerpujacym i szeroko zakrojonym poradnikiem, który ma na celu uzupelnienie gry TES V: Skyrim o najlepsze modyfikacje (zwane potocznie modami) oraz optymalizacje ustawien. {{fc|#E6B69E|Glównym zalozeniem projektu jest zachowanie wiernosci oryginalnej zawartosci Skyrima, przy jednoczesnym wzbogaceniu wrazen wizualnych i dzwiekowych oraz poprawieniu bledów w mechanice gry.}} | ||
Autorem projektu jest [https://skyrim.nexusmods.com/users/2547509 TheCompiler], calosc jest jednak praca zbiorowa, powstala przy udziale spolecznosci modderskiej, ochotników posiadajacych wiedze techniczna oraz administratorów projektu. Celem STEP-a jest zapewnienie sprawdzonych i przetestowanych metod, które pozwola na instalacje i utrzymanie wzbogaconego o modyfikacje Skyrima. W poradniku przedstawiamy w sposób szczególowy, jak zrobic z oryginalnej instalacji wzbogacony „szablon” czy tez „podstawke” gry, która pózniej mozna wykorzystac do instalacji kolejnych modów. Niedoswiadczonym uzytkownikom zalecamy dokladne stosowanie sie do instrukcji "krok-po-kroku" zawartych w poradniku, natomiast bardziej zaawansowani gracze moga uzyc STEP-a jako ogólnych wytycznych do modowania swojej gry. | |||
W celu zebrania informacji odpowiedniej jakosci (czyli takich, które jak najlepiej spelnia oczekiwania uzytkowników), zespól projektu STEP wspólpracuje ze spolecznoscia modderów poprzez szczególowe recenzje, opinie i sugestie wymieniane i omawiane wspólnie na [https://stepmodifications.org/forum/ Forum Spolecznosci STEP]. Na forum obowiazuje regulamin, z którym nalezy sie zapoznac (cala strona funkcjonuje wylacznie w jezyku angielskim). Po rejestracji mozna sie juz cieszyc pelnym dostepem do wszelkich udostepnianych informacji, a w razie problemów - liczyc na chetna do pomocy ekipe. W celu porównania jak wyglada Skyrim przed i po instalacji STEP-a, mozecie sprawdzic [https://skyrim.nexusmods.com/mods/11 zrzuty ekranu na stronie Nexus], ale tak naprawde jedyny sprawdzony sposób na doswiadczenie, czym naprawde jest STEP, to wypróbowanie go! | |||
<blockquote style="color:white;"><big>Ucieszymy sie z kazdego [https://skyrim.nexusmods.com/users/donate/?mode=straight&id=2547509 wsparcia finansowego] Projektu STEP - datki przeznaczane sa na utrzymanie serwera, domeny i zarzadzanie projektem. </big></blockquote> | |||
<blockquote style="color:white;"><big> | |||
<br /> | <br /> | ||
= STEP | = Wytyczne projektu STEP = | ||
<div style="color:rgb(225,225,245); text-align:center; font-size:1.4em; font-weight:500; border-style:solid; border-bottom-width:3px; border-color:rgb(200,100,20); padding-bottom:10px; overflow:hidden;"> | <div style="color:rgb(225,225,245); text-align:center; font-size:1.4em; font-weight:500; border-style:solid; border-bottom-width:3px; border-color:rgb(200,100,20); padding-bottom:10px; overflow:hidden;">Zobowiazania</div> | ||
{{fs|160%|{{fc|#14C8FF| | {{fs|160%|{{fc|#14C8FF|Podstawa projektu jest wzbogacenie ''oryginalnej wersji gry Skyrim'' na komputery PC poprzez...}}}} | ||
:* | :* zamiane tekstur na lepsze, przy minimalnej utracie wydajnosci gry | ||
:* | :* konsekwentny i logiczny dobór modyfikacji graficznych i dzwiekowych w celu poprawienia klimatu rozgrywki | ||
:* poprawienie komfortu UI i systemu menu | |||
:* wybór modyfikacji naprawiajacych blednie funkcjonujace aspekty mechaniki gry | |||
:* | |||
:* | |||
{{fs|160%|{{fc|#14C8FF| | {{fs|160%|{{fc|#14C8FF|Projekt NIE dotyczy modyfikacji, które...}}}} | ||
:* | :* wprowadzaja zmiany sprzeczne z zalozeniami oryginalnej wersji gry oraz uniwersum The Elder Scrolls | ||
:* | :* wprowadzaja do gry erotyke oraz podmieniaja modele kobiecych postaci | ||
:* | :* podmieniaja muzyke z oryginalnego produktu | ||
:* | :* diametralnie inegruja w sposób rozgrywki | ||
=== | === STEP w wersjach Wydajnosciowej, Podstawowej i Ekstremalnej === | ||
STEP | Projekt STEP oferuje 3 rózne wersje. Instalacja modów oznaczonych jako "Core" (zielony pasek przy nazwie moda) jest niezbedne i wymagana do poprawnego funkcjonowania wszystkich trzech wersji STEP. Pozostale mody nie sa niezbedne, aczkolwiek Ekipa projektu STEP goraco poleca ich instalacje. Poszczególne wersje STEP zostaly stworzone z mysla o wydajnosci, w zaleznosci od mozliwosci komputera gracza: | ||
:{{Fs|1.3em|{{fc|rgb(50,200,50)|''' | :{{Fs|1.3em|{{fc|rgb(50,200,50)|'''Wersja Wydajnosciowa:'''}} }} Jedynie mody oznaczone jako "Core". Wybór opcji wydajnosciowej dla wszystkich modów. | ||
::{{Fc|#E6B69E|'' | ::{{Fc|#E6B69E|''Czyli: "Z litosci nie bede katowal procesora i karty graficznej, ale musze miec STEP!"''}} | ||
:{{Fs|1.3em|{{fc|rgb(200,200,50)|''' | :{{Fs|1.3em|{{fc|rgb(200,200,50)|'''Wersja Podstawowa:'''}} }} Mody oznaczone jako "Core" oraz dowolne mody dodatkowe. Wybór opcji wydajnosciowej lub sredniej jakosci, jesli to tylko mozliwe. | ||
::{{Fc|#E6B69E|'' | ::{{Fc|#E6B69E|''Czyli: "Mój komputer daje rade, ale nie zniose, jesli gra bedzie sie choc troche zacinac!"''}} | ||
:{{Fs|1.3em|{{fc|rgb(255,100,100)|''' | :{{Fs|1.3em|{{fc|rgb(255,100,100)|'''Wersja Ekstremalna:'''}} }} Wszystkie mody oznaczone jako "Core" oraz wszystkie mody dodatkowe. Wybór opcji oferujacych najwyzsza jakosc, jesli to mozliwe. | ||
::{{Fc|#E6B69E|'' | ::{{Fc|#E6B69E|''Czyli: "Posiadam superkomputer!"''}} | ||
<br /> | <br /> | ||
= | = KROK 1 = | ||
<div style="color:rgb(225,225,245); text-align:center; font-size:1.4em; font-weight:500; border-style:solid; border-bottom-width:3px; border-color:rgb(200,100,20); padding-bottom:10px; overflow:hidden;"> | <div style="color:rgb(225,225,245); text-align:center; font-size:1.4em; font-weight:500; border-style:solid; border-bottom-width:3px; border-color:rgb(200,100,20); padding-bottom:10px; overflow:hidden;">Konfiguracja przed instalacja</div> | ||
=== | === Wymagania === | ||
:* | :* Oficjalny Patch v1.8 | ||
:* | :* Cierpliwosc i szczególowe wykonywanie instrukcji krok-po-kroku | ||
{{ | {{AlertSmall|type=notice|text=Oficjlane dodatki do gry (DLC) NIE SA wymagane do instalacji STEP, ale mozna je miec zainstalowane.}} | ||
=== | === System === | ||
Poradnik STEP zostal napisany z mysla o komputerach posiadajacyh ponizsze (lub porównywalne) parametry: | |||
:* Windows 7 | :* Windows 7 | ||
:* Intel i5/i7 quad core | :* Intel i5/i7 quad core | ||
:* 4+ GB | :* 4+ GB pamieci RAM | ||
:* | :* Karta graficzne 1+ GB VRAM (DDR5) | ||
:* | :* Rozdzielczosc ekranu: 1680x1050 | ||
{{ | {{AlertSmall|type=notice|text=Uzytkownicy posiadajace slabsze komputery powinni zainstalowac STEP w wersji Wydajnosciowej. Wiecej informacji [[User:Rootsrat/Polish_2.2.1#STEP_w_wersjach_Wydajno.C5.9Bciowej.2C_Podstawowej_i_Ekstremalnej|tutaj]].}} | ||
== 1.A. | == 1.A. Instalacja platformy Steam oraz Skyrima == | ||
{{fc|#E6B69E| | {{fc|#E6B69E|Niniejszy poradnik zaklada, ze uzytkownik zainstalowal aplikacje Steam zgodnie z Poradnikiem Instalacji Skyrima (chwilowo dostepny jedynie w wersji angielskiej). Zalecamy poswiecic troche czasu na poprawna instalacje i konfiguracje zarówno platfortmy Steam jak i samego Skyrima, wedlug instrukcji zawartych w poradniku.}} | ||
{{Fs|1.3em|{{Fc|White| | {{Fs|1.3em|{{Fc|White|UWAGA! Waznym jest, zeby dalsza instalacje STEP przeprowadzac na SWIEZYM, NOWO ZAINSTALOWANYM SKYRIMIE! Ewentualnie mozna spróbowac przywrócic Skyrima do podstawowej, swiezej wersji wedlug [[Guide:Troubleshooting#Restore_Vanilla_Skyrim|tego poradnika (w jez. angielskim)]].}} }} | ||
== 1.B. | {{Fs|1.3em|{{Fc|White|UWAGA! Poradnik STEP przeznaczony jest do gry w wersji angielskiej. Autor tego tlumaczenia posiada gre wlasnie w takiej wersji i nie gwarantuje, ze Projekt STEP bedzie w pelni funkcjonalny w polskiej wersji gry. Wiele z modów zawartych w poradniku podmienia opisy przedmiotów, ras itp. Autor tlumaczenia nie wie, jaki wplyw na polska wersje gry beda mialy mody tego typu i nie bierze odpowiedzialnosci za wszelkie ewentualne problemy, które wynikna z tego tytulu.}} }} | ||
=== 1.B.1. | |||
# | == 1.B. Opcje Menu Startowego Skyrima == | ||
# | === 1.B.1. Ustawienia Menu Startowego === | ||
# | # Uruchom Skyrima przez aplikacje Steam i kliknij na {{fc|#E6B69E|[Options (Opcje)]}}. Spowoduje to utworzenie plików konfiguracyjnych (tzw. pliki INI) i automatyczne ustawienie opcji gry zgodnie z wykrytym sprzetem. Powstana równiez wpisy w Rejestrze Windowsa, które beda niezbedne do dzialania pomocniczych programów, niezbednych w dalszej czesci poradnika. | ||
# | # Kliknij przycik {{fc|#E6B69E|[Ultra]}}. | ||
# | # {{fc|#E6B69E|Antialiasing}} ustaw na {{fc|#E6B69E|4}}. Róznica miedzy 4 a 8 próbkami jest na bardzo subtelna i niewarta utraty wydajnosci, która powoduje (zgodnie z [https://www.geforce.com/Optimize/Guides/the-elder-scrolls-v-skyrim-tweak-guide/#1 Poradnikiem Tweakguides]). W celu ostatecznej poprawy wydajnosci obniz wartosc z 4 do 2. {{fc|#E6B69E|UWAGA: Jesli uzywasz SMAA, ustaw Antialiasing na ZERO.}} | ||
#* | # {{fc|#E6B69E|Anisotropic Filtering (Filtrowanie Anizotropowe)}} ustaw na {{fc|#E6B69E|16}} (ustawienie na 8 nieznacznie poprawi wydajnosc gry). | ||
# Kliknij przycisk{{fc|#E6B69E|[Advanced (Zaawansowane)]}} i upewnij sie, ze opcja {{fc|#E6B69E|FXAA}} jest ''ODZNACZONA''. FXAA pogarsza efekt Filtrowania Anizotropowego, jak równiez ogólna jakosc tekstur. Oferuje co prawda znaczacy wzrost wydajnosc w stosunku to Antyaliasingu, ale widocznie zmniejsza jakosc. {{fc|#E6B69E|UWAGA: [https://www.iryoku.com/smaa/ SMAA] jest nieco lepsza alternatywa dla FXAA.}} | |||
#* Rozwaz ustawienie jakosci cieniowania na 'High' (Wysokie) zamiast na 'Ultra', jesli masz karte graficzna z mniej niz 1 GB VRAM (STEP w wersji Wydajnosciowej) lub pozostaw ustawienie 'Ultra' dla wersji Ekstremanlen STEP. | |||
#* Under {{fc|#E6B69E|[View Distance]}}, make sure {{fc|#E6B69E|Object Detail Fade}} is ''UN-checked'' and adjust grass to 100% with all other settings around 50%.{{fc|#E6B69E|NOTE: High-end systems can handle max view distances just fine.}} | #* Under {{fc|#E6B69E|[View Distance]}}, make sure {{fc|#E6B69E|Object Detail Fade}} is ''UN-checked'' and adjust grass to 100% with all other settings around 50%.{{fc|#E6B69E|NOTE: High-end systems can handle max view distances just fine.}} | ||
# | # Wyjdz z menu opcji i kliknij "Play". Spowoduje to utworzenie niezbednego pliku konfiguracyjnego i wpisów w rejestrze Windows, wymaganych przez niektóre z aplikacji opisanych w dalszej czesci poradnika. Wbrew powszechnemu mniemaniu uruchomienie gry nie jest wymagane do utworzenia plików INI. | ||
== 1.C. | == 1.C. Ustawienia ekranu i karty graficznej. == | ||
=== 1.C.1. Nvidia | === 1.C.1. Posiadacze kart Nvidia === | ||
# | # Pobierz i zainstaluj [https://www.nvidia.com/Download/Find.aspx?lang=us najnowsze sterowniki] (wersje beta, jesli jest dostepna). | ||
# | # Pobierz program [https://www.guru3d.com/files_details/nvidia_inspector_download.html Nvidia Inspector]. | ||
# | # Przeczytaj [[Guide:NVIDIA_Inspector|Wiki Poradnik Nvidia Inspector Wiki]] (tylko w jez. angielskim). | ||
=== 1.C.2. ATI | === 1.C.2. Posiadacze kart ATI === | ||
# | # Pobierz i zainstaluj [https://support.amd.com/us/gpudownload/Pages/index.aspx najnowsze sterowniki] (wersje beta, jesli jest dostepna). | ||
# | # Uruchom Catalyst Control Center i kliknij przycisk {{fc|#E6B69E|[Preferences]}} w prawym górnym rogu. Wybierz {{fc|#E6B69E|Advanced View}}. | ||
# | # Po lewej stronie, w sekcji {{fc|#E6B69E|Gaming}} wybierz {{fc|#E6B69E|3D Application Settings}}. | ||
#* | #* Ustaw anti-aliasing i anisotropic filtering tak samo jak w opcjach Skyrima powyzej. | ||
#* | #* Ustaw [Tessellation] na {{fc|#E6B69E|AMD Optimized}} | ||
#* | #* Ustaw [Catalyst A.I.] na najwyzsze ustawienia tekstur i zaznacz {{fc|#E6B69E|Enable Surface Format Optimization}} | ||
#* | #* Ustaw [Wait for vertical refresh] na {{fc|#E6B69E|Quality}} | ||
#* | #* Ustaw [Anti-Aliasing Mode] na {{fc|#E6B69E|Multi-sample AA}} | ||
#* | #* Zaznacz opcje {{fc|#E6B69E|Triple buffering}} w [OpenGL Settings] | ||
=== 1.C.3. | === 1.C.3. Ekran === | ||
Skonfiguruj ustawienia ekranu monitora uzywajac narzedzia Windowsa. | |||
* | * Najpierw uzyj jednego z wbudpwanych ustawen konfiguracyjnych | ||
* | * Nastepnie powtórz proces kalibracji przy uzyciu narzedzi dostepnych z poziomu sterownika karty graficznej | ||
* | * Za kazdem uruchom wszystkie opje kalibrowania monitora, zwracajac szczególna uwage na ustawienia gamma, jasnosci i kontrastu. | ||
== 1.D. | == 1.D. Benchmark Wydajnosci == | ||
{{Fc|#E6B69E| | {{Fc|#E6B69E|Ponizsza procedura jest bardzo wazna, jesli chodzi o ustalenie podstawowej wydajnosci systemu, jak równiez bardzo pomocna dla ekipy projektu STEP w ustaleniu rozrzutu wydajnosci wsród uzytkowników. Dane te pozwalaja nam na dokladniejsze ustalenie wymagan dla przyszlych wersji STEP. Wklad uzytkowników w benchmarki jest bardzo ceniony i ma duza wage dla jakosci projektu!}} | ||
Nastepujace kroki powinny byc jak dotad zakonczone: | |||
* | * "Czysta" instalacja aplikacji STEAM oraz Skyrima, | ||
* | * Podstawowa konfiguracja opcji gry, wygerenowane pliki INI, | ||
* | * Konfiguracja karty graficznej oraz kalibracja monitora. | ||
{{Fc|White| | Jest to idealny wrecz moment na zebranie podstawowych danych dotyczacych wydajnosci, jesli chodzi o Skyrima. Wszelkie kolejne zmiany konfiguracyjne beda wprowadzane recznie. Zmiany te moga miec znaczacy wplyw na wydajnosc naszego systemu. Ten pierwszy, podstawowy benchmark pozwoli zebrac cenne informacje na temat ustawien i srodowiska gry. Najlepszy czas na wykrycie wszelkich problemów ze sterownikami, niekompatybilnych aplikacji, problemów ze sprzetem oraz innych defektów jest teraz, kiedy gra jest jeszcze niezmodowana, poniewaz tego typu problemy beda znacznie trudniejsze do zidentyfikowania w pózniejszej fazie, kiedy zaczniemy instalowac nasze modyfikacje. Zaleca sie, aby uzytkownik wykonal ponizsze kroki za kazdym razem, kiedy zmieniane sa pliki konfiguracyjne INI oraz po ukonczeniu instalacji modów z kazdej sekcji poradnika STEP. <br /> | ||
{{Fc|White|Ponizsza ikona pojawia sie w poradniku za kazdym razem, kiedy zaleca sie wykonanie benchmarka:}}<br /> | |||
{{Benchmark}} | {{Benchmark}} | ||
Ponizej przedstawiamy caly proces wykonania standardowego benchmarka wydajnosci, do celów projektu STEP: | |||
# | # Sprawdz czy w tle dzialaja jakies niepotrzebne programy, aplikacje i procesy. Sprawdz, czy mozliwe jest nadanie programowi antywirusowemu niskiego priorytetu lub ustawienie go na "tryb gry" ("game mode"). Wszystkie procesy dzialajace w tle zabieraja czesc zasobów komputera, które moglyby zostac wykorzystane przez Skyrima. Zwiekszaja one równiez prawdopodobienstwo niestabilnisci gry. Oczywiscie procesy w tle moga byc spokojnie uruchomione, nalezy jednak zawsze wiedziec jakie to procesy, co pózniej pomoze wyeliminowac zródla ewentualnych problemów. | ||
# | # Jesli zainstalowales niedawno jakies modyfikacje i JESLI NIE UZYWASZ DYSKU SSD, zdefragmentuj dysk twardy, na którym zainstalowana jest gra. Pomoze to uniknac "szarpania" podczas rozgrywki (krótkie, ale czeste zacinanie sie gry). UWAGA! NIGDY NIE DEFRAGMENTUJ DYSKÓW SSD!!! | ||
# | # Uruchom [https://www.fraps.com/download.php Fraps] w celu pomiaru FPS (klatek na sekunde). Skonfiguruj zapis pliku dziennika (output log file). | ||
# Uruchom [https://www.techpowerup.com/downloads/SysInfo/GPU-Z/ GPU-z] w celu dokonania pomiarów wydajnosci GPU (procesora na karcie graficznej) oraz pomiarów wydajnosci pamieci. Skonfiguruj zapis pliku dziennika. Wybierz nastepujace parametry (Sensors > Log to File; zapis kazdego z parametrów moze byc ustawiony poprzez odpowiedni wybór z rozwijanego menu): | |||
#* GPU Core Clock (MHz) | #* GPU Core Clock (MHz) | ||
#* GPU Temperature (°C) | #* GPU Temperature (°C) | ||
#* GPU Load (%) | #* GPU Load (%) | ||
#* Memory Usage (Dedicated) - | #* Memory Usage (Dedicated) - (czyli pamiec RAM na karcie graficznej, tzw. VRAM) | ||
#* Memory Usage (Dynamic) - | #* Memory Usage (Dynamic) - (czyli ilosc VRAM odpwrowadzanej do - o wiele wolniejszej - pamieci systemowej RAM) | ||
# | # Uruchom Skyrima i rozpocznij nowa gre. Kiedy gra sie zaladuje i pojawi sie dzwiek oraz licznik FPS, wcisnij przycisk rozpoczynajacy benchamrk FRAPS (domyslnie F11). | ||
# | # Pozwól grze potoczyc sie do pierwszego autosave'u - tuz przed zeskoczeniem z wozu - po czym ponownie wcisnij klawisz benchamrka FRAPS. Spowoduje to zatrzymanie aplikacji. Powinno uplynac okolo 240 sekund od pierwszego uruchomienia benchamrka. | ||
# | # Wyjdz z gry najszybciej jak to tylko mozliwe i natychmiast zamknij aplikacje GPU-z - spowoduje to zaprzestanie dalszego zapisu informacji do pliku dziennika. | ||
# | # Otwórz plik dziennki GPU-Z. Odszukaj miejsce, gdzie wartosc GPU Core Clock po raz pierwszy osiaga maksymalna wartosc oraz miejsce, gdzie wartosci GPU Load oraz Dedicated Memory osiagaja maksymalne wartosci i pozostaja na w miare niezmiennym poziomie. (Powinno to byc okolo 50-90 wierszy od poczatku dziennkia). Wykasuj wszystkie poprzedzajace wiersze. | ||
# | # Przejdz do koncowej czesci dziennkia i wyszukaj miejsce, gdzie wartosci dla GPU Load oraz Dedicated Memory zaczynaja malec (dzieje sie to, kiedy wlaczamy menu i wychodzimy z gry; zwykle jest to okolo 20-40 wierszy danych, zaleznie od tego ile czasu zajelo nam wyjscie z gry i wylaczenie GPU-Z). Wykasuj wszystkie wiersze ponizej. Plik dziennika GPU-Z jest teraz wyczyszczony z "brudnych" danych. | ||
# Przenies dane z dziennika GPU-Z do arkusza kalkulacyjengo i oblicz srednia wartosc oraz maksymalna dewiacje dla nastepujacych danych: | |||
#* GPU Load | #* GPU Load | ||
#* GPU Temperature | #* GPU Temperature | ||
#* Memory Usage (Dedicated) | #* Memory Usage (Dedicated) | ||
#* Memory Usage (Dynamic) | #* Memory Usage (Dynamic) | ||
# | # Otówrz log FPS Fraps i przekopiuj dane do nowej kolumny w arkuszu z danymi GPU-Z. | ||
# | # [https://dl.dropbox.com/u/45644759/STEP/STEP_Bench1_z929669.xlsx '''Przykladowy arkusz'''] do pobrania. | ||
# Powyzszy akrusz zawiera kilka kolumn oraz okolo 200 wierszy z danymi. Odpowiednie statystyki to mean (czyli srednia) oraz standard deviation (czyli pomiar rozbieznosci danych wzgledem sredniej). Mozna je obliczyc przez uzycie nastepujacej formuly (wiekszosc programów powinna ja rozpoznac): | |||
<pre> | |||
=AVERAGE(A2:A240) | |||
=STDEV(A2:A240) | |||
</pre> | |||
:: [[Image:Bench.JPG|thumb|150px|left|Example benchmarks]] | |||
{{clear}} | |||
'''Wyniki przykladowych benchmarków uzytkowników:'''<br> | |||
: [[User:Kelmych/Benchmark_Testing|Kelmych]]<br> | |||
: [[User:Techangel85/Benchmarks|techangel85]]<br> | |||
: [[User:Z929669/Benchmarks|z929669]] | |||
== 1.E. Instalacja Aplikacji Uzytkowych == | |||
== 1.E. | |||
=== 1.E.2. Better Oblivion Sorting Software === | === 1.E.2. Better Oblivion Sorting Software === | ||
[ | [https://code.google.com/p/better-oblivion-sorting-software/ Better Oblivion Sorting Software] (BOSS) jest jednym z najniezbedniejszych narzedzi sluzacym do zarzadzania modami (pluginami) do Skyrima. Jego glówna funkcja jest zapewnienie wlasciwej kolejnosci ladowania modów podczas uruchamiania gry (tzw. Load Order) oraz nadanie modom tzw. Bash Tags. Sluzy równiez do identyfikacji tych pluginów (czyli plików ESP i ESM, które sa czescia modów), które wymagaja wyczyszczenia oraz podjecia innych, specjalnych akcji (wiecej o tym wkrótce). Pobierz program BOSS i zainstaluj zgodnie z instrukcjami autora. | ||
=== 1.E.3. BOSS Userlist Manager === | === 1.E.3. BOSS Userlist Manager === | ||
[ | [https://skyrim.nexusmods.com/mods/311 Boss Userlist Manager] (BUM) jest narzedziem pomocniczym dla BOSSa - dostarcza graficzny interfejs oraz mozliwosc recznej edycji masterlisty - czyli pliku, którego BOSS uzywa do zdefiniowania kolejnosci wgrywania modów podczas uruchamiania gry (ponownie: Load Order). | ||
=== 1.E.4. Mod | === 1.E.4. Programy zarzadzajace modami (Mod Managers) === | ||
Istnieje kilka aplikacji, które sluza zarzadzaniu modami i instalacja STEP-a. Co prawda modyfikacje do Skyrima moga byc równiez zainstalowane "recznie", bez pomocy programów - ale ze wzgledów technicznych nie jest to zalecane. STEP jest skomplikowanym przedsiewzieciem i odpowiednie programy sa niezbedne, aby instalcja i setup przebiegly sprawnie i bez problemowo. Program typu mod manager sprawia, ze deinstalacja czy tez aktualizacje modów przebiegaja w znacznie prostszy i kontrolowany sposób. Czynnosci te sa praktycznie niemozliwe do poprawnego wykonania bez uzycia mod managera. | |||
* {{Fs|1.3em|Wrye Bash}} | * {{Fs|1.3em|Wrye Bash}} | ||
:: [ | :: [https://skyrim.nexusmods.com/mods/1840 Wrye Bash] (WB) jest prawdopodobnie najbardziej zaawansowana aplikacja, sluzaca to zarzadzania modami. Program posiada mnóstwo opcji, które sa przydatne zarówno dla uzytkowników, jak i dla autorów modów. Dosyc wyczerpujacy poradnik (w jezyku angielskim) znajdziecie [[Guide:Wrye Bash|Wrye tutaj]]. Poradnik jest napisany w kontekscie projektu STEP. | ||
W chwili obecnej Wrye Bash nie posiada zautomatyzowanego systemu aktualizacji modów kompatybilnego z serwisem Nexus, tak wiec wszelkie update'y musza byc przeprowadzone przez samego uzytkownika. {{fc|#E6B69E|Aktualizacje modów nie sa niezbedne przy projekcie STEP, a ekipa STEP wrecz ODRADZA zamodzielna aktualzacje pojednynczych modów.}} Nowe wersje modów sa zawsze sprawdzane i testowane przez ekipe projektu zanim zostana dopuszczone do kolejnej wersji STEP, w celu unikniecia potencjalnych konfliktów i blednego dzialania gry. | |||
* {{Fs|1.3em|Mod Organizer}} | * {{Fs|1.3em|Mod Organizer}} | ||
:: [ | :: [https://skyrim.nexusmods.com/mods/1334 Mod Organizer] (MO) jest programem, który posiada szeroki wachlarz róznorakich funkcji i mozliwosci. Na szczególna uwage zasluguje mozliwosc wirtualizacji folderów z zasobami Skyrima, co pozwala na utrzymanie faktycznego folderu z gra w "czystosci". Dzieki tej funkcji program pozwala równiez na stworzenie kilku profilów, kazdy z róznym zestawem aktywnych modów. MO umozliwia równiez integracje z serwisem Nexus, co pozwala na latwe i zautomatyzowane aktualizaje modów. [[Guide:Mod Organizer|Poradnik Mod Organizer]] jest oczywiscie dostepny w serwisie STEP. | ||
* {{Fs|1.3em|Nexus Mod Manager}} | * {{Fs|1.3em|Nexus Mod Manager}} | ||
{{ | {{AlertSmall|type=warning|text=The Nexus Mod Manager (NMM) nie ma wsparcia ze strony ekipy projektu STEP! Powodem jest bark niezbednych, zaawansowanych funkcji pozwalajacych na bezproblemowa instalacje wszystkich niezbednych modów projektu STEP. }} | ||
=== 1.E.5. TES5Edit === | |||
[https://skyrim.nexusmods.com/mods/25859 TES5Edit] to narzedzie, które pozwala na "naprawe" pluginów (plików .esp, które sa czescia wiekszosci modów) w celu unikniecia problemów podczas gry. Prawdopodobientwo zawieszenia sie gry (czasami tuz po uruchomieniu!), wystapienia bledów i konfliktów wzrasta proporcjonalnie do liczby aktywnych modów. Niezbedne jest wiec "wyczyszczenie" niektórych pluginów. Wspomniany wczesniej BOSS potrafi zidentyfikowac pluginy, które wymagaja czyszczenia. Poradnik (w jezyku angielskim) jak wyczyscic mody znajduje sie [[TES5Edit#Mod Cleaning|tutaj]]. | |||
== 1.F. INI | == 1.F. Dostosowanie plików INI == | ||
INI | Pliki konfiguracyjne INI uzywane sa do dostosowania i recznej konfiguracji wielu aspektów gry oraz wspomagaja dzialanie niektórych modów. Ponizsze modyfikacje plików INI maja zastosowanie w wersji Podstawowej STEP. Wersja Wydajnosciowa bedzie wymagac obnizenia niektórych parametrów ustawien, natomiast przy wersji Ekstremalnej STEP mozna te ustawienia zwiekszyc, aby uzyskac lepsze efekty w grze. | ||
Pliki konfiguracyjne INI Skyrima znajduja sie w jednym z nastepujacych katalogów, zaleznie od uzywanego systemu operacyjnego: "''Documents/My Games/Skyrim''" or "''My Documents/My Games/Skyrim'',". Standardowe pliki INI zostaly utworzone podczas akcjom podjetym w [[#1.B._Opcje_Menu_Startowego_Skyrima| czesci 1.B]] poradnika. Ponizsze modyfikacje bazuja na zalozeniu, ze {{Fc|white|standardowe pliki INI nie byly modyfikowane}}. Jesli uzywacie Mod Organizera, edycja plików INI odbywa sie przez wybranie opcji {{fc|#E6B69E|'''[Edit Ini]'''}}. Uzytkopwnicy programu Wrye Bash moga zarzadzac i edytowac pliki INI w zakladce INI Tweaks. | |||
{{ | {{AlertSmall|type=notice|text=Changing settings in the Skyrim Launcher can undo some of the below INI tweaks. To avoid this, make sure to [https://windows.microsoft.com/en-US/windows7/Prevent-changes-to-a-file-by-setting-it-to-read-only set the INI files as "read only"] when all the tweaks are in place. }} | ||
=== 1.F.1. Skyrim INI === | === 1.F.1. Skyrim INI === | ||
| Line 242: | Line 239: | ||
</pre> | </pre> | ||
: ''Helps reduce [[Guide:Z-Fighting|Z-fighting]], but may increase clipping, especially with a higher field of view. See Gopher's [ | : ''Helps reduce [[Guide:Z-Fighting|Z-fighting]], but may increase clipping, especially with a higher field of view. See Gopher's [https://youtu.be/D0Rtj4bfSVQ More Z-fighting] video for more information and examples.'' | ||
<pre> | <pre> | ||
fNearDistance=18.0000 | fNearDistance=18.0000 | ||
| Line 251: | Line 248: | ||
: ''Disables the annoying intro sequence.'' | : ''Disables the annoying intro sequence.'' | ||
<pre> | <pre> | ||
sIntroSequence= | sIntroSequence= | ||
</pre> | </pre> | ||
| Line 281: | Line 278: | ||
'''{{Fs|1.3em|Modify the following values under {{fc|white|[Display]}}:}}''' | '''{{Fs|1.3em|Modify the following values under {{fc|white|[Display]}}:}}''' | ||
: ''Valid values range from 0 - 7. Lower values will sharpen shadows (not the resolution), making vegetation more "vibrant." It gives a subtle increase in performance, but also gives more pixelated and striping effects to shadows. Higher values will make shadows softer and more blurred. Consider a value of | : ''Valid values range from 0 - 7. Lower values will sharpen shadows (not the resolution), making vegetation more "vibrant." It gives a subtle increase in performance, but also gives more pixelated and striping effects to shadows. Higher values will make shadows softer and more blurred. Consider a value of two if using ENB.'' | ||
<pre> | <pre> | ||
iBlurDeferredShadowMask= | iBlurDeferredShadowMask=3 | ||
</pre> | </pre> | ||
| Line 310: | Line 307: | ||
'''{{Fs|1.3em|Modify the following under {{fc|white|[TerrainManager]}}:}}''' | '''{{Fs|1.3em|Modify the following under {{fc|white|[TerrainManager]}}:}}''' | ||
: ''Helps reduce [[Guide:Z-Fighting|Z-fighting]], but may increase clipping, especially with a higher field of view. See Gopher's [ | : ''Helps reduce [[Guide:Z-Fighting|Z-fighting]], but may increase clipping, especially with a higher field of view. See Gopher's [https://youtu.be/D0Rtj4bfSVQ More Z-fighting] video for more information and examples.'' | ||
<pre> | <pre> | ||
fBlockMaximumDistance=500000 | fBlockMaximumDistance=500000 | ||
| Line 320: | Line 317: | ||
'''{{Fs|1.3em|Modify the following under {{fc|white|[MAIN]}}:}}''' | '''{{Fs|1.3em|Modify the following under {{fc|white|[MAIN]}}:}}''' | ||
: ''Also helps reduce [[Guide:Z-Fighting|Z-fighting]]. See Gopher's [ | : ''Also helps reduce [[Guide:Z-Fighting|Z-fighting]]. See Gopher's [https://youtu.be/D0Rtj4bfSVQ More Z-fighting] video for more information and examples.'' | ||
<pre> | <pre> | ||
fSkyCellRefFadeDistance=500000.0000 | fSkyCellRefFadeDistance=500000.0000 | ||
| Line 330: | Line 327: | ||
# [[Guide:Skyrim_Installation|Skyrim Installation Guide]] (SIG) – Comprehensive installation and configuration guide to Skyrim and its DLCs, mods, extensions, and utilities. | # [[Guide:Skyrim_Installation|Skyrim Installation Guide]] (SIG) – Comprehensive installation and configuration guide to Skyrim and its DLCs, mods, extensions, and utilities. | ||
# [[Guide:Wrye_Bash|Wrye Bash Guide]] (WBG) – A practical, hands-on introduction to Wrye Bash using STEP as a working example. | # [[Guide:Wrye_Bash|Wrye Bash Guide]] (WBG) – A practical, hands-on introduction to Wrye Bash using STEP as a working example. | ||
# [[Guide: | # [[Guide:Mod Organizer|Mod Organizer Guide]] (MOG) – A WIP with some advice and troubleshooting suggestions. | ||
<br /> | <br /> | ||
= Final Notes = | = Final Notes = | ||
<div style="color: | <div style="color:#ccc; text-align:center; font-size:1.4em; font-weight:500; border-style:solid; border-bottom-width:3px; border-color:rgb(200,100,20); padding-bottom:10px; overflow:hidden;">A Final Consideration</div> | ||
Install mods in the order that they are presented in the following tables in order to achieve an aesthetically and mechanically well-vetted result. More experienced or adventurous modders may want to use STEP as a loose guide. | Install mods in the order that they are presented in the following tables in order to achieve an aesthetically and mechanically well-vetted result. More experienced or adventurous modders may want to use STEP as a loose guide. | ||
{{fc|#E6B69E|Information from certain mods used can write additional information into save games. Thus, some mods can continue to affect the game even after the mods are removed or updated.}} | {{fc|#E6B69E|Information from certain mods used can write additional information into save games. Thus, some mods can continue to affect the game even after the mods are removed or updated.}} | ||
From the Bethesda document, [ | From the Bethesda document, [https://forums.bethsoft.com/topic/1343317-skyrim-mod-troubleshooting-best-practices/ Skyrim Mod Troubleshooting: Best Practices]: | ||
<blockquote>"When you play Skyrim with a mod, in most cases, the new data for the mod will be written into any new saved games you create. For example, if you play Skyrim with Mod X and create a save, the next time you load that save, the game will expect Mod X to also be loaded. If you no longer want to play Skyrim with Mod X, it is best to unload Mod X (by unchecking the plugin under Data Files in your Skyrim launcher) and loading a save that does not require Mod X, usually an older save or a backed up save."</blockquote> | <blockquote>"When you play Skyrim with a mod, in most cases, the new data for the mod will be written into any new saved games you create. For example, if you play Skyrim with Mod X and create a save, the next time you load that save, the game will expect Mod X to also be loaded. If you no longer want to play Skyrim with Mod X, it is best to unload Mod X (by unchecking the plugin under Data Files in your Skyrim launcher) and loading a save that does not require Mod X, usually an older save or a backed up save."</blockquote> | ||
| Line 350: | Line 347: | ||
= STEP 2 = | = STEP 2 = | ||
<div style="color: | <div style="color:#ccc; text-align:center; font-size:1.4em; font-weight:500; border-style:solid; border-bottom-width:3px; border-color:rgb(200,100,20); padding-bottom:10px; overflow:hidden;">Mod Installation</div> | ||
<br /> | <br /> | ||
== Mod Table Reference == | |||
Below is the legend and reference for the mod tables used in this Guide. Users should refer back to it when confused about a mod listing. | |||
{| class="steptable" | | {| class="steptable" | | ||
! class="first" | | ! class="first" | | ||
! '''Mod Name''' | ! class="second" | | ||
! '''Baseline''' | ! class="modname" | '''Mod Name''' | ||
! ''' | ! class="baseline" | '''Baseline''' | ||
! | ! class="notes" | '''Notes''' | ||
! | |- style="border-bottom: 1px solid #666C71;" | ||
|- | ! class="first" | | ||
! class="second" | | |||
| class="modname" | [[Main Page|Mod (patches not required)]]<sup>[[File:Wikilink.png|20px]]</sup> | |||
| class="baseline" | Baseline | |||
| class="notes" | Notes | |||
|- style="border-bottom: 1px solid #666C71;" | |||
! class="core" | | ! class="core" | | ||
| | ! class="landw" | | ||
| | | class="modname" | [[Main Page|Mod (requires patches)]]<sup>[[File:Wikilink.png|20px]]</sup> | ||
| class="baseline" | Baseline | |||
| class=" | | class="notes" | Notes | ||
| Notes | |||
|} | |} | ||
<br/> | |||
{| valign=" | == Mod Table Legend == | ||
! style=" | <p>The following is an example of the mod tables, found in [[#Step_2|Step 2]] below, followed by the legend for reading the table. Users should familiarize themselves with this information.</p> | ||
| style="border-bottom: 1px solid #666C71; border-top: 1px solid #666C71;;" | | {| valign="left" style="width: 95%; background-color: transparent; font-size:0.95em; margin-left:2rem;" | ||
| style="border-bottom: 1px solid #666C71; border-top: 1px solid #666C71;" | | ! class="chartrbg" style="width: 0.25rem; border-bottom: 1px solid #666C71; border-top: 1px solid #666C71; padding: 0;" | | ||
! class="redbg" style="width: 0.25rem; border-bottom: 1px solid #666C71; border-top: 1px solid #666C71; padding: 0;" | | |||
| style="width: 9%; border-bottom: 1px solid #666C71; border-top: 1px solid #666C71; padding: 0 0.5rem;" | '''Patch Requirement''' | |||
| style="border-bottom: 1px solid #666C71; border-top: 1px solid #666C71;" | A green vertical bar indicates that the mod is required by the Step Conflict Resolution Patch, and a red bar indicates that the LW patch is required. | |||
|- | |- | ||
| style="border-bottom: 1px solid #666C71;" | | | style="border-bottom: 1px solid #666C71;" | | ||
| style="border-bottom: 1px solid #666C71;" | Mod Name | | style="border-bottom: 1px solid #666C71;" | | ||
| style="border-bottom: 1px solid #666C71;" | Nexus mod name | | style="border-bottom: 1px solid #666C71;" | '''Mod Name''' | ||
| style="border-bottom: 1px solid #666C71;" | Nexus mod name presented as a link to Nexus for download. | |||
|- | |- | ||
| style="border-bottom: 1px solid #666C71;" | | |||
| style="border-bottom: 1px solid #666C71;" | | | style="border-bottom: 1px solid #666C71;" | | ||
| style="border-bottom: 1px solid #666C71;" | [[File:Wikilink.png]] | | style="border-bottom: 1px solid #666C71;" | [[File:Wikilink.png]] | ||
| style="border-bottom: 1px solid #666C71;" | Link to the mod's | | style="border-bottom: 1px solid #666C71;" | Link to the mod's wiki page, which includes various information about the mod. | ||
|- | |- | ||
| style="border-bottom: 1px solid #666C71;" | | | style="border-bottom: 1px solid #666C71;" | | ||
| style="border-bottom: 1px solid #666C71;" | Baseline | | style="border-bottom: 1px solid #666C71;" | | ||
| style="border-bottom: 1px solid #666C71;" | This notes the STEP Baseline version or option of the corresponding mod. | | style="border-bottom: 1px solid #666C71;" | '''Baseline''' | ||
| style="border-bottom: 1px solid #666C71;" | This notes the STEP Baseline version or option of the corresponding mod that should be installed, and usually refers to options affecting performance/quality. General suggestions are located in the "''Notes''" column; see below. | |||
|- | |- | ||
| style="border-bottom: 1px solid #666C71;" | | | style="border-bottom: 1px solid #666C71;" | | ||
| style="border-bottom: 1px solid #666C71;" | | | style="border-bottom: 1px solid #666C71;" | | ||
| style="border-bottom: 1px solid #666C71;" | Indicates if there are | | style="border-bottom: 1px solid #666C71;" | '''Quality''' | ||
| style="border-bottom: 1px solid #666C71;" | Indicates if there are lower or higher quality options for the mod ''relative to the Baseline recommendation'': | |||
|- | |- | ||
| style="border-bottom: 1px solid #666C71;" | | | style="border-bottom: 1px solid #666C71;" | | ||
| style="border-bottom: 1px solid #666C71;" | | | style="border-bottom: 1px solid #666C71;" | | ||
| style="border-bottom: 1px solid #666C71;" | | | style="border-bottom: 1px solid #666C71;" | | ||
| style="border-bottom: 1px solid #666C71;" | [[File:LowQuality.png|18px]] '''''Relative to Baseline''''', a lower quality, less demanding version of the mod is also available. | |||
|- | |- | ||
| style="border-bottom: 1px solid #666C71;" | | | style="border-bottom: 1px solid #666C71;" | | ||
| style="border-bottom: 1px solid #666C71;" | | | style="border-bottom: 1px solid #666C71;" | | ||
| style="border-bottom: 1px solid #666C71;" | [[File: | | style="border-bottom: 1px solid #666C71;" | | ||
| style="border-bottom: 1px solid #666C71;" | [[File:HighQuality.png|18px]] '''''Relative to Baseline''''', a higher quality, more demanding version of the mod is also available. | |||
|- | |- | ||
| style="border-bottom: 1px solid #666C71;" | | | style="border-bottom: 1px solid #666C71;" | | ||
| style="border-bottom: 1px solid #666C71;" | | | style="border-bottom: 1px solid #666C71;" | | ||
| style="border-bottom: 1px solid #666C71;" | | | style="border-bottom: 1px solid #666C71;" | | ||
| style="border-bottom: 1px solid #666C71;" | [[File:LowQuality.png|18px]] [[File:HighQuality.png|18px]] '''''Relative to Baseline''''', both lower and higher quality versions of the mod are available. | |||
|- | |- | ||
| style="border-bottom: 1px solid #666C71;" | | | style="border-bottom: 1px solid #666C71;" | | ||
| style="border-bottom: 1px solid #666C71;" | | | style="border-bottom: 1px solid #666C71;" | | ||
| style="border-bottom: 1px solid #666C71;" | Notes | | style="border-bottom: 1px solid #666C71;" | '''Notes''' | ||
| style="border-bottom: 1px solid #666C71;" | Brief notes that apply to the mod or installation. In some cases, mods with | | style="border-bottom: 1px solid #666C71;" | Brief notes that apply to the mod or installation. In some cases, mods with several options will include a suggested option. These ''suggestions'' will take the form of: {{fc|#ddd|"STEP recommends <nowiki>'</nowiki>''Option A''<nowiki>'</nowiki>."}} In other cases, there may only be one appropriate option, which fits the STEP Mandate. These ''instructions'' will take the form of: {{fc|#ddd|"Download and install <nowiki>'</nowiki>''Option A''<nowiki>'</nowiki>."}} Users will also see links displayed as: {{fc|#ddd|Detailed instructions available}}. Users should follow these links to find detailed instructions for installing the mod. | ||
|} | |} | ||
{{alert|type=notice|text=Consider the following while installing mods: | |||
* {{Fc|#e6b69e|Mods should be installed in the order that they are listed to ensure that mods further down the list overwrite those occurring before them. This is necessary to ensure the desired in-game effect. Mods are otherwise listed in alphabetical order within each section, and any deviations from this are purposeful to achieve the desired outcome.}} | |||
{{ | * {{Fc|#96b6ce|To achieve the best results, “Loose files” (non-BSA) versions of mods should be used. If a "loose files" version is not available, extract the BSA as described [[Guide:BSA Extraction and Optimization|here]].}} | ||
* {{Fc|#e6b69e|Always install plugins (ESPs/ESMs) unless otherwise noted. If there are not any notes associated with a particular mod, then all options fit the STEP mandate. The notes only provide instructions where necessary; otherwise, STEP encourages user customization.}} | |||
| | * {{Fc|#96b6ce|Unless otherwise stated, follow BOSS's advice with regards to mod cleaning.}} | ||
| | |||
| | |||
| | |||
}} | |||
}} | }} | ||
== 2. | == 2.A. {{#show:Category:ModGroup_01-Tools|?ModGroupName}} == | ||
:{{Fc|#E6B69E|{{#show:Category: | :{{Fc|#E6B69E|{{#show:Category:ModGroup_01-Tools|?ModGroupDescription}} }} | ||
{{ModTable|ModTableRow= | {{ModTable|ModTableRow= | ||
{{#ask:[[Version::{{ | {{#ask:[[Game::{{NAMESPACE}}]][[Version::{{SUBPAGENAME}}]][[ModGroup::01-Tools]] | ||
|?ModName | |||
|?Version | |||
|mainlabel=- | |mainlabel=- | ||
|named args=yes | |named args=yes | ||
|link=none | |link=none | ||
| | |format=plainlist | ||
| | |template=ModTableMods | ||
|sort=OrderID | |sort=OrderID}} | ||
}} | |||
}} | }} | ||
== 2.C {{#show:Category: | == 2.C. {{#show:Category:ModGroup_02-Extenders|?ModGroupName}} == | ||
:{{Fc|#E6B69E|{{#show:Category: | :{{Fc|#E6B69E|{{#show:Category:ModGroup_02-Extenders|?ModGroupDescription}} }} | ||
{{ModTable|ModTableRow= | {{ModTable|ModTableRow= | ||
{{#ask:[[Version::{{ | {{#ask:[[Game::{{NAMESPACE}}]][[Version::{{SUBPAGENAME}}]][[ModGroup::02-Extenders]] | ||
|?ModName | |||
|?Version | |||
|mainlabel=- | |mainlabel=- | ||
|named args=yes | |named args=yes | ||
|link=none | |link=none | ||
| | |format=plainlist | ||
| | |template=ModTableMods | ||
|sort=OrderID | |sort=OrderID}} | ||
}} | |||
}} | }} | ||
== 2.D {{#show:Category: | == 2.D. {{#show:Category:ModGroup_09-Fixes|?ModGroupName}} == | ||
:{{Fc|#E6B69E|{{#show:Category: | :{{Fc|#E6B69E|{{#show:Category:ModGroup_09-Fixes|?ModGroupDescription}} }} | ||
{{ModTable|ModTableRow= | {{ModTable|ModTableRow= | ||
{{#ask:[[Version::{{ | {{#ask:[[Game::{{NAMESPACE}}]][[Version::{{SUBPAGENAME}}]][[ModGroup::09-Fixes]] | ||
|?ModName | |||
|?Version | |||
|mainlabel=- | |mainlabel=- | ||
|named args=yes | |named args=yes | ||
|link=none | |link=none | ||
| | |format=plainlist | ||
| | |template=ModTableMods | ||
|sort=OrderID | |sort=OrderID}} | ||
}} | |||
}} | }} | ||
{{Benchmark}} | |||
== 2.E {{#show:Category: | == 2.E. {{#show:Category:ModGroup_16-Interface|?ModGroupName}} == | ||
:{{Fc|#E6B69E|{{#show:Category: | :{{Fc|#E6B69E|{{#show:Category:ModGroup_16-Interface|?ModGroupDescription}} }} | ||
{{ModTable|ModTableRow= | {{ModTable|ModTableRow= | ||
{{#ask:[[Version::{{ | {{#ask:[[Game::{{NAMESPACE}}]][[Version::{{SUBPAGENAME}}]][[ModGroup::16-Interface]] | ||
|?ModName | |||
|?Version | |||
|mainlabel=- | |mainlabel=- | ||
|named args=yes | |named args=yes | ||
|link=none | |link=none | ||
| | |format=plainlist | ||
| | |template=ModTableMods | ||
|sort=OrderID | |sort=OrderID}} | ||
}} | |||
}} | }} | ||
{{Benchmark}} | |||
== 2.F {{#show:Category: | == 2.F. {{#show:Category:ModGroup_06-Models and Textures|?ModGroupName}} == | ||
:{{Fc|#E6B69E|{{#show:Category: | :{{Fc|#E6B69E|{{#show:Category:ModGroup_06-Models and Textures|?ModGroupDescription}} }} | ||
{{ModTable|ModTableRow= | {{ModTable|ModTableRow= | ||
{{#ask:[[Version::{{ | {{#ask:[[Game::{{NAMESPACE}}]][[Version::{{SUBPAGENAME}}]][[ModGroup::06-Models and Textures]] | ||
|?ModName | |||
|?Version | |||
|mainlabel=- | |mainlabel=- | ||
|named args=yes | |named args=yes | ||
|link=none | |link=none | ||
| | |format=plainlist | ||
| | |template=ModTableMods | ||
|sort=OrderID | |sort=OrderID}} | ||
}} | |||
}} | }} | ||
{{Benchmark}} | {{Benchmark}} | ||
== 2. | == 2.H. {{#show:Category:ModGroup_08-Character Appearance|?ModGroupName}} == | ||
:{{Fc|#E6B69E|{{#show:Category: | :{{Fc|#E6B69E|{{#show:Category:ModGroup_08-Character Appearance|?ModGroupDescription}} }} | ||
{{ModTable|ModTableRow= | {{ModTable|ModTableRow= | ||
{{#ask:[[Version::{{ | {{#ask:[[Game::{{NAMESPACE}}]][[Version::{{SUBPAGENAME}}]][[ModGroup::08-Character Appearance]] | ||
|?ModName | |||
|?Version | |||
|mainlabel=- | |mainlabel=- | ||
|named args=yes | |named args=yes | ||
|link=none | |link=none | ||
| | |format=plainlist | ||
| | |template=ModTableMods | ||
|sort=OrderID | |sort=OrderID}} | ||
}} | |||
}} | }} | ||
{{Benchmark}} | |||
== 2. | == 2.J. {{#show:Category:ModGroup_05-Animation and Physics|?ModGroupName}} == | ||
:{{Fc|#E6B69E|{{#show:Category: | :{{Fc|#E6B69E|{{#show:Category:ModGroup_05-Animation and Physics|?ModGroupDescription}} }} | ||
{{ModTable|ModTableRow= | {{ModTable|ModTableRow= | ||
{{#ask:[[Version::{{ | {{#ask:[[Game::{{NAMESPACE}}]][[Version::{{SUBPAGENAME}}]][[ModGroup::05-Animation and Physics]] | ||
|?ModName | |?ModName | ||
|? | |?Version | ||
|mainlabel=- | |mainlabel=- | ||
|named args=yes | |named args=yes | ||
|link=none | |link=none | ||
| | |format=plainlist | ||
| | |template=ModTableMods | ||
|sort=OrderID | |sort=OrderID}} | ||
}} | |||
}} | }} | ||
{{Benchmark}} | |||
== 2. | == 2.L. {{#show:Category:ModGroup_07-Sounds and Music|?ModGroupName}} == | ||
:{{Fc|#E6B69E|{{#show:Category: | :{{Fc|#E6B69E|{{#show:Category:ModGroup_07-Sounds and Music|?ModGroupDescription}} }} | ||
{{ModTable|ModTableRow= | {{ModTable|ModTableRow= | ||
{{#ask:[[Version::{{ | {{#ask:[[Game::{{NAMESPACE}}]][[Version::{{SUBPAGENAME}}]][[ModGroup::07-Sounds and Music]] | ||
|?ModName | |?ModName | ||
|? | |?Version | ||
|mainlabel=- | |mainlabel=- | ||
|named args=yes | |named args=yes | ||
|link=none | |link=none | ||
| | |format=plainlist | ||
| | |template=ModTableMods | ||
|sort=OrderID | |sort=OrderID}} | ||
}} | |||
}} | }} | ||
{{Benchmark}} | |||
== 2. | == 2.M. {{#show:Category:ModGroup_10-Gameplay-General|?ModGroupName}} == | ||
:{{Fc|#E6B69E|{{#show:Category: | :{{Fc|#E6B69E|{{#show:Category:ModGroup_10-Gameplay-General|?ModGroupDescription}} }} | ||
{{ModTable|ModTableRow= | {{ModTable|ModTableRow= | ||
{{#ask:[[Version::{{ | {{#ask:[[Game::{{NAMESPACE}}]][[Version::{{SUBPAGENAME}}]][[ModGroup::10-Gameplay-General]] | ||
|?ModName | |?ModName | ||
|? | |?Version | ||
|mainlabel=- | |mainlabel=- | ||
|named args=yes | |named args=yes | ||
|link=none | |link=none | ||
| | |format=plainlist | ||
| | |template=ModTableMods | ||
|sort=OrderID | |sort=OrderID}} | ||
}} | |||
}} | }} | ||
{{Benchmark}} | {{Benchmark}} | ||
| Line 620: | Line 570: | ||
= STEP 3 = | = STEP 3 = | ||
<div style="color: | <div style="color:#ccc; text-align:center; font-size:1.4em; font-weight:500; border-style:solid; border-bottom-width:3px; border-color:rgb(200,100,20); padding-bottom:10px; overflow:hidden;">Tips & Troubleshooting Common Issues</div> | ||
== 3.A. Technical Tips == | == 3.A. Technical Tips == | ||
The following is a good place to begin, but be certain to also check the [[Guide:Troubleshooting|Troubleshooting Guide]]. Also, search the [ | The following is a good place to begin, but be certain to also check the [[Guide:Troubleshooting|Troubleshooting Guide]]. Also, search the [https://stepmodifications.org/forum/forumdisplay.php?fid=21 support & Troubleshooting forum] on the STEP Boards, | ||
=== 3.A.1. Maximizing STEP === | === 3.A.1. Maximizing STEP === | ||
| Line 636: | Line 586: | ||
#* shadow quality | #* shadow quality | ||
#* texture quality | #* texture quality | ||
{{ | {{AlertSmall|type=notice|text=Starting up the Launcher will overwrite some of the INI settings previously recommended, so those will need to be reset.}} | ||
=== 3.A.2. Fix game launch crash after installing STEP === | === 3.A.2. Fix game launch crash after installing STEP === | ||
| Line 645: | Line 595: | ||
=== 3.A.3. Defrag the Hard Drive === | === 3.A.3. Defrag the Hard Drive === | ||
For hard drives (<u>not SSDs</u>), this is a very important task once most/all mods are installed. The Windows defrag utility may be used, but it is sub-standard. A couple of the best free utilities are [ | For hard drives (<u>not SSDs</u>), this is a very important task once most/all mods are installed. The Windows defrag utility may be used, but it is sub-standard. A couple of the best free utilities are [https://www.piriform.com/defraggler Defraggler] and [https://www.auslogics.com/en/software/disk-defrag/ Auslogics Disk Defrag]. <u>'''Do NOT defrag an SSD as it will detrimentally affect its lifetime'''</u>. | ||
=== 3.A.4. Semi-Invisible People & Misbehaving Walls === | === 3.A.4. Semi-Invisible People & Misbehaving Walls === | ||
| Line 651: | Line 601: | ||
=== 3.A.5. Using Windowed Mode (ATI) === | === 3.A.5. Using Windowed Mode (ATI) === | ||
If having stuttering problems or CTDs in full screen mode, try "full screen" windowed mode by downloading [ | If having stuttering problems or CTDs in full screen mode, try "full screen" windowed mode by downloading [https://skyrim.nexusmods.com/mods/4 Simple Borderless Window]. The "Simple Borderless Window" launcher {{fc|white|SBW.exe}} launches SKSE, so start the game through {{fc|white|SBW.exe}}. | ||
=== 3.A.6. Increase Overall Performance === | === 3.A.6. Increase Overall Performance === | ||
| Line 679: | Line 629: | ||
= User Contributions = | = User Contributions = | ||
<div style="color: | <div style="color:#ccc; text-align:center; font-size:1.4em; font-weight:500; border-style:solid; border-bottom-width:3px; border-color:rgb(200,100,20); padding-bottom:10px; overflow:hidden;">How YOU Can Help</div> | ||
STEP can only get bigger and better with help from the user community. Even simply maintaining the current STEP is too much work for the core STEP team to ensure that the highest quality is maintained. We need people to help us identify mods that are thought to improve Skyrim while adhering to the [[#STEP Mandate|STEP Mandate]]. We also need ongoing reviews and updates on mods that may be causing problems or that stray from the STEP philosophy. Finally, we need help from the community in terms of testing, benchmarking and analysis. More detail is presented in the [[Guide:Mod Testing|Mod Testing Guide]]. | STEP can only get bigger and better with help from the user community. Even simply maintaining the current STEP is too much work for the core STEP team to ensure that the highest quality is maintained. We need people to help us identify mods that are thought to improve Skyrim while adhering to the [[#STEP Mandate|STEP Mandate]]. We also need ongoing reviews and updates on mods that may be causing problems or that stray from the STEP philosophy. Finally, we need help from the community in terms of testing, benchmarking and analysis. More detail is presented in the [[Guide:Mod Testing|Mod Testing Guide]]. | ||
In order to suggest a mod, visit the [ | In order to suggest a mod, visit the [https://stepmodifications.org/forum/forumdisplay.php?fid=43 Mod Suggestions] section of the STEP Forums. | ||
{{ | {{alert|type=notice|size=90|text=The STEP team will be beta testing a new mod-testing procedure and interface currently in final stages of development here on the STEP Wiki. Anyone interested in testing mods of any kind --whether included in STEP or not-- should [mailto:admin@step-project.com contact the STEP administrators by email] or on the forums (click on the link in upper left of header).}} | ||
<center>{{fs|2.0em|{{fc|white|Thank you for reading and enjoy the game!}} }}</center> | <center>{{fs|2.0em|{{fc|white|Thank you for reading and enjoy the game!}} }}</center> | ||
| Line 697: | Line 647: | ||
* The STEP beta testers ... for their good humor and rigorous analyses | * The STEP beta testers ... for their good humor and rigorous analyses | ||
* The Nexus community | * The Nexus community | ||
* Bealdwine, EisDrache & | * Bealdwine, EisDrache & Frihyland - site founders on indefinite leave (we hope you guys are well!) | ||
* Outstanding v2.2. | * Outstanding v2.2.5 contributors - dstansberry, Eliian, Kelmych, Neovalen, torminater, WilliamImm, Wormheart, and many others. | ||
* Bethesda Softworks for Skyrim (and TES in general) | * Bethesda Softworks for Skyrim (and TES in general) | ||
{{DonorCredits}} | |||
====== The core STEP team is: ====== | ====== The core STEP team is: ====== | ||
* Farlo - Mediawiki developer & extraordinaire, Mod-list co-compiler, forums admin, site founder | * Farlo - Mediawiki developer & extraordinaire, Mod-list co-compiler, forums admin, site founder | ||
* | * MontyMM - Solutions developer (Semi-Automatic STEP), site founder | ||
* stoppingby4now - Main site developer, Semantic Mediawiki developer & extraordinaire, site founder | * stoppingby4now - Main site developer, Semantic Mediawiki developer & extraordinaire, site founder | ||
* TheCompiler - STEP creator, mod-list extraordinaire | * TheCompiler - STEP creator, mod-list extraordinaire | ||
* z929669 - Wiki & forums content editor, main site administrator, hosting maintenance, site founder | * z929669 - Wiki & forums content editor, main site administrator, hosting maintenance, site founder | ||
* | * [https://stepmodifications.org/forum/showthread.php?tid=2086 STEP Forum moderators]: Kelmych, rootsrat, techangel85, torminater | ||
[[Category: | [[Category:Official Mod-Build Guides]][[Category:Official Mod-Build Guides]][[Category:{{NAMESPACE}} Mod-Build Guides]] | ||
[[Category:Translations]] | |||
{{#css:MediaWiki:StepGuide.css}} | {{#css:MediaWiki:StepGuide.css}} | ||
Revision as of 15:46, March 30, 2023
WARNING
This guide is out of date and is NOT supported! It may contain information that is incorrect or not in line with the current state of the game.Go to the latest supported SkyrimLE Guide.
O projekcie STEP
STEP jest wyczerpujacym i szeroko zakrojonym poradnikiem, który ma na celu uzupelnienie gry TES V: Skyrim o najlepsze modyfikacje (zwane potocznie modami) oraz optymalizacje ustawien. Glównym zalozeniem projektu jest zachowanie wiernosci oryginalnej zawartosci Skyrima, przy jednoczesnym wzbogaceniu wrazen wizualnych i dzwiekowych oraz poprawieniu bledów w mechanice gry.
Autorem projektu jest TheCompiler, calosc jest jednak praca zbiorowa, powstala przy udziale spolecznosci modderskiej, ochotników posiadajacych wiedze techniczna oraz administratorów projektu. Celem STEP-a jest zapewnienie sprawdzonych i przetestowanych metod, które pozwola na instalacje i utrzymanie wzbogaconego o modyfikacje Skyrima. W poradniku przedstawiamy w sposób szczególowy, jak zrobic z oryginalnej instalacji wzbogacony „szablon” czy tez „podstawke” gry, która pózniej mozna wykorzystac do instalacji kolejnych modów. Niedoswiadczonym uzytkownikom zalecamy dokladne stosowanie sie do instrukcji "krok-po-kroku" zawartych w poradniku, natomiast bardziej zaawansowani gracze moga uzyc STEP-a jako ogólnych wytycznych do modowania swojej gry.
W celu zebrania informacji odpowiedniej jakosci (czyli takich, które jak najlepiej spelnia oczekiwania uzytkowników), zespól projektu STEP wspólpracuje ze spolecznoscia modderów poprzez szczególowe recenzje, opinie i sugestie wymieniane i omawiane wspólnie na Forum Spolecznosci STEP. Na forum obowiazuje regulamin, z którym nalezy sie zapoznac (cala strona funkcjonuje wylacznie w jezyku angielskim). Po rejestracji mozna sie juz cieszyc pelnym dostepem do wszelkich udostepnianych informacji, a w razie problemów - liczyc na chetna do pomocy ekipe. W celu porównania jak wyglada Skyrim przed i po instalacji STEP-a, mozecie sprawdzic zrzuty ekranu na stronie Nexus, ale tak naprawde jedyny sprawdzony sposób na doswiadczenie, czym naprawde jest STEP, to wypróbowanie go!
Ucieszymy sie z kazdego wsparcia finansowego Projektu STEP - datki przeznaczane sa na utrzymanie serwera, domeny i zarzadzanie projektem.
Wytyczne projektu STEP
Podstawa projektu jest wzbogacenie oryginalnej wersji gry Skyrim na komputery PC poprzez...
- zamiane tekstur na lepsze, przy minimalnej utracie wydajnosci gry
- konsekwentny i logiczny dobór modyfikacji graficznych i dzwiekowych w celu poprawienia klimatu rozgrywki
- poprawienie komfortu UI i systemu menu
- wybór modyfikacji naprawiajacych blednie funkcjonujace aspekty mechaniki gry
Projekt NIE dotyczy modyfikacji, które...
- wprowadzaja zmiany sprzeczne z zalozeniami oryginalnej wersji gry oraz uniwersum The Elder Scrolls
- wprowadzaja do gry erotyke oraz podmieniaja modele kobiecych postaci
- podmieniaja muzyke z oryginalnego produktu
- diametralnie inegruja w sposób rozgrywki
STEP w wersjach Wydajnosciowej, Podstawowej i Ekstremalnej
Projekt STEP oferuje 3 rózne wersje. Instalacja modów oznaczonych jako "Core" (zielony pasek przy nazwie moda) jest niezbedne i wymagana do poprawnego funkcjonowania wszystkich trzech wersji STEP. Pozostale mody nie sa niezbedne, aczkolwiek Ekipa projektu STEP goraco poleca ich instalacje. Poszczególne wersje STEP zostaly stworzone z mysla o wydajnosci, w zaleznosci od mozliwosci komputera gracza:
- Wersja Wydajnosciowa: Jedynie mody oznaczone jako "Core". Wybór opcji wydajnosciowej dla wszystkich modów.
- Czyli: "Z litosci nie bede katowal procesora i karty graficznej, ale musze miec STEP!"
- Wersja Podstawowa: Mody oznaczone jako "Core" oraz dowolne mody dodatkowe. Wybór opcji wydajnosciowej lub sredniej jakosci, jesli to tylko mozliwe.
- Czyli: "Mój komputer daje rade, ale nie zniose, jesli gra bedzie sie choc troche zacinac!"
- Wersja Ekstremalna: Wszystkie mody oznaczone jako "Core" oraz wszystkie mody dodatkowe. Wybór opcji oferujacych najwyzsza jakosc, jesli to mozliwe.
- Czyli: "Posiadam superkomputer!"
KROK 1
Wymagania
- Oficjalny Patch v1.8
- Cierpliwosc i szczególowe wykonywanie instrukcji krok-po-kroku
System
Poradnik STEP zostal napisany z mysla o komputerach posiadajacyh ponizsze (lub porównywalne) parametry:
- Windows 7
- Intel i5/i7 quad core
- 4+ GB pamieci RAM
- Karta graficzne 1+ GB VRAM (DDR5)
- Rozdzielczosc ekranu: 1680x1050
1.A. Instalacja platformy Steam oraz Skyrima
Niniejszy poradnik zaklada, ze uzytkownik zainstalowal aplikacje Steam zgodnie z Poradnikiem Instalacji Skyrima (chwilowo dostepny jedynie w wersji angielskiej). Zalecamy poswiecic troche czasu na poprawna instalacje i konfiguracje zarówno platfortmy Steam jak i samego Skyrima, wedlug instrukcji zawartych w poradniku.
UWAGA! Waznym jest, zeby dalsza instalacje STEP przeprowadzac na SWIEZYM, NOWO ZAINSTALOWANYM SKYRIMIE! Ewentualnie mozna spróbowac przywrócic Skyrima do podstawowej, swiezej wersji wedlug tego poradnika (w jez. angielskim).
UWAGA! Poradnik STEP przeznaczony jest do gry w wersji angielskiej. Autor tego tlumaczenia posiada gre wlasnie w takiej wersji i nie gwarantuje, ze Projekt STEP bedzie w pelni funkcjonalny w polskiej wersji gry. Wiele z modów zawartych w poradniku podmienia opisy przedmiotów, ras itp. Autor tlumaczenia nie wie, jaki wplyw na polska wersje gry beda mialy mody tego typu i nie bierze odpowiedzialnosci za wszelkie ewentualne problemy, które wynikna z tego tytulu.
1.B. Opcje Menu Startowego Skyrima
1.B.1. Ustawienia Menu Startowego
- Uruchom Skyrima przez aplikacje Steam i kliknij na [Options (Opcje)]. Spowoduje to utworzenie plików konfiguracyjnych (tzw. pliki INI) i automatyczne ustawienie opcji gry zgodnie z wykrytym sprzetem. Powstana równiez wpisy w Rejestrze Windowsa, które beda niezbedne do dzialania pomocniczych programów, niezbednych w dalszej czesci poradnika.
- Kliknij przycik [Ultra].
- Antialiasing ustaw na 4. Róznica miedzy 4 a 8 próbkami jest na bardzo subtelna i niewarta utraty wydajnosci, która powoduje (zgodnie z Poradnikiem Tweakguides). W celu ostatecznej poprawy wydajnosci obniz wartosc z 4 do 2. UWAGA: Jesli uzywasz SMAA, ustaw Antialiasing na ZERO.
- Anisotropic Filtering (Filtrowanie Anizotropowe) ustaw na 16 (ustawienie na 8 nieznacznie poprawi wydajnosc gry).
- Kliknij przycisk[Advanced (Zaawansowane)] i upewnij sie, ze opcja FXAA jest ODZNACZONA. FXAA pogarsza efekt Filtrowania Anizotropowego, jak równiez ogólna jakosc tekstur. Oferuje co prawda znaczacy wzrost wydajnosc w stosunku to Antyaliasingu, ale widocznie zmniejsza jakosc. UWAGA: SMAA jest nieco lepsza alternatywa dla FXAA.
- Rozwaz ustawienie jakosci cieniowania na 'High' (Wysokie) zamiast na 'Ultra', jesli masz karte graficzna z mniej niz 1 GB VRAM (STEP w wersji Wydajnosciowej) lub pozostaw ustawienie 'Ultra' dla wersji Ekstremanlen STEP.
- Under [View Distance], make sure Object Detail Fade is UN-checked and adjust grass to 100% with all other settings around 50%.NOTE: High-end systems can handle max view distances just fine.
- Wyjdz z menu opcji i kliknij "Play". Spowoduje to utworzenie niezbednego pliku konfiguracyjnego i wpisów w rejestrze Windows, wymaganych przez niektóre z aplikacji opisanych w dalszej czesci poradnika. Wbrew powszechnemu mniemaniu uruchomienie gry nie jest wymagane do utworzenia plików INI.
1.C. Ustawienia ekranu i karty graficznej.
1.C.1. Posiadacze kart Nvidia
- Pobierz i zainstaluj najnowsze sterowniki (wersje beta, jesli jest dostepna).
- Pobierz program Nvidia Inspector.
- Przeczytaj Wiki Poradnik Nvidia Inspector Wiki (tylko w jez. angielskim).
1.C.2. Posiadacze kart ATI
- Pobierz i zainstaluj najnowsze sterowniki (wersje beta, jesli jest dostepna).
- Uruchom Catalyst Control Center i kliknij przycisk [Preferences] w prawym górnym rogu. Wybierz Advanced View.
- Po lewej stronie, w sekcji Gaming wybierz 3D Application Settings.
- Ustaw anti-aliasing i anisotropic filtering tak samo jak w opcjach Skyrima powyzej.
- Ustaw [Tessellation] na AMD Optimized
- Ustaw [Catalyst A.I.] na najwyzsze ustawienia tekstur i zaznacz Enable Surface Format Optimization
- Ustaw [Wait for vertical refresh] na Quality
- Ustaw [Anti-Aliasing Mode] na Multi-sample AA
- Zaznacz opcje Triple buffering w [OpenGL Settings]
1.C.3. Ekran
Skonfiguruj ustawienia ekranu monitora uzywajac narzedzia Windowsa.
- Najpierw uzyj jednego z wbudpwanych ustawen konfiguracyjnych
- Nastepnie powtórz proces kalibracji przy uzyciu narzedzi dostepnych z poziomu sterownika karty graficznej
- Za kazdem uruchom wszystkie opje kalibrowania monitora, zwracajac szczególna uwage na ustawienia gamma, jasnosci i kontrastu.
1.D. Benchmark Wydajnosci
Ponizsza procedura jest bardzo wazna, jesli chodzi o ustalenie podstawowej wydajnosci systemu, jak równiez bardzo pomocna dla ekipy projektu STEP w ustaleniu rozrzutu wydajnosci wsród uzytkowników. Dane te pozwalaja nam na dokladniejsze ustalenie wymagan dla przyszlych wersji STEP. Wklad uzytkowników w benchmarki jest bardzo ceniony i ma duza wage dla jakosci projektu!
Nastepujace kroki powinny byc jak dotad zakonczone:
- "Czysta" instalacja aplikacji STEAM oraz Skyrima,
- Podstawowa konfiguracja opcji gry, wygerenowane pliki INI,
- Konfiguracja karty graficznej oraz kalibracja monitora.
Jest to idealny wrecz moment na zebranie podstawowych danych dotyczacych wydajnosci, jesli chodzi o Skyrima. Wszelkie kolejne zmiany konfiguracyjne beda wprowadzane recznie. Zmiany te moga miec znaczacy wplyw na wydajnosc naszego systemu. Ten pierwszy, podstawowy benchmark pozwoli zebrac cenne informacje na temat ustawien i srodowiska gry. Najlepszy czas na wykrycie wszelkich problemów ze sterownikami, niekompatybilnych aplikacji, problemów ze sprzetem oraz innych defektów jest teraz, kiedy gra jest jeszcze niezmodowana, poniewaz tego typu problemy beda znacznie trudniejsze do zidentyfikowania w pózniejszej fazie, kiedy zaczniemy instalowac nasze modyfikacje. Zaleca sie, aby uzytkownik wykonal ponizsze kroki za kazdym razem, kiedy zmieniane sa pliki konfiguracyjne INI oraz po ukonczeniu instalacji modów z kazdej sekcji poradnika STEP.
Ponizsza ikona pojawia sie w poradniku za kazdym razem, kiedy zaleca sie wykonanie benchmarka:
Ponizej przedstawiamy caly proces wykonania standardowego benchmarka wydajnosci, do celów projektu STEP:
- Sprawdz czy w tle dzialaja jakies niepotrzebne programy, aplikacje i procesy. Sprawdz, czy mozliwe jest nadanie programowi antywirusowemu niskiego priorytetu lub ustawienie go na "tryb gry" ("game mode"). Wszystkie procesy dzialajace w tle zabieraja czesc zasobów komputera, które moglyby zostac wykorzystane przez Skyrima. Zwiekszaja one równiez prawdopodobienstwo niestabilnisci gry. Oczywiscie procesy w tle moga byc spokojnie uruchomione, nalezy jednak zawsze wiedziec jakie to procesy, co pózniej pomoze wyeliminowac zródla ewentualnych problemów.
- Jesli zainstalowales niedawno jakies modyfikacje i JESLI NIE UZYWASZ DYSKU SSD, zdefragmentuj dysk twardy, na którym zainstalowana jest gra. Pomoze to uniknac "szarpania" podczas rozgrywki (krótkie, ale czeste zacinanie sie gry). UWAGA! NIGDY NIE DEFRAGMENTUJ DYSKÓW SSD!!!
- Uruchom Fraps w celu pomiaru FPS (klatek na sekunde). Skonfiguruj zapis pliku dziennika (output log file).
- Uruchom GPU-z w celu dokonania pomiarów wydajnosci GPU (procesora na karcie graficznej) oraz pomiarów wydajnosci pamieci. Skonfiguruj zapis pliku dziennika. Wybierz nastepujace parametry (Sensors > Log to File; zapis kazdego z parametrów moze byc ustawiony poprzez odpowiedni wybór z rozwijanego menu):
- GPU Core Clock (MHz)
- GPU Temperature (°C)
- GPU Load (%)
- Memory Usage (Dedicated) - (czyli pamiec RAM na karcie graficznej, tzw. VRAM)
- Memory Usage (Dynamic) - (czyli ilosc VRAM odpwrowadzanej do - o wiele wolniejszej - pamieci systemowej RAM)
- Uruchom Skyrima i rozpocznij nowa gre. Kiedy gra sie zaladuje i pojawi sie dzwiek oraz licznik FPS, wcisnij przycisk rozpoczynajacy benchamrk FRAPS (domyslnie F11).
- Pozwól grze potoczyc sie do pierwszego autosave'u - tuz przed zeskoczeniem z wozu - po czym ponownie wcisnij klawisz benchamrka FRAPS. Spowoduje to zatrzymanie aplikacji. Powinno uplynac okolo 240 sekund od pierwszego uruchomienia benchamrka.
- Wyjdz z gry najszybciej jak to tylko mozliwe i natychmiast zamknij aplikacje GPU-z - spowoduje to zaprzestanie dalszego zapisu informacji do pliku dziennika.
- Otwórz plik dziennki GPU-Z. Odszukaj miejsce, gdzie wartosc GPU Core Clock po raz pierwszy osiaga maksymalna wartosc oraz miejsce, gdzie wartosci GPU Load oraz Dedicated Memory osiagaja maksymalne wartosci i pozostaja na w miare niezmiennym poziomie. (Powinno to byc okolo 50-90 wierszy od poczatku dziennkia). Wykasuj wszystkie poprzedzajace wiersze.
- Przejdz do koncowej czesci dziennkia i wyszukaj miejsce, gdzie wartosci dla GPU Load oraz Dedicated Memory zaczynaja malec (dzieje sie to, kiedy wlaczamy menu i wychodzimy z gry; zwykle jest to okolo 20-40 wierszy danych, zaleznie od tego ile czasu zajelo nam wyjscie z gry i wylaczenie GPU-Z). Wykasuj wszystkie wiersze ponizej. Plik dziennika GPU-Z jest teraz wyczyszczony z "brudnych" danych.
- Przenies dane z dziennika GPU-Z do arkusza kalkulacyjengo i oblicz srednia wartosc oraz maksymalna dewiacje dla nastepujacych danych:
- GPU Load
- GPU Temperature
- Memory Usage (Dedicated)
- Memory Usage (Dynamic)
- Otówrz log FPS Fraps i przekopiuj dane do nowej kolumny w arkuszu z danymi GPU-Z.
- Przykladowy arkusz do pobrania.
- Powyzszy akrusz zawiera kilka kolumn oraz okolo 200 wierszy z danymi. Odpowiednie statystyki to mean (czyli srednia) oraz standard deviation (czyli pomiar rozbieznosci danych wzgledem sredniej). Mozna je obliczyc przez uzycie nastepujacej formuly (wiekszosc programów powinna ja rozpoznac):
 =AVERAGE(A2:A240)
 =STDEV(A2:A240)
Wyniki przykladowych benchmarków uzytkowników:
1.E. Instalacja Aplikacji Uzytkowych
1.E.2. Better Oblivion Sorting Software
Better Oblivion Sorting Software (BOSS) jest jednym z najniezbedniejszych narzedzi sluzacym do zarzadzania modami (pluginami) do Skyrima. Jego glówna funkcja jest zapewnienie wlasciwej kolejnosci ladowania modów podczas uruchamiania gry (tzw. Load Order) oraz nadanie modom tzw. Bash Tags. Sluzy równiez do identyfikacji tych pluginów (czyli plików ESP i ESM, które sa czescia modów), które wymagaja wyczyszczenia oraz podjecia innych, specjalnych akcji (wiecej o tym wkrótce). Pobierz program BOSS i zainstaluj zgodnie z instrukcjami autora.
1.E.3. BOSS Userlist Manager
Boss Userlist Manager (BUM) jest narzedziem pomocniczym dla BOSSa - dostarcza graficzny interfejs oraz mozliwosc recznej edycji masterlisty - czyli pliku, którego BOSS uzywa do zdefiniowania kolejnosci wgrywania modów podczas uruchamiania gry (ponownie: Load Order).
1.E.4. Programy zarzadzajace modami (Mod Managers)
Istnieje kilka aplikacji, które sluza zarzadzaniu modami i instalacja STEP-a. Co prawda modyfikacje do Skyrima moga byc równiez zainstalowane "recznie", bez pomocy programów - ale ze wzgledów technicznych nie jest to zalecane. STEP jest skomplikowanym przedsiewzieciem i odpowiednie programy sa niezbedne, aby instalcja i setup przebiegly sprawnie i bez problemowo. Program typu mod manager sprawia, ze deinstalacja czy tez aktualizacje modów przebiegaja w znacznie prostszy i kontrolowany sposób. Czynnosci te sa praktycznie niemozliwe do poprawnego wykonania bez uzycia mod managera.
- Wrye Bash
- Wrye Bash (WB) jest prawdopodobnie najbardziej zaawansowana aplikacja, sluzaca to zarzadzania modami. Program posiada mnóstwo opcji, które sa przydatne zarówno dla uzytkowników, jak i dla autorów modów. Dosyc wyczerpujacy poradnik (w jezyku angielskim) znajdziecie Wrye tutaj. Poradnik jest napisany w kontekscie projektu STEP.
W chwili obecnej Wrye Bash nie posiada zautomatyzowanego systemu aktualizacji modów kompatybilnego z serwisem Nexus, tak wiec wszelkie update'y musza byc przeprowadzone przez samego uzytkownika. Aktualizacje modów nie sa niezbedne przy projekcie STEP, a ekipa STEP wrecz ODRADZA zamodzielna aktualzacje pojednynczych modów. Nowe wersje modów sa zawsze sprawdzane i testowane przez ekipe projektu zanim zostana dopuszczone do kolejnej wersji STEP, w celu unikniecia potencjalnych konfliktów i blednego dzialania gry.
- Mod Organizer
- Mod Organizer (MO) jest programem, który posiada szeroki wachlarz róznorakich funkcji i mozliwosci. Na szczególna uwage zasluguje mozliwosc wirtualizacji folderów z zasobami Skyrima, co pozwala na utrzymanie faktycznego folderu z gra w "czystosci". Dzieki tej funkcji program pozwala równiez na stworzenie kilku profilów, kazdy z róznym zestawem aktywnych modów. MO umozliwia równiez integracje z serwisem Nexus, co pozwala na latwe i zautomatyzowane aktualizaje modów. Poradnik Mod Organizer jest oczywiscie dostepny w serwisie STEP.
- Nexus Mod Manager
1.E.5. TES5Edit
TES5Edit to narzedzie, które pozwala na "naprawe" pluginów (plików .esp, które sa czescia wiekszosci modów) w celu unikniecia problemów podczas gry. Prawdopodobientwo zawieszenia sie gry (czasami tuz po uruchomieniu!), wystapienia bledów i konfliktów wzrasta proporcjonalnie do liczby aktywnych modów. Niezbedne jest wiec "wyczyszczenie" niektórych pluginów. Wspomniany wczesniej BOSS potrafi zidentyfikowac pluginy, które wymagaja czyszczenia. Poradnik (w jezyku angielskim) jak wyczyscic mody znajduje sie tutaj.
1.F. Dostosowanie plików INI
Pliki konfiguracyjne INI uzywane sa do dostosowania i recznej konfiguracji wielu aspektów gry oraz wspomagaja dzialanie niektórych modów. Ponizsze modyfikacje plików INI maja zastosowanie w wersji Podstawowej STEP. Wersja Wydajnosciowa bedzie wymagac obnizenia niektórych parametrów ustawien, natomiast przy wersji Ekstremalnej STEP mozna te ustawienia zwiekszyc, aby uzyskac lepsze efekty w grze.
Pliki konfiguracyjne INI Skyrima znajduja sie w jednym z nastepujacych katalogów, zaleznie od uzywanego systemu operacyjnego: "Documents/My Games/Skyrim" or "My Documents/My Games/Skyrim,". Standardowe pliki INI zostaly utworzone podczas akcjom podjetym w czesci 1.B poradnika. Ponizsze modyfikacje bazuja na zalozeniu, ze standardowe pliki INI nie byly modyfikowane. Jesli uzywacie Mod Organizera, edycja plików INI odbywa sie przez wybranie opcji [Edit Ini]. Uzytkopwnicy programu Wrye Bash moga zarzadzac i edytowac pliki INI w zakladce INI Tweaks.
1.F.1. Skyrim INI
Go to the bottom of the Skyrim.ini and create the following:
- Increases the distance arrows fly. (From "Arrows and Bolts Tweaks").
[Actor]
fVisibleNavmeshMoveDist=12288.0000
- Places the camera just above your character's head in third-person view, and correct the camera angle in third-person view while on horseback. (From "Third Person Horse Camera"). Provides instant camera-angle switching when switching view types or when mounting/dismounting your horse. (from "Instant Camera POV Switching").
[Camera]
fOverShoulderAddY=0.0
fOverShoulderPosZ=18.0
fOverShoulderPosX=0.0
fOverShoulderCombatAddY=0.0
fOverShoulderCombatPosZ=24.0
fOverShoulderCombatPosX=0.0

fOverShoulderHorseAddY=-72.0
fOverShoulderHorsePosZ=50.0
fOverShoulderHorsePosX=35.0
fActorFadeOutLimit=-100

fMouseWheelZoomSpeed=60.0
f1st3rdSwitchDelay=0.95
iHorseTransitionMillis=001
- Speeds up the book opening animation, and move the HUD elements closer to the borders of the screen.:
[Interface]
fBookOpenTime=200.0

fSafeZoneX=10
fSafeZoneY=10
fSafeZoneXWide=10
fSafeZoneYWide=10
Add the following under [Combat]:
- Shifts the point of aim to the center of the aiming reticule for arrows and crossbows (with this setting targets will be hit where the cursor is placed at approximately 100 feet from the target).
f1PArrowTiltUpAngle=0.7
f3PArrowTiltUpAngle=0.7
f1PBoltTiltUpAngle=0.7
f3PBoltTiltUpAngle=0.7
Add the following under [Display]:
- Fixes the shadow flickering issue. Shadow flickering is caused by updating sun shadows.
fSunShadowUpdateTime=0
fSunUpdateThreshold=2.0
- Increases the time that blood decals remain visible (tweak from “Enhanced Blood Textures” mod).
fDecalLifetime=512.0
- Helps reduce Z-fighting, but may increase clipping, especially with a higher field of view. See Gopher's More Z-fighting video for more information and examples.
fNearDistance=18.0000
Add the following under [General]:
- Disables the annoying intro sequence.
sIntroSequence=
- Prevents crashes when loading into a large interior area.
iLargeIntRefCount=262144
- Helps prevent lighting “pop-in” by pushing back the distance at which the flicker/pulse animation loops begin.
fFlickeringLightDistance=8192
1.F.2. SkyrimPrefs INI
Modify the following under [Controls]:
- Disable mouse acceleration.
bMouseAcceleration=0
Add the following under [Decals]:
- Enables higher resolution blood decals on NPCs.
bDecalsOnSkinnedGeometry=1
Modify the following values under [Display]:
- Valid values range from 0 - 7. Lower values will sharpen shadows (not the resolution), making vegetation more "vibrant." It gives a subtle increase in performance, but also gives more pixelated and striping effects to shadows. Higher values will make shadows softer and more blurred. Consider a value of two if using ENB.
iBlurDeferredShadowMask=3
- Enables shadows rendering on trees.
bTreesReceiveShadows=1
- If running Extreme STEP using 'Ultra' setting for shadow shadow quality to in 1.B.1, this tweak will further improve shadow resolution at a performance cost. Consider also raising 'iShadowMapResolutionSecondary' to 4096 on high-end machines. For Performance or Baseline STEP, do not change the default values for either of these settings.
iShadowMapResolutionPrimary=4096
iShadowMapResolutionSecondary=2048
- Improves the blood decals number per scene (from “Enhanced Blood Textures”).
iMaxDecalsPerFrame=256
- ENB users ONLY! Enabling these without an ENB will decrease performance with no visual impact and possibly introduce excessive shadow striping.
bDrawLandShadows=1
bFloatPointRenderTarget=1
Modify the following under [TerrainManager]:
- Helps reduce Z-fighting, but may increase clipping, especially with a higher field of view. See Gopher's More Z-fighting video for more information and examples.
fBlockMaximumDistance=500000
fBlockLevel1Distance=140000
fBlockLevel0Distance=75000
fSplitDistanceMult=4.0
Modify the following under [MAIN]:
- Also helps reduce Z-fighting. See Gopher's More Z-fighting video for more information and examples.
fSkyCellRefFadeDistance=500000.0000
Reminder - Essential Guides
The following guides form the base from which STEP builds and provide details on many of the topics mentioned in this Guide.
- Skyrim Installation Guide (SIG) – Comprehensive installation and configuration guide to Skyrim and its DLCs, mods, extensions, and utilities.
- Wrye Bash Guide (WBG) – A practical, hands-on introduction to Wrye Bash using STEP as a working example.
- Mod Organizer Guide (MOG) – A WIP with some advice and troubleshooting suggestions.
Final Notes
Install mods in the order that they are presented in the following tables in order to achieve an aesthetically and mechanically well-vetted result. More experienced or adventurous modders may want to use STEP as a loose guide.
Information from certain mods used can write additional information into save games. Thus, some mods can continue to affect the game even after the mods are removed or updated.
From the Bethesda document, Skyrim Mod Troubleshooting: Best Practices:
"When you play Skyrim with a mod, in most cases, the new data for the mod will be written into any new saved games you create. For example, if you play Skyrim with Mod X and create a save, the next time you load that save, the game will expect Mod X to also be loaded. If you no longer want to play Skyrim with Mod X, it is best to unload Mod X (by unchecking the plugin under Data Files in your Skyrim launcher) and loading a save that does not require Mod X, usually an older save or a backed up save."
The short version is “Never continue with a save once a mod it relies upon has been removed.” Although this is good advice, there may be occasions when it is inconvenient to revert to an older save. The Troubleshooting Guide provides a "best-practice procedure" for attempting to ‘clean’ the effects of a removed mod from a save game.
FINALLY...
ALWAYS read the ReadMe and other mod-related documentation that comes packaged with most mods. This includes the mod description on the Nexus. If the mod author has seen fit and taken time to create these reference materials, then they are relevant and important in the eyes of the mod author. This means that they are relevant and important to you!
STEP 2
Mod Table Reference
Below is the legend and reference for the mod tables used in this Guide. Users should refer back to it when confused about a mod listing.
| Mod Name | Baseline | Notes | ||
|---|---|---|---|---|
| Mod (patches not required) |
Baseline | Notes | ||
| Mod (requires patches) |
Baseline | Notes |
Mod Table Legend
The following is an example of the mod tables, found in Step 2 below, followed by the legend for reading the table. Users should familiarize themselves with this information.
| Patch Requirement | A green vertical bar indicates that the mod is required by the Step Conflict Resolution Patch, and a red bar indicates that the LW patch is required. | ||
| Mod Name | Nexus mod name presented as a link to Nexus for download. | ||
| Link to the mod's wiki page, which includes various information about the mod. | |||
| Baseline | This notes the STEP Baseline version or option of the corresponding mod that should be installed, and usually refers to options affecting performance/quality. General suggestions are located in the "Notes" column; see below. | ||
| Quality | Indicates if there are lower or higher quality options for the mod relative to the Baseline recommendation: | ||
| | |||
| | |||
| | |||
| Notes | Brief notes that apply to the mod or installation. In some cases, mods with several options will include a suggested option. These suggestions will take the form of: "STEP recommends 'Option A'." In other cases, there may only be one appropriate option, which fits the STEP Mandate. These instructions will take the form of: "Download and install 'Option A'." Users will also see links displayed as: Detailed instructions available. Users should follow these links to find detailed instructions for installing the mod. |
NOTE
Consider the following while installing mods:
- Mods should be installed in the order that they are listed to ensure that mods further down the list overwrite those occurring before them. This is necessary to ensure the desired in-game effect. Mods are otherwise listed in alphabetical order within each section, and any deviations from this are purposeful to achieve the desired outcome.
- To achieve the best results, “Loose files” (non-BSA) versions of mods should be used. If a "loose files" version is not available, extract the BSA as described here.
- Always install plugins (ESPs/ESMs) unless otherwise noted. If there are not any notes associated with a particular mod, then all options fit the STEP mandate. The notes only provide instructions where necessary; otherwise, STEP encourages user customization.
- Unless otherwise stated, follow BOSS's advice with regards to mod cleaning.
2.A. 01-Tools
- Standalone applications that aid in the management of the modding process
| Mod Name | Baseline | Instructions |
|---|
| BOSS |
Detailed Instructions available | |||||
| It is recommended to install BOSS directly to your Skyrim game directory instead of its default location at the top of your system drive, unless you are using an SSD on which you would rather conserve space. This allows Mod Organizer to automatically detect and add BOSS to your list of executables.
Mod Organizer users: If you do not want to follow the above advice as to where to install BOSS, do the following in order to add BOSS to the list of executables:
Now each time you want to run BOSS, simply select it from the drop-down menu at top right and click Run. | ||||||
| BOSS Userlist Manager |
Detailed Instructions available | |||||
Since you must launch BOSS Userlist Manager (BUM) through Mod Organizer in order for it to recognize your mods, add BUM to the list of executables by doing the following:
Now each time you want to run BUM, simply select it from the drop-down menu at top right and click Run. | ||||||
| Wrye Bash |
Installer version | Detailed Instructions available | ||||
| If updating to 306, you need to uninstall your previous version.
MO users - Install and be certain to tick the stand-alone executable version when prompted for the path to the Steam/Skyrim directory. Wrye Bash users - see the Wrye Bash Guide. Since you must launch Wrye Bash through Mod Organizer in order for it to recognize your mods, add Wrye Bash to the list of executables by doing the following:
Now each time you want to run Wrye Bash, simply select it from the drop-down menu at top right and click Run. | ||||||
| Mod Organizer |
Detailed Instructions available | |||||
Mod Organizer 2 installation instructions have been moved to the SSG. Follow guides for usage instructions.
Do not run MO yet! It will be run for the first time later in the guide. | ||||||
| DDSopt |
DDSopt - pre-release - update 4 | Detailed Instructions available | ||||
| For users who do not want to do a custom run with DDSopt, STEP now provides the STEP Optimized Vanilla Textures which is installed during in the Fixes section of the STEP Guide. There is no need to run DDSopt if choosing to install this new mod from STEP.
Do NOT run through Mod Organizer! See DDSopt Guide for usage details. The Quick-Start Guide is a good place to start. | ||||||
| Optimizer Textures |
| TES5Edit |
Detailed Instructions available | |||||
To clean any mods that require it, run "Quick Auto Clean". It will allow users to select the mod to clean and automatically clean it. | ||||||
| Skyrim Performance Monitor |
Detailed Instructions available | |||||
Installing Skyrim Performance Monitor
Please remember to completely uninstall any previous versions of SPM prior to upgrading. Initial Setup of Skyrim Performance Monitor
Configuring Skyrim Performance Monitor for Use with Mod Organizer
| ||||||
2.C. 02-Extenders
- Mods that expand on the inherent functionality of a game or another mod without themselves affecting content
| Mod Name | Baseline | Instructions |
|---|
| SKSE |
Detailed Instructions available | |||||
Download and install the latest archive:
[Display] iTintTextureResolution=2048 [General] ClearInvalidRegistrations=1 The SKSE folder structure, including the skse.ini should look like the following: Restart MO; if SKSE is installed correctly, MO will detect it and show in the executables drop down. Use the SKSE executable when launching Skyrim from MO from now on. | ||||||
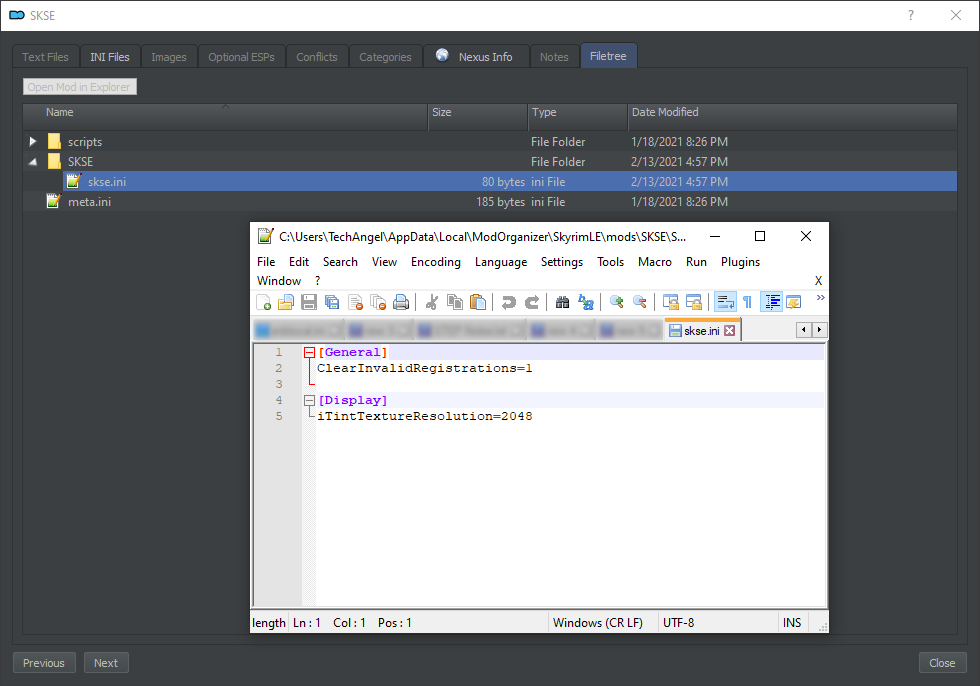
2.D. 09-Fixes
- Mods have a programmatic component that fixes various bugs and/or inconsistencies
| Mod Name | Baseline | Instructions |
|---|
| Ancient Nord Armor Fix |
| Appropriately Attired Jarls |
| Argonian Decapitation Fix |
This is now covered by USKP 2.0.5. |
| Barrow Button Fix |
| Bowlegged Jump Fix |
| Brawl Bugs Patch |
Detailed Instructions available | |||||
| Only use the "Compatibility Edition" main file. Not necessary for Extended users that are installing Enhanced Blood Textures. | ||||||
| Fast Travel Timescale Fix |
| Nitpick |
Users NOT using Mod Organizer should install this mod. The fixes are already included in Mod Organizer. |
| Unofficial Skyrim Patch |
| Unofficial Dawnguard Patch |
| Unofficial Hearthfire Patch |
| Unofficial Dragonborn Patch |
| Acquisitive Soul Gems |
Vanilla users: Use the old v2.1 file. |
| Waterbreathing Breathless Emerge |
2.E. 16-Interface
- Mods that affect any aspect of the user interface
| Mod Name | Baseline | Instructions |
|---|
| Better Book Names |
Use the "Vanilla Version".
Dawnguard users: Use the "Vanilla - Dawnguard" file. Dragonborn users: Use the "Vanilla - Dragonborn" file. Dawnguard and Dragonborn users: Use the "Vanilla - All DLCs" file. |
| Better Dialogue Controls |
| Better MessageBox Controls |
| Categorized Favorites Menu |
| Dungeon Quest Awareness |
May cause minor spoilers. |
| Immersive HUD |
| Lockpicking Interface |
STEP recommends the without wings around keyhole main file. |
| Lore-Based Loading Screens |
| Main Font Replacement |
Fertigo Pro | DO NOT USE this mod if Skyrim language is not set to English! |
| Not Another Colored Map Icon Mod |
STEP recommends installing only the optional "NACMIM - Full" file. Turn off version checking for maps in the MCM: SkyUI menu. This is necessary until NACMIM is made fully compatible with SkyUI 4.0 or higher. |
| Simple Crosshair |
STEP recommends"Normal". |
| Smaller Cursor |
STEP recommends the main file. |
2.F. 06-Models and Textures
- Mods that replace existing models or textures
| Mod Name | Baseline | Instructions |
|---|
| High Quality 3D Map |
Hi-res meshes, 1k normals | STEP recommends installing both the HQ3DMap - Meshes Hi-Res and HQ3DMap - Normals Original main files. Do not install any of the files with "Textures" in the file name. Choose the 03 - High 1024x1024 option in the installer. |
| Better Dynamic Snow |
| No Stretching |
Full |
| Skyrim HD |
LITE | Detailed Instructions available | ||||
| STEP recommends to download and install only the Landscape LITE optional file.
The following files from the main file should not be used, so either hide them with Mod Organizer in the Filetree or Data tab after installation or remove them from the mod package. Hide the following files:
| ||||||
| Serious HD |
1024 | Detailed Instructions available | ||||
| Download and install the "Serious HD Retexture LANDSCAPE 1024px" file found in the Old Versions section and the "Serious HD Retexture RIFTEN 1024px" file found in the Optional Files section.
Hide the following files:
| ||||||
| AOF Farmhouses |
| Skyrim Flora Overhaul |
Basic | Detailed Instructions available | ||||
| Download and install the Skyrim Flora Overhaul Basic Edition v1.87 main file. Also install the Dragonborn addon v02 main file. Select [Merge] when asked while installing the addon.
| ||||||
| Chimneys for Skyrim |
| Dragon Glyphs-Fixed |
Dragon Chiseled | Detailed Instructions available | ||||
| Step recommends the Dragon Chiseled Main File.
Hide the following files/folders:
| ||||||
| Enhanced Night Skyrim |
Download and install only the Enhanced Night Skyrim v04 Low Stars optional file. |
| HD Enhanced Terrain |
1024 | Step recommends: Hd Enhanced Terrain and Map snow 1024x1024 Version Old File. |
| High Quality LODs |
Hi-Res Meshes | Install the HQLODs - Meshes Hi-Res main file. Do not install the normals. For slightly better performance at slightly less quality, the medium-resolution meshes can be used. |
| Milky Way Galaxy |
2048 |
| Real Ice |
1024 | Detailed Instructions available | ||||
| Download the All-in-One Pack. Choose the 'With Parallax' option (even without using ENB; this is a parallax effect without an ENB requirement) and then the "Half Icecube-Half Dull" option (00 Dull and Ice). The BCF includes a wizard and Fomod to simplify installation --> | ||||||
| Realistic Tundra Moss |
1024, Yellow |
| Re-Defined Dungeons |
1024 | Detailed Instructions available | ||||
| Download and install the Re-Defined Dungeons 1024x1024 optional file. This mod is not packaged correctly. When installing this mod, right-click on the Data folder and choose [Set data directory]. Okay [OK] to install.
If using the main file (2048x textures), hide or remove the candle textures as they conflict with SMIM. The recommended version (1024x textures) does not contain these textures and does not have this issue. | ||||||
| Trees HD |
High | Detailed Instructions available | ||||
| If installing with MO:
Hide the following files: meshes/landscape/trees (entire folder) textures/landscape/trees/Vurt_Pine01.dds textures/landscape/trees/Vurt_Pine02.dds | ||||||
| Vibrant Auroras |
| Visible Windows |
Medium version | STEP recommends the "Gritty" option for all windows and the "Default" for all color options but "Yellow Tint" for both Solitude and Whiterun. BCF Available. BCF needs 2 files (Reduced Night Glow optional file also needed) |
| WATER |
Medium | Detailed Instructions available | ||||
Uptional Addons
Medium & High Resolution (waves)
Dragonborn
Ocean, March & Lake Hue
| ||||||
| Whiterun Trellis Redesigned |
1024 |
| Windmills Resized |
1.5x | Install the default (1.5x) version. (Has minor clipping issues with the stables in Solitude when not used in combination with SkyFalls and SkyMills.) |
| Better Circlets |
1024x512 |
| Accingite Vos |
| Weapon Retexture Project |
| Elemental Staffs |
1024 | Install the Main File and merge the Elemental Staffs LE Basic Optional File. |
| Elven Weapons for Silence |
Detailed Instructions available | |||||
| If using the STEP recommended options for Book of Silence which installs the Gold Eleven Armor, then his mod can be skipped entirely.
If using the Black Eleven Armor, the following is recommended:
| ||||||
| Improved Closefaced Helmets |
Detailed Instructions available | |||||
| Download and install the "Improved Closefaced Helmets (Legendary Edition)" and the "Update - Male corundum Dragon Priest mask texture fix" update file. [Merge] when asked for installing the update file. | ||||||
| Nightingale Prime |
Leather |
| Not Really HD-Mask of Clavicus Vile |
STEP recommends "Wrecked". |
| Shield of Ysgramor |
1024 |
| Yuril Rings |
1k | STEP recommends "Gold Circle". |
| The 418th Step |
Snow Version |
| Better Bones |
| Better Shadowmarks |
| Designs of the Nords |
| Destructible Bottles |
| Detailed Chests |
1024 | STEP recommends "Washed-Out Dirty". |
| Detailed Rugs |
Main File | Download and install the Detailed Rugs v1-5 Main File. |
| Golden Gods Shrines |
STEP recommends "default" on all options. |
| HD Baskets |
512 x 1024 |
| HD Linens |
| HD Sacks |
Step recommends: HDSacks14TypeBBig and HDSacks14TypeBSmall Main Files. |
| HQ Skyrim Map |
2048 |
| Intricate Spider Webs |
High |
| Lockpick Inventory Remodel |
| Ultimate HD Torch |
1024 | Install the Main File and Ultimate HD Torch -less glowing cloth- Optional File. |
| New Thinner Torch |
Download and install the Ultimate HD Torch by rheadude compatible Optional File. |
| Not Really HD-Display Case |
STEP recommends "Smudged Glass". |
| Not Really HD-Keys |
With normals |
| Pilgrim's Delight |
Step recommends: Pilgrims Delight - Legacy Optional File. |
| Realistic Instruments |
| Realistic Paper |
Step recommends: Realistic Paper DARK Optional File. |
| Septim HD |
Detailed Instructions available | |||||||
| ||||||||
| Silly Level of Detail-Wine Cellar |
Install both the Main and Optional Files. |
| Skyrim Redesigned |
Detailed Instructions available | |||||||
| Download and install the FOMOD version and install according to the instructions below: DO NOT use the STEP option in the installer. It pertains to old versions of the Guide.
Users who experience black and purple or rainbow colors on their money bag and alchemy lab tables need to set iTexMipMapSkip to the value of 0. This is found in the SkyrimPrefs.ini file under the [Display] header. | ||||||||
| Soul Gems Differ |
Detailed Instructions available | |||||||
| Download and install the Soul Gems Differ - All-In-One main file.
| ||||||||

| Super Realistic Ore |
Download the Just the textures optional file. This mod is not packaged correctly. Right-click on Data and choose [Set data directory]. Click [OK] to install. |
| Sweet Mother |
| Bellyache's Creature Pack |
Medium | Detailed Instructions available | ||||
| Use the Default Animal Replacement Med Res file located in the Miscellaneous Files.
Hide the following files/folders:
| ||||||
| Footprints |
Install the Footprints v1_00 - Legendary main file. Clean save required if updating from 0.99 |
| Deadly Spell Impacts |
Medium | Detailed Instructions available | ||||||
If issues arise from this mod, try installing the low resolution version. | ||||||||
| Enchantment Effect Replacer |
STEP recommends "2XRes". |
| Improved Weapon Impact Effects |
| Ultimate HD Fire Effects |
Medium | Step recommends: Ultimate HD Fire Effects -Medium Resolution- Main File. |
2.H. 08-Character Appearance
- Mods that affect the appearance of the player character or NPCs
| Mod Name | Baseline | Instructions |
|---|
| Consistent Older People |
Install the Consistent Older People All NPCs USLEEP Main File. |
| AOF Believable Hair |
| Better Beast Races |
Lite | This mod is not packaged correctly. When installing this mod, right-click on the Data folder and choose [Set data directory]. Okay [OK] to install. |
| Better Freckles |
This mod is not packaged correctly. When installing this mod, right-click on the Data folder and choose [Set data directory]. Okay [OK] to install. |
| Birds of Skyrim |
Lower resolution |
| Cover Khajiits |
1024 | Install both Main Files. Merge when asked. |
| Female Vampires Have Fangs |
| Frost Atronach HD |
| HQ Beards |
Lite |
| HQ Eyebrows |
Ultra light |
| Natural Eyes |
128k |
| New Children |
Detailed Instructions available | |||||
| Mod is not packaged correctly. Double-click child_detail_dirt. Right-click on data and choose [Set data directory]. Click [OK] to install. | ||||||
| Pond Fish |
| XCE-Dawnguard |
This mod is not packaged correctly. Right-click on Data and choose [Set data directory]. Click [OK] to install. |
| More Village Animals |
Use all three Main Files. |
2.J. 05-Animation and Physics
- Mods that affect animations or physics
| Mod Name | Baseline | Instructions |
|---|
| Better Turn Animation |
Detailed Instructions available | |||||
| Install both the main file and the Fix Crossed Swords and Turn with Leg move update file.
Hide the following files:
| ||||||
| Enhanced Projectile Soul Trap |
Use the "With Aquistive Soul Gems" version. |
| Finer Dust |
| Get Snowy |
Use the main "v4.x" file. |
| No Spinning Death Animation |
Detailed Instructions available | |||||
| This mod is now included in all versions of the STEP Patches: STEP Core Patch, STEP Extended Patch, and both versions of the STEP Combined Plugin.
If not using ANY of the STEP Patches:
| ||||||
| Rainbows |
| Running With Bows |
| Shooting Stars |
| Skyrim Performance Plus |
Detailed Instructions available | |||||
| Recommended for all users and particularly those with lower-end systems and those with performance issues.
Use the following three Main files:
... and one of the following: | ||||||
| Skyrim Sunglare |
This mod is currently unavailable. |
| Warmer Magic Lights |
Mod page contains various compatibility patches. Only install one of the ESPs from "Warmer Magic Lights v2_Compatibility_Patches". STEP recommends "Warmer Magic Lights v2.esp". Comparison images can be found here. |
2.L. 07-Sounds and Music
- Mods that affect sounds or music
| Mod Name | Baseline | Instructions |
|---|
| Activate Fail Noise Removal |
| Ambient Seagulls |
| Better Animal Footsteps |
Detailed Instructions available | |||||||
| ||||||||
| Better Horse Pain Sounds |
| Heart of the Beast |
High Agression |
| Immersive Thunder |
This mod is not packaged correctly. Double-click on ImmersiveSkyrimThunderV6. Right-click on Data and choose [Set data directory]. Click [OK] to install. |
| Improved Combat Sounds |
| Roosters At Dawn |
| Thundering Shouts |
Install only the Thundering Shouts - loose files Optional File. |
2.M. 10-Gameplay-General
- Mods that affect general or multiple gameplay mechanics
| Mod Name | Baseline | Instructions |
|---|
| Ars Metallica-Smithing |
| Auto Unequip Ammo |
Detailed Instructions available | |||||
In the MCM settings for Auto Ammo Unequip, STEP recommends changing following settings:
| ||||||
| Candle Lanterns of the North |
Use the "Dawnguard Edition" file. |
| Dark Brotherhood to Misc |
Currently NOT recommended. Use the optional in Even Better Quest Objectives instead. |
| Death Cam Duration Options |
| Disable Thieves Guild Autostart |
| Dynamic Fires |
| Lantern Caretakers |
Requires "Lanterns of Skyrim" |
| More Salt Please |
Also install the optional "Dragonborn Addon" file. |
| Move It Dammit |
Less Wait Time |
| No NPC Greetings |
Sligtly Reduced | Included in every version of the STEP Patches, STEP Core Patch, STEP Extended Patch, and both versions of the STEP Combined Plugin. |
| Realistic Crime Radius |
| Wearable Lanterns |
No BSA |
| Lanterns for Caravans |
No BSA |
| Lanterns for Guards |
No BSA |
| When Vampires Attack |
Post-Installation Housekeeping
Once all mods have been installed and are ready to play, be certain to either:
- Start a brand new character, or
- load the save game generated just after character creation if it exists, or
- load an existing character after clean saving the relevant save game.
STEP 3
3.A. Technical Tips
The following is a good place to begin, but be certain to also check the Troubleshooting Guide. Also, search the support & Troubleshooting forum on the STEP Boards,
3.A.1. Maximizing STEP
A heavily modded Skyrim can bring even a very powerful system to its knees. Maximum visual quality is highly dependent upon total on-card graphics-dedicated video memory (VRAM), the number of GPUs, and monitor resolution. The goal should be to maintain 32 or more FPS on average without any noticeable stuttering. Following are some enhancements that users with rather powerful systems might be able to take advantage of:
- Try using SSAO (using video driver settings) for better quality graphics and note the performance hit.
- Use one of the STEP-recommended ENB configurations.
- Make sure Skyrim.ini and SkyrimPrefs.ini are writable and, using the Skyrim Launcher, max out ...
- anti-aliasing
- anisotropic filtering
- view distances
- shadow quality
- texture quality
3.A.2. Fix game launch crash after installing STEP
For crashes to desktop (CTDs),
- Set the Skyrim executable "TESV.exe" to run as administrator (right click TESV.exe > Properties > Compatibility > Check Run this program as administrator).
- If using RCRN or any other FXAA-Injector/ENB mod, turn off any on-screen display programs and monitoring tools such as Fraps, ATI Tray Tools, MSI Afterburner, GPU-Z, etc.
- Get the latest DirectX runtime installed.
3.A.3. Defrag the Hard Drive
For hard drives (not SSDs), this is a very important task once most/all mods are installed. The Windows defrag utility may be used, but it is sub-standard. A couple of the best free utilities are Defraggler and Auslogics Disk Defrag. Do NOT defrag an SSD as it will detrimentally affect its lifetime.
3.A.4. Semi-Invisible People & Misbehaving Walls
Be certain that ATI Antialiasing is set to Multi-Sample and NOT Adaptive. Also, remember to download the latest ATI drivers. Also be certain that bFloatPointRenderTarget=1 in the SkyrimPrefs.ini if using ENB.
3.A.5. Using Windowed Mode (ATI)
If having stuttering problems or CTDs in full screen mode, try "full screen" windowed mode by downloading Simple Borderless Window. The "Simple Borderless Window" launcher SBW.exe launches SKSE, so start the game through SBW.exe.
3.A.6. Increase Overall Performance
If after following the whole guide and installing the enhanced graphics, the game is unplayable due to low performance, try one or more of the following:
- Disable SSAO or Supersampling AA (or both) if enabled.
- Reduce shadow quality from the Skyrim Launcher.
- Install the performance-friendly versions of textures where applicable.
- Consider texture optimization.
- Reduce The [View Distance] settings in the game launcher (see 1.B.1).
3.A.7. Texture Shimmering, Etc.
Refer to the Z-Fighting Guide.
3.B. In-Game Tips
The console can be activated by pressing the tilde ([~]) key, often located just below [Escape], while in-game.
3.B.1. Optimize Field of View (FOV)
In the console enter the following using a number from 66-100, depending on resolution and screen ratio. Default is 65 (4:3 screens), but 70-75 works nicely for 16:10 screens and 75-80 works nicely for 16:9 screens:
FOV ##
This change will be permanent in the saved game. Other INI FOV tweaks don't require opening the console, but they don’t 'stick' and can corrupt the game. Also note that high FOV can cause a performance drop for some configurations.
3.B.2. BIG Frame Drops During Cell Loading
This is a likely indicator that VRAM is too often operating at or beyond capacity (see 3.A.6).
User Contributions
STEP can only get bigger and better with help from the user community. Even simply maintaining the current STEP is too much work for the core STEP team to ensure that the highest quality is maintained. We need people to help us identify mods that are thought to improve Skyrim while adhering to the STEP Mandate. We also need ongoing reviews and updates on mods that may be causing problems or that stray from the STEP philosophy. Finally, we need help from the community in terms of testing, benchmarking and analysis. More detail is presented in the Mod Testing Guide.
In order to suggest a mod, visit the Mod Suggestions section of the STEP Forums.
NOTE
The STEP team will be beta testing a new mod-testing procedure and interface currently in final stages of development here on the STEP Wiki. Anyone interested in testing mods of any kind --whether included in STEP or not-- should contact the STEP administrators by email or on the forums (click on the link in upper left of header).
Special Credits
The STEP administrators would sincerely like to thank (from the bottoms of our fuzzy little hearts):
- The authors of mods recommended in STEP
- The core STEP Community for feedback, suggestions and input
- The STEP beta testers ... for their good humor and rigorous analyses
- The Nexus community
- Bealdwine, EisDrache & Frihyland - site founders on indefinite leave (we hope you guys are well!)
- Outstanding v2.2.5 contributors - dstansberry, Eliian, Kelmych, Neovalen, torminater, WilliamImm, Wormheart, and many others.
- Bethesda Softworks for Skyrim (and TES in general)
Site Donors
We have had a handful of generous user donations to keep this site alive and viable. Most of these donors have not left their user names, so they will remain anonymous; however, the following are site contributors that have generously given a bit of their livelihood in support of STEP. For that, we thank them immensely!
- geeee785
- Lauren
- solist
- 26 additional generous contributors that will remain anonymous until their user names are made known to us.
The core STEP team is:
- Farlo - Mediawiki developer & extraordinaire, Mod-list co-compiler, forums admin, site founder
- MontyMM - Solutions developer (Semi-Automatic STEP), site founder
- stoppingby4now - Main site developer, Semantic Mediawiki developer & extraordinaire, site founder
- TheCompiler - STEP creator, mod-list extraordinaire
- z929669 - Wiki & forums content editor, main site administrator, hosting maintenance, site founder
- STEP Forum moderators: Kelmych, rootsrat, techangel85, torminater
{{#css:MediaWiki:StepGuide.css}}