
User:Kesta/FO4PersonnalGuide: Difference between revisions
TobyKenobi (talk | contribs) |
|||
| (337 intermediate revisions by 4 users not shown) | |||
| Line 1: | Line 1: | ||
__NOTITLE__ | __NOTITLE__ | ||
<br><br> | <br><br> | ||
{{ | {{alert|type=construction|size=80|text=BABY is a WIP. While it is usable in its current state, the most interesting sections (gameplay, crafting, settlements,...) are currently hidden. | ||
The guide is currently being updated to revolve around MO2 features, and cooler visuals... but author's computer is starting to have a few issues and need an upgrade :P }}<br><br> | |||
'''Game''' : Fallout 4 <br> | <div style="font-size:18px;">'''Game''' : Fallout 4 <br> | ||
'''Title''' : ''Boston Atomic Bomb Yankee''<br> | '''Title''' : ''Boston Atomic Bomb Yankee''<br> | ||
'''Forum thread''' : [ | '''Version''' : {{User:Kesta/BABYVersion}} <span style="font-size:10px;">[https://stepmodifications.org/wiki/User:Kesta/BABYVersion changelog]</span><br> | ||
'''Author''' : Kesta <br> | '''Forum thread''' : [https://stepmodifications.org/forum/topic/9430-wip-fo4-personnal-guide/ HERE] <br> | ||
'''Author''' : [[User:Kesta|Kesta]] <br></div><br><br> | |||
[https://www.paypal.com/cgi-bin/webscr?cmd=_s-xclick&hosted_button_id=N5TLCEMXY7KQU https://www.paypalobjects.com/en_US/i/btn/btn_donate_LG.gif]<br> | |||
{{fc|#e0dfff|Help support STEP! ALL donations are applied to operating expenses.}}<br> | |||
== Introduction == | == Introduction == | ||
This guide is | This guide is destined to enhance your fallout 4 experience using the extended modding possibilities made possible by both Bethesda and its awesome community. Of course, as every modding guide, it'll be down to personal preferences. | ||
Boston Atomic Bomb Yankee doesn't mean anything... yeah, I know that. It's just some words related to the Fallout 4 universe I mashed-up together. But who care, the acronym is awesome ! | |||
While I'm trying to provide as much explanations and tips as I can, BABY isn't suited for complete beginners. If you've never modded a Bethesda's game before, you might have a hard time following the guide. | |||
In BABY, you'll find some great visuals enhancements and retexture. That said, I consider Fallout 4 default visuals to be already decent, so I'm not aiming at "modding everything". Some things just don't need to be improved.<br> | |||
This means that textures and other visuals mods linked here will either be covering some critical aspects where Fallout 4 failed to be good-looking, unexpected but awesome improvements, or personals coup de coeur.<br> | |||
As for gameplay changes, BABY essentially aim to expand player's capabilities rather than overhauling existing ones. I haven't played the game enough yet to get bored already, and don't feel like in-depth gameplay changes balance overhaul is needed to enjoy the game. This might change in future versions though.<br> | |||
Finally, about overall compatibility : The current number of available mods make it rather easy to track down compatibility issues. Patches will be created specifically for this guide when they're not already available on their respective mod page, so you don't have to worry about it as long as you follow the instructions and advice properly. | |||
<center>[[File:plzstdby.jpg|600px]]</center> | <center>[[File:plzstdby.jpg|600px]]</center> | ||
{{TOC | {{TOC|limit=4}} | ||
== The beginning == | == The beginning == | ||
=== How to read this guide ? === | |||
[https://www.youtube.com/watch?v=8a3-QPqupOI From the top to the bottom], obviously ! | |||
==== General Informations ==== | |||
Everything but the mod list under [[User:Kesta/FO4PersonnalGuide#Time_to_mod_!|Time to mod]] is pretty much mandatory for a decent modding setup, though you can skip it / skim through if you're already familiar with commons modding tools, tweaks and extenders.<br> | |||
All the ramble is there so the mod installation section can be streamlined in an easy-to-follow step by step flow (''or should I say ftep by ftep ? ''). | |||
The mod installation part have been broken down in various categories, as you can see in the content resume on the right.<br> | |||
The way mods are split between categories isn't only thematic but also technical. Save for a few exceptions, there should be close to no conflicts across mods from different section. This mean that you can install categories in a non-linear order, or only those you're interested into, and still get a perfectly functional modded game. | |||
==== Mods installation ==== | |||
Mods in each sections should be installed in the order they appear, as this is the order they'll overwrite each others if need be. | |||
Mods are presented as a "card", providing informations about everything you need to know about the mod, from download link to mod-specific installation instructions. | |||
Each card is preceded by a flare: | |||
* {{User:Kesta/flare|Core}} This mod is a full part of the guide and is expected to be installed. | |||
* {{User:Kesta/flare|Tool}} This isn't a mod, but a modding utility to be used during your modding adventure. | |||
* {{User:Kesta/flare|PERF}} This mod improve game's performance, but might slightly decrease visual quality. | |||
* {{User:Kesta/flare|OPT}} This mod is optional. This is an addition considered useful to the setup, but might be more of a personal preference. | |||
* {{User:Kesta/flare|HQ}} This mod is to be used only for users looking for a High Quality visual experience. This doesn't necessarily means it should be avoided at all cost by low-end system users, but simply that the performance hit might not be worth the visuals improvements on weaker machines. | |||
* {{User:Kesta/flare|NSFW}} This mod contains Not safe For Work content. No childporn, I promise, but depending on where you are when browsing this guide, it's better for you to know. Of course, NSFW are still considered {{User:Kesta/flare|Core}}, because of reasons. | |||
There is no {{User:Kesta/flare|LQ}} flare for main downloads. Obviously, a mod deserving such flare would just be downgrading Vanilla's visuals, without significant performance improvement that would win him the {{User:Kesta/flare|PERF}} flare.<br> | |||
We don't want this kind of mod for BABY. If you need to downgrade vanilla visuals to play the game, here is the best advice I can give you : Close this page, uninstall FO4, find a job, earn money, buy a better computer with the money, come back modding, play, loose your job, keep playing. | |||
The files to download are listed in a similar layout than the one in Nexus. They should be installed in the same order as they appear in the list. This means that the answer to "''should I overwrite ?''" will always be YES between two files belonging to the same mods, except if explicitly stated otherwise. | |||
==== Options and Alternatives ==== | |||
Listed mods may also have potentials alternatives and options, aside the main files to download.<br> | |||
* When there is {{Fc|Important|'''Optional'''}} files listed, this means you have to install them {{Fc|Important|along with the proposed files}} if you want them.<br> | |||
* On the contrary, {{Fc|Important|'''Alternatives'''}} files are meant to {{Fc|Important|replace the files}} from the main download entirely.<br> | |||
Options and alternative usually have flares as well, indicating why they're proposed to complement/replace the main files : | |||
* {{User:Kesta/flare|OPT}} This is a nice feature, but falls under personal preference. | |||
* {{User:Kesta/flare|HQ}} This is an higher visuals version of the {{User:Kesta/flare|Core}} one, worth installing on decent machines. | |||
* {{User:Kesta/flare|LQ}} This is a lower visuals version of the {{User:Kesta/flare|Core}} one, in case the main file is too performance-heavy for low-end machines. | |||
* {{User:Kesta/flare|SAFE}} There is a safe for work version available, to prevent sexual or not-so-politically-correct content. | |||
* {{User:Kesta/flare|Easy}} This version will make gameplay easier. | |||
* {{User:Kesta/flare|Hard}} This version will make gameplay harder. | |||
Note that not all the files available on the nexus mod page are listed under options/alternatives. This isn't laziness, but usually means that the "lower resolution" version isn't worth installing, the "high quality" one is just overkill, or simply that other files aren't relevant in the context of BABY. | |||
==== Guide versions ==== | |||
At the beginning of the guide, you maybe noticed the 4-digits version number. It allow you to keep track of the advancement of the guide. The current version being {{User:Kesta/BABYVersion}} | |||
More informations on the version system, along with the last update date and the complete changelog can be found on the [https://stepmodifications.org/wiki/User:Kesta/BABYVersion BABY - Version] page. | |||
Interesting-looking mods planed for review to be potentially added are listed on the [[User:Kesta/BABY_Testing|testing page]], though It's messy. That's basically my online clipboard. | |||
==== Post-installation ==== | |||
Records conflicts (aka conflicts due to multiple .esp altering the same set of data), and load order management are handled at the end of the guide: | |||
* Patches tailored specifically for BABY will be provided on their own [https://www.nexusmods.com/fallout4/mods/4790/? Nexus page]. | |||
* Advanced load order management, atop of what automated sorting utilities can do, will be explained in the [[User:Kesta/FO4PersonnalGuide#Load_Order_management|Load Order mangement]] section. | |||
* In-game configuration advice for mods are currently given in the mod's card. | |||
=== Installing Fallout 4 === | === Installing Fallout 4 === | ||
Head to steam, buy the game if you haven't already, and download. | Head to steam, buy the game if you haven't already, and download. Seriously, if you haven't done this yet, what are you even doing here ? | ||
On a more important note : DLCs and updates expand the modding possibilities by providing new features to be used by modders. BABY is built assuming you're using : | |||
* The latest stable version of FO4, but {{Fc|Important|NOT}} the beta. | |||
* All of the currently released DLCs | |||
To make sure you have all the DLCs, check the '''DLC''' section of FO4's steam page and make sure all of them are ticked and have the ''installed'' mention, or open Fallout 4 steam's properties and check the DLC tab : | |||
[[File:steamFO4DLCTab.png|450px|highslide:]] | |||
If not, right click on Fallout 4 in your game list, select ''properties'', look under the '''DLC''' tab, and tick everything. | |||
For easier modding support, make sure that {{Fc|Important|Steam is installed '''OUTSIDE''' your ''program files'' folder}}.<br> | |||
This will prevent several modding utilities to be thwarted by windows' UAC. | |||
=== Installing useful programs === | === Installing useful programs === | ||
| Line 42: | Line 123: | ||
If you don't have them already, there is two generic programs very usefull when modding games : | If you don't have them already, there is two generic programs very usefull when modding games : | ||
[ | [https://www.7-zip.org/ 7-zip] : This is an archive extractor. It'll allow you to extract archives (.zip, .rar, .7z). Since most mods and other utilities come in this format, it's critical to be able to extract them.<br> | ||
To make it even more convenient to use : | |||
* Locate the 7-zip File manager : 7zFM.exe, (located by default in ''C:\Program Files\7-Zip'', or simply type in ''7-zip File Manager'' in windows' search bar) | |||
* Start it with administrator privileges (right-click -> run as administrator). | |||
* Navigate under ''Tools'' -> ''Options..'' and look at the ''System'' tab, you'll find the file association manager. | |||
* Associate 7zip with .7z, .zip, and .rar files by simply clicking on them. | |||
This way, you will be able to preview the content of archives and extract what you want out of them by simply double-clicking on it. | |||
[https://notepad-plus-plus.org/ Notepad++] : An advanced text editor. Usefull to edit various configurations files, as its layout, syntax-coloration, and other built-in search functions are by far superior to what your basic notepad can do. | [https://notepad-plus-plus.org/ Notepad++] : An advanced text editor. Usefull to edit various configurations files, as its layout, syntax-coloration, and other built-in search functions are by far superior to what your basic notepad can do. | ||
Since we're going to open a lot of .ini files in this guide, it's a good idea to tell windows that you want to automatically open them with Notepad++ : | |||
* After you've installed it, right click on any .ini file on your system (if you don't have any yet, just read a bit further, you'll discover them ;) ) | |||
* Select ''Open With...'' -> ''Choose default program...'' | |||
* Select Notepad++. If Notepad++ is not on the list, use the ''Browse...'' button and navigate to NP++ installation path (by default ''C:\Program Files (x86)\Notepad++''). | |||
* Make sure that the ''Always use the selected program to open this kind of file'' check-box is ticked in. | |||
I also recommend to follow the same procedure for regular text files, as NP++ is more convenient than Notepad anyway. | |||
Optionally, you can also install the [https://sourceforge.net/projects/npp-compare/ NP++ Compare Plugin], which is an addon for Notepad++ that allow for easy comparison between files. In BABY's context, it'll help you check various INI configurations. | |||
=== Setting some things up === | === Setting some things up === | ||
Make sure you have the latest drivers for your GPU. This is especially true if using an AMD video card, as some of the not-so-outdated-but-a-little-bit drivers will lead to a crash on the FO4 main menu. | Make sure you have the latest drivers for your GPU. This is especially true if using an AMD video card, as some of the not-so-outdated-but-a-little-bit drivers will lead to a crash on the FO4 main menu. | ||
AMD users : [ | * AMD users : [https://support.amd.com/en-us/download Click here] | ||
* nVidia users : [https://www.nvidia.fr/Download/index.aspx Click here] | |||
It is also recommended to clean your computer if you're not doing this regularly.<br> | |||
If you're not exactly an advanced PC user, there is several utilities that can take of that automatically, but free ones aren't extremely efficient. You can still have a look at [https://www.piriform.com/ccleaner/download CCleaner] which is one of the most efficient free ones. | |||
Once your computer is ready, the first thing to do is to initialize your game once : Simply press Play in the FO4's steam page, and this message will appear :<br> | |||
[[File:Fallout4LauncherMessage.png|400px|highslide:]] | |||
This will automatically detect your hardware and select a configuration preset accordingly. | |||
It's time to have a look at two important locations on your computer you'll be visiting often : | |||
* The game's installation folder, which depend on where Steam is installed : ''<Steam>\steamapps\common\Fallout 4\'' | |||
* The game's document folder, created after the previous step have been completed : ''<Documents>\My Games\Fallout4'' | |||
If you intend to dedicate some times to modding your games, it is highly recommended that you favorite those two folders in windows explorer to have a quick access to them, or put a shortcut to them wherever you like to have your shortcuts. | |||
== Tailoring your configuration == | |||
Now is the moment to configure Fallout 4 according to your preferences. This is done by modifying the INI files Fallout4.ini and Fallout4Prefs.ini located in the game documents folder we just talked about. There is several way of doing it : | |||
* Manually editing the INI files with Notepad++ | |||
* Using configuration tools with GUI (incomplete and not always error-proof, but easier). | |||
* Using the game's configuration tool by clicking on '''Option''' in the launcher (Very incomplete) | |||
=== Starting on a good base === | |||
Before working with INI files, make sure they are ''valid''. The default files aren't easy to work with, because they're filled with bogus settings, and aren't sorted nor exhaustive. | |||
{{User:Kesta/ModInstructions | |||
|flare={{User:Kesta/flare|Tool}} | |||
|fINIp 4|https://www.nexusmods.com/fallout4/mods/67/?|1.0|DoubleYou | |||
|{{User:Kesta/NexusDownload | |||
|name=Files to download | |||
|MAIN=fINIp 4 Installer}} | |||
Setup : | |||
* Delete Fallout4.ini and Fallout4Prefs.ini for the game documents folder. | |||
* Download manually. | |||
* Run fINIp 4 Installer-67-1-0.exe and follow the instructions. | |||
* Select your install folder when asked to. | |||
* Install. | |||
* Wait for fINIp 4 to start the launcher and let it set your INIs. | |||
* You can open the settings to adjust some values to your liking. | |||
Fallout INI Project 4 offer a convenient way to prepare your ini files. It will edit the default template used by the automatic INI generation of the launcher in a way that your ini files will be filled exhaustively, free of bogus or placebo settings, and sorted in alphabetical order, and then proceed to run the launcher. | |||
}} | |||
For additional informations on how INI files behave and affect your games, see the [[User:Kesta/FO4Configuration|Fallout 4 configuration]] reference. For a complete review of all the settings, see the [https://stepmodifications.org/wiki/Guide:Fallout4Prefs_INI Fallout4Prefs.ini Guide]. | |||
=== Adjusting your settings === | |||
You can most likely skip this if you can play on Ultra without noticing even a slight drop in performances during gameplay. | |||
If you can't, two things to test before down-grading your visuals is to | |||
* Disable Godrays | |||
* Set Shadow Distance to Medium | |||
<br> | |||
If you still can't have decent FPS with it, use a lower setting that match your computer's performance. Some settings have a high quality/performance ratio, and thus should be maxed out : | |||
* Anisotropy -> Set it to at least 8x. Performance hit is only noticeable at 16x, but 8x look 1000x time better than 0 or 2x. | |||
* Anti-Aliasing -> TAA. There is a small performance hit, but TAA look infinitely better than FXAA (not even talking about no-AA at all). | |||
<br> | |||
Note that there is an issue with Godrays pixelating your character if they aren't set on Ultra. So you either use ultra godrays, or no godrays.<br> | |||
Shadow distance should be left to Medium, as this is handled later in the guide.<br> | |||
An other option for good-quality AA is too use SMAA in combinations with downsampling. Setting this is a bit more complex, so google for it if you want. The main reason for doing so instead of using TAA is to avoid the slight blurriness on edges introduced by TAA.<br> | |||
=== Further INI tweaking === | |||
Go to the game's documents folders and start tweaking your INIs | |||
==== In Fallout4(Custom).ini ==== | |||
{{alert|type=notice|text=It is recommended that you create {{Fc|Important|Fallout4Custom.ini}} and make your tweaks to the Fallout4.ini settings in there instead of directly editing the original file.}} | |||
Put bInvalidateOlderFiles=1 and blank out sResourceDataDirsFinal in the [Archive] section, so loose files will load through the game.<br> | |||
<pre> | |||
[Archive] | |||
bInvalidateOlderFiles=1 | |||
sResourceDataDirsFinal= | |||
</pre> | |||
If you've already played the game enough, you'll probably want to disable tutorials message for your future playthrough: <pre> | |||
[Interface] | |||
bShowTutorials=0</pre> | |||
You can improve the usability/readability of the console by expanding its size and modifying its font color and size with the following settings: | |||
<pre> | |||
[Menu] | |||
iConsoleSizeScreenPercent=65 | |||
iConsoleTextSize=16 | |||
rConsoleHistoryTextColor=153,160,153 | |||
rConsoleTextColor=255,255,255 | |||
rDebugTextColor=255,235,222 | |||
</pre> | |||
==== In Fallout4Prefs.ini ==== | |||
Make sure {{Fc|Important|''iShadowMapResolution'' is at least 2048}}. Even if it cost some FPS, 1024 is way too ugly to play. 4096 is the default Ultra setting. You can even raise this setting to 8192 if you've got an ultra-powerful computer.<br> | |||
<pre> | |||
[Display] | |||
iShadowMapResolution=4096 | |||
</pre> | |||
<br> | |||
'''External sources''' :<br> | |||
A lot of interesting settings are exposed here : [https://www.afkmods.com/index.php?/topic/4316-fallout-4-useful-ini-settings/ Useful INI Settings], thanks to InsanePlumber.<br> | |||
There is especially a lot of priceless informations for UI configuration. | |||
Nice UI colors presets can be found in the [https://www.nexusmods.com/fallout4/mods/13355/? Vogue UI Colors] nexus page. | |||
== Setting up your modding environment == | |||
=== Choose and install a mod manager === | === Choose and install a mod manager === | ||
Only NMM have been properly updated for Fallout 4. This is in my opinion the best choice | Only NMM have been properly updated for Fallout 4. This is in my opinion the best choice, since Mod Organizer 2 isn't going to see any updates to fix the various issues and annoyances it come with. | ||
An other alternative is Wrye Flash, which also have been updated for FO4 support. | An other alternative is Wrye Flash, which also have been partially updated for FO4 support, but the public version got hidden. | ||
* [https://github.com/TanninOne/modorganizer/releases Mod Organizer 2] | * [https://github.com/TanninOne/modorganizer/releases Mod Organizer 2] | ||
* [ | * [https://www.nexusmods.com/fallout4/mods/modmanager/? Nexus Mod Manager] | ||
==== Resetting "Download with Manager" for NMM ==== | ==== Resetting "Download with Manager" for NMM ==== | ||
| Line 84: | Line 280: | ||
</pre> | </pre> | ||
{{ | {{AlertSmall|type=warning|size=80|text=The path to the executable have to match your own installation folder! Don't just copy-paste it!}} | ||
Save and close nxmhandlers.ini, and run nxmhandler.exe located in the same folder. Click "register active", and press "yes" on the prompt. Done. Fallout4 downloads will now be directed towards NMM instead of MO. | Save and close nxmhandlers.ini, and run nxmhandler.exe located in the same folder. Click "register active", and press "yes" on the prompt. Done. Fallout4 downloads will now be directed towards NMM instead of MO. | ||
| Line 103: | Line 299: | ||
===== Conflicting files installation ===== | ===== Conflicting files installation ===== | ||
When | When two mods try to install the same file (or should I say, in NMM's case, when a mod try to install a file already installed by an other mod), NMM will ask you to choose between the two with this dialogue :<center>[[File:nmm_overwrite_dialogue.PNG|600px|highslide:]]</center> | ||
You have 2x 4 options (4 for "YES" and 4 for "NO") : | You have 2x 4 options (4 for "YES" and 4 for "NO") : | ||
| Line 120: | Line 316: | ||
If you've made a mistake when choosing yes/no, you can simply disable and re-enable the mod, NMM will ask you again for each conflicts which mod should overwrite which one. | If you've made a mistake when choosing yes/no, you can simply disable and re-enable the mod, NMM will ask you again for each conflicts which mod should overwrite which one. | ||
=== | === Install and Configure LOOT === | ||
LOOT (Load Order Optimization Tool) is an utility that aim to sort your load order in the most optimized way possible. This will ensure that mods with dependencies are loaded before their masters properly without having to sort them manually. | |||
{{User:Kesta/ModInstructions | |||
|flare={{User:Kesta/flare|Tool}} | |||
|LOOT - Load Order Optimization Tool|https://www.nexusmods.com/fallout4/mods/5310/?|0.8.1.321|WrinklyNinja | |||
|{{User:Kesta/NexusDownload | |||
|MAIN=LOOT v0.8.1-321 - gc54be64 - Snapshot}} | |||
'''Installation''' : | |||
* Download manually | |||
* Extract the archive in a suitable location. Using a "Modding Tools" or similar folder is strongly advised to keep all your modding utilities together. | |||
* Start LOOT.exe | |||
* Make sure the current game (next to the house icon) is Fallout 4 : | |||
[[File:LOOT_2016-05-05_16-08-07.png|150px|highslide:]] | |||
* If not, click on it and select Fallout 4 : | |||
[[File:LOOT_2016-05-05_16-08-26.png|150px|highslide:]] | |||
}} | |||
=== Install Advanced tools === | |||
==== FO4Edit ==== | |||
< | A good thing to do in those obscure time is also to grab a copy of FO4Edit so you can checks the mods you install yourself.<br> | ||
Some early mods have been released with a lot of errors, so checking them with FO4Edit to ensure they aren't to risky for your playthrough and savegame is a good habit.<br> | |||
On top of that, it will allow you to make some customisations. | |||
If | {{User:Kesta/ModInstructions | ||
<pre>-l:XX -cp:utf-8</pre> | |flare={{User:Kesta/flare|Tool}} | ||
|FO4Edit|https://www.nexusmods.com/fallout4/mods/2737/?|3.1.3|the xEdit Team | |||
|{{User:Kesta/NexusDownload | |||
|MAIN=FO4Edit 3.1.3 - 1f9c3d8}} | |||
'''Installation''' : | |||
* Download manually | |||
* Extract the archive in a suitable location. Using a "Modding Tools" or similar folder is strongly advised to keep all your modding utilities together. | |||
* Rename TESVEdit.exe to FO4Edit.exe {{Fc|Important|'''OR'''}} | |||
** Create a shortcut to TESVEdit.exe | |||
** Rename your shortcut to FO4Edit (optional) | |||
** Edit this shortcut (right-click-> properties) : | |||
*** under the "target" field of the shortcut, add the following argument :<pre>-fo4 -edit</pre> | |||
*** If using a non-english version of the game : Add also those two arguments :<pre>-l:XX -cp:utf-8</pre>Where XX is your language's abbreviation (example : fr for french) | |||
** Don't forget that you'll need to use the shortcut instead of the main executable to launch it with the parameters we just set up. | |||
}} | |||
FO4Edit will also allow you to check conflicting records when your whole load order is analyzed. This is how you're supposed to organize priorities in your load order | FO4Edit will also allow you to check conflicting records when your whole load order is analyzed. This is how you're supposed to organize priorities in your load order to fine-tune what automated tools such as LOOT offer. Indications for load order management specific to BABY are given in the [[User:Kesta/FO4PersonnalGuide#Load_Order_management|Load Order management]] section. | ||
More informations on how to use FO4Edit can be found on the [[Guide:XEdit|xEdit guide]] | More informations on how to use FO4Edit can be found on the [[Guide:XEdit|xEdit guide]] | ||
=== | ==== Fallout 4's Creation Kit & Co ==== | ||
==== | |||
The creation kit for fallout 4 is more than just the creation kit. It also come with various tools, especially Archive2, that we're going to use to repack .ba2 files. | |||
The creation kit and its toolpack have to be installed through the Bethesda.net launcher.<br> | |||
You can download the installer by clicking [https://download.cdp.bethesda.net/BethesdaNetLauncher_Setup.exe here].<br> | |||
Once the download is complete, run {{Fc|Important|BethesdaNetLauncher_Setup.exe}} to install it to the location of your choice.<br> | |||
Then, start the launcher (either from the shortcut if you chose to create one during the installation, or by launching {{Fc|Important|BethesdaNetLauncher.exe}} ). You will be presented with this page: | |||
[[File:BethesdaNetLauncher_Login.png|400px|highslide:]] | |||
If you don't already have a Bethesda.net account, you will need to create a one by clicking on CREATE ACCOUNT. If you already have one, simply enter your credentials to gain access to the launcher: | |||
[[File:BethesdaNetLauncher.png|400px|highslide:]] | |||
Simply select Creation Kit: Fallout 4 in the left panel, and click INSTALL on the bottom-left corner of the launcher. | |||
Accept the EULA, and leave the install options at default (except for shortcuts if you want/don't want them). | |||
Wait for the download/installation to complete (less than 1 minute). | |||
' | Congratulation ! You know have access the the FO4's creation kit and all of its toolset. | ||
==== Bethesda Archive Extractor ==== | |||
{{User:Kesta/ModInstructions | {{User:Kesta/ModInstructions | ||
|flare={{User:Kesta/flare|Tool}} | |flare={{User:Kesta/flare|Tool}} | ||
| | |B.A.E. - Beteshda Archive Extractor|https://www.nexusmods.com/fallout4/mods/78/?|0.10|Jon | ||
|{{User:Kesta/NexusDownload | |{{User:Kesta/NexusDownload | ||
|MAIN= | |MAIN=Bethesda Archive Extractor v0.10 }} | ||
'''Description''' : This tool allow you to | '''Installation''' : | ||
... | * Download manually | ||
... | * Extract the archive in a suitable location. Using a "Modding Tools" or similar folder is strongly advised to keep all your modding utilities together. | ||
'''Description''' : This tool allow you to have a quick peek inside .BA2 or .BSA archive files (Bethesda's specific archive format), or even extract them to an external location. While essentially aimed at modders to extract, analyze, and edit resources, B.A.E. can allow you to better understand which files exist within the original game, and which files will be provided brand new by installed mods. | |||
... | |||
More informations on how to setup and use B.A.E. are available on its [[Guide:BAE|dedicated guide]]. | |||
... | |||
If you also installed the Creation Kit, you might want to use Archive2 instead, which offer way possibility. BAE is still nice to just preview .ba2 because of the visualized arborescence. | |||
}} | |||
== Installing extenders and injectors == | == Installing extenders and injectors == | ||
| Line 221: | Line 407: | ||
=== Fallout 4 Script Extender === | === Fallout 4 Script Extender === | ||
F4SE have already | F4SE have already become critical to your modding setup, as it will allow you to bypass the Launcher, preventing any unwanted modifications and faster gamestart.<br> | ||
It also come with the possibility to customize heavily your keybindings, some extended scripting functions that beta mods might require, and the possibility to load powerful .dll plugins, which you can think of as "mod written in C++ hooking directly in the game engine without the burden of the regular modding API". Those .dll basically allow more freedom on modding possibilities, such as re-enabling achievments on modded game or save/load presets/settings files independently from the original system. | |||
{{User:Kesta/ModInstructions | |||
|Fallout 4 Script Extender|https://f4se.silverlock.org|1.9.4|ianpatt, behippo, and Purple Lunchbox | |||
|Files to download : | |||
Fallout 4 runtime 1.9.7 Current build: 0.3.7 - 7z archive | |||
Installation : | |||
Put the following files into your installation folder : | |||
* f4se_loader.exe | * f4se_loader.exe | ||
* | * f4se_1_9_4.dll | ||
* f4se_steam_loader.dll | * f4se_steam_loader.dll | ||
* Data folder (merge with existing) | |||
Utilization :<br> | |||
From now on, you must always {{Fc|Important|run the game using f4se_loader.exe}} instead of Fallout4.exe}} | |||
To customize keymapping ( | To customize keymapping (from F4SE readme) : | ||
* | * Extract ''CustomControlMap.txt'' to ''Data\F4SE\CustomControlMap.txt'' | ||
* Edit that file to set your bindings. You have to specify | * Edit that file with Notepad++ to set your bindings. | ||
* You have to specify what is known as Virtual-Key codes. | |||
** A full list of VK Key is available here : [https://msdn.microsoft.com/en-us/library/windows/desktop/dd375731%28v=vs.85%29.aspx MSDN Virtual-Key Codes]. Note that 0xff means unbound. | |||
**If using a non-qwerty keyboards, you will also need those official Look-Up tables : [https://msdn.microsoft.com/en-us/library/ms892480.aspx Translating Scan Codes to Virtual-Key Codes]<br> | |||
* Do not use the space-bar when editing the file, columns have to be separated by tabulations only. | |||
** The first column is the name of the internal keybind. | ** The first column is the name of the internal keybind. | ||
** The second column is the | ** The second column is the Virtual-Key code that should activate the bind. | ||
** The third column is for mice. | ** The third column is for mice. | ||
** The fourth column is for controllers. | ** The fourth column is for controllers. | ||
** The next three columns control whether or not a control should be written to the user's config file. | ** The next three columns control whether or not a control should be written to the user's config file. | ||
** The final column specifies which input layer the bind is associated with. ''You will probably not want to change that.'' | ** The final column specifies which input layer the bind is associated with. ''You will probably not want to change that.'' | ||
* Delete ''Custom_MapControl.txt'' from ''Documents\My Games\Fallout4\'' if you have one here. | |||
=== ENBoost and ENBSeries === | === ENBoost and ENBSeries === | ||
| Line 247: | Line 445: | ||
This also fix some multi-threading issues with shaders, but fixes aren't necessarily noticeable on all configurations.<br> | This also fix some multi-threading issues with shaders, but fixes aren't necessarily noticeable on all configurations.<br> | ||
No performance hit. You also have a nice FPS counter available at will (* key on your numpad).<br> | No performance hit. You also have a nice FPS counter available at will (* key on your numpad).<br> | ||
[ | [https://enbdev.com/download_mod_fallout4.htm Download Binaries]<br> | ||
Click on the latest binaries available, and on the next page on [[File:down1.gif]]download.<br> | Click on the latest binaries available, and on the next page on [[File:down1.gif]]download.<br> | ||
Look for the folder named ''WrapperVersion'' in the archive, and extract the following files in your installation folder<br> | |||
Copy the following files in your installation folder : | Copy the following files in your installation folder : | ||
* d3d11.dll | * d3d11.dll | ||
* d3dcompiler_46e.dll | * d3dcompiler_46e.dll | ||
* enblocal.ini | * enblocal.ini | ||
Edit enblocal.ini with Notepad++ to modify the following setting : | |||
<pre> | |||
UsePatchSpeedhackWithoutGraphics=true | |||
</pre> | |||
This will disable the graphical part of enbseries (which require the other files from the wrapper folder we didn't install) to only leave bugfixes enabled. If you install a post-processing mod later based on enbseries, you'll need to come back to set this parameter to false. Note that such post-processing mods (known as ''ENB Presets'') come with their own effect files, so you won't need those in the original enbseries (which are mostly here as template / examples for presets authors, though you can still use them).<br> | |||
If you wish to install the default effect files and tweak them by yourself (i.e. design your own preset), some help to get started is available on the [https://stepmodifications.org/forum/topic/9437-modular-shader-library-for-enbseries-fo4/ STEP Forum], thanks to JawZ<br> | |||
{{alert|type=notice|text=The {{Fc|Important|d3dcompiler_46e.dll}} isn't technically required for ENBoost only.<br> | |||
This is used for runtime compilation of some specific effect shaders. This file should be already present on the computer and unnecessary for users of windows 8 or above, and users having Visual Studio 2012 or above installed on their computer. Though it won't do any harm to install it along the others, and it ensure you have absolutely anything that could ever be needed for future ENB presets installations. }} | |||
More informations : | More informations : | ||
[ | [https://www.nexusmods.com/fallout4/mods/332/? Official Nexus Page]<br> | ||
There is some information and preset here regarding the | There is some information and preset here regarding the ForceVideoMemorySizeparameter. Leaving it at default (disabled) is recommended for lower configuration. Only systems with a lot of RAM will take advantage of this.<br> | ||
More general informations about enbseries can be found around STEP, check the forum and other guides. Keep in mind that some of the content might not apply to Fallout 4 though.<br> | |||
=== ReShade === | |||
== | ReShade is a framework to enhance post-processing. This allow to inject shaders in games at run-time. The most known shader library now using ReShade is SweetFX. | ||
{{alert|type=warning|text=Do NOT install ReShade if you don't intend to install a preset.<br> | |||
ReShade will be dropped in the next update of the guide.}} | |||
The main download is here : [https://reshade.me/ ReShade]<br> | |||
The main download is here : [ | |||
Installation : | Installation : | ||
* Extract the archive in a temporary folder | * Extract the archive in a temporary folder | ||
| Line 275: | Line 485: | ||
* Move dxgi.dll, ReShade.fx, and the ReShade folder with all of its content to your Fallout 4 installation folder. | * Move dxgi.dll, ReShade.fx, and the ReShade folder with all of its content to your Fallout 4 installation folder. | ||
Note that some presets might require an | Note that some presets might require an older ReShade framework to work as intended. Always check the preset's mod page you're downloading for special instructions.<br> | ||
==== Installing a ReShade Preset ==== | ==== Installing a ReShade Preset ==== | ||
| Line 283: | Line 492: | ||
* Go to the (nexus) page of the preset | * Go to the (nexus) page of the preset | ||
* Download manually | * Download manually | ||
* | * Open the archive with 7zip | ||
* | * Drag and drop the files/folders so : | ||
** They overwrite the ones installed by the framework. | ** They overwrite the ones installed by the framework. | ||
**The ReShade folder merge with the one installed by the framework. | ** The ReShade folder merge with the one installed by the framework. | ||
As mentioned above, if your preset require a different version than the one you currently have installed, you will first need to uninstall your current ReShade framework, install the legacy version, and only then install your preset. | |||
=== | {{AlertSmall|type=notice|size=85|text=Doing things manually will result in a need to completely uninstall and reinstall ReShade when switching between presets. This will remain so until a reliable manager is available.}} | ||
== Time to mod ! == | |||
=== BugFixes & Annoyances removal === | |||
This section aim to fix game's bugs, inconsistencies and issues, as well as removing some annoyances present in the original game. | |||
==== Nexus Mods ==== | |||
===== Unofficial Fallout 4 Patch ===== | |||
{{User:Kesta/ModInstructions | |||
|Unofficial Fallout 4 Patch|https://www.nexusmods.com/fallout4/mods/4598/?|1.0.2|the Unofficial Patch Project Team | |||
|{{User:Kesta/NexusDownload | |||
|name=Files to download | |||
|MAIN=Unofficial Fallout 4 Patch}} | |||
'''Description''' : This is the unofficial patch for Fallout 4. This fix several bugs, glitches, issues and inconsistencies not dealt with by Bethesda in the official version of the game.}} | |||
===== Dead Body Collision ===== | |||
{{User:Kesta/ModInstructions | |||
|Dead Body Collision|https://www.nexusmods.com/fallout4/mods/2570/?|1.0|MadAce | |||
|{{User:Kesta/NexusDownload | |||
|name=Files to download | |||
|MAIN=DeadBodyCollision}} | |||
'''Description''' : Enable collision physic on dead bodies.}} | |||
===== Realistic Death Physics ===== | |||
{{User:Kesta/ModInstructions | |||
|Realistic Death Physics|https://www.nexusmods.com/fallout4/mods/4371/?|1.2|mm137 | |||
|{{User:Kesta/NexusDownload | |||
|name=Files to download | |||
|MAIN=Realistic Death Physics - No Animations}} | |||
'''Description''' : Reduce impacts' strength to prevent NPCs from flying around the place when taking a fatal bullet, and replace odd-looking death animations by simple ragdoll to make body crumbles in a more natural fashion}} | |||
===== Faster terminal Display ===== | |||
{{User:Kesta/ModInstructions | {{User:Kesta/ModInstructions | ||
| | |Faster terminal Display|https://www.nexusmods.com/fallout4/mods/937/?|3.0|Old Nick | ||
|{{User:Kesta/NexusDownload | |{{User:Kesta/NexusDownload | ||
|name=Files to download | |name=Files to download | ||
| | |OPT=Faster Terminal Displays (5x) Creation Kit Version}} | ||
'''Description''' : Increase the speed at which terminals text is displayed.}} | |||
''' | |||
===== Achievements ===== | |||
{{User:Kesta/ModInstructions | {{User:Kesta/ModInstructions | ||
| | |flare={{User:Kesta/flare|OPT}} | ||
|Achievements|https://www.nexusmods.com/fallout4/mods/12465/?|1.0.3|Expired | |||
|{{User:Kesta/NexusDownload | |{{User:Kesta/NexusDownload | ||
|name=Files to download | |name=Files to download | ||
|MAIN= | |MAIN=Achievements v1-0-3}} | ||
'''Description''' : | '''Description''' : Re-enable steam achievements even when playing a modded game. You obviously don't need it if you already have all of the achievements (or don't care about them).}} | ||
=== | ===== Unlimited Survival Action ===== | ||
{{User:Kesta/ModInstructions | |||
|flare={{User:Kesta/flare|OPT}} | |||
|Unlimited Survival Action|https://www.nexusmods.com/fallout4/mods/11663/?|1.0|Lucyf3r and sely1337 | |||
|{{User:Kesta/NexusDownload | |||
|name=Files to download | |||
|OPT=Unlimited Survival Activations - Merged}} | |||
'''Description''' : The original purpose of this mod is to allow the player to switch in and out of survival mode at will, which is basically a cheat to get rid off survival malus. However, this feature might come in handy if you're planing on a long play-through and need to switch survival mode off for a few hours. But the main interest is the merged file download, that re-enable regular save and quicksaves from the menu. (Quicksaves using F5 still won't work).}} | |||
===== Highly Customizable Survival Damages ===== | |||
{{User:Kesta/ModInstructions | |||
|flare={{User:Kesta/flare|Easy}} | |||
|HCSD - Highly Customizable Survival Damages|https://www.nexusmods.com/fallout4/mods/12562/?|1.0|Fame7 | |||
|{{User:Kesta/NexusDownload | |||
|name=Files to download | |||
|MAIN=HCSD PC 1.5x Enemy 1.5x}} | |||
'''Description''' : A collection of difficulty presets for survival mode. Recommended download will make NPC and PC damages even.}} | |||
===== Survival Mode Console ===== | |||
{{User:Kesta/ModInstructions | |||
|flare={{User:Kesta/flare|OPT}} | |||
|Survival Mode Console|https://www.nexusmods.com/fallout4/mods/11834/?|1|Zion9876 | |||
|{{User:Kesta/NexusDownload | |||
|name=Files to download | |||
|MAIN=Survival Mode Console}} {{user:Kesta/NexusDownload | |||
|name=Alternative | |||
|OPT=SMC}} | |||
'''Description''' : Re-enable the use of the console in survival mode. The alternative optional download will also re-enable fast-travel, though using it will seriously reduce the interest of survival mode.}} | |||
=== Performances Improvements === | |||
Though Bethesda did way better with Fallout 4 than with their previous titles regarding stability and performances, there is still work to do to make things as smooth as possible. | |||
==== External Mods ==== | |||
===== Shadow Boost ===== | |||
{{User:Kesta/ModInstructions | |||
|flare={{User:Kesta/flare|PERF}} | |||
|Shadow Boost|https://www.dev-c.com/fallout4/shadowboost/|1.5.157.0|Alexander Blade | |||
|Use the '''Download''' link<br> | |||
Installation : | Installation : | ||
* Extract the archive in a temporary folder. | * Extract the archive in a temporary folder. | ||
| Line 324: | Line 589: | ||
** ''fShadowDrawDistMin'' is the minimal shadow distance, so even at lower FPS, shadow won't be reduced to a weird-looking distance. | ** ''fShadowDrawDistMin'' is the minimal shadow distance, so even at lower FPS, shadow won't be reduced to a weird-looking distance. | ||
** ''fShadowDrawDistMax'' is the maximal shadow distance. There is no need to set it super-high as you won't be able to see that far anyway | ** ''fShadowDrawDistMax'' is the maximal shadow distance. There is no need to set it super-high as you won't be able to see that far anyway | ||
[https://www.nexusmods.com/fallout4/mods/1822/? Official Shadow Boost Nexus Page] | |||
'''Description''': Remember the advice earlier about setting shadow distance to medium to drastically increase performance ?<br> | |||
Well, this is a fix. This will allow you to set a desired minimum FPS. While you're above the desired FPS, Shadow Distance will be increased dynamically. If your FPS start dropping, it'll be reduced until you go back to your desired limit.}} | |||
== | ==== Nexus Mods ==== | ||
===== Optimized vanilla Textures ===== | |||
=== | |||
{{User:Kesta/ModInstructions | {{User:Kesta/ModInstructions | ||
| | |flare={{User:Kesta/flare|PERF}} | ||
|Optimized vanilla Textures|https://www.nexusmods.com/fallout4/mods/1204/?|1.10|Myst | |||
|{{User:Kesta/NexusDownload | |{{User:Kesta/NexusDownload | ||
|name=Files to download | |name=Files to download | ||
|MAIN= | |MAIN=Optimized Vanilla Textures 1-07 Full | ||
|UPDT=Optimized Vanilla Textures 1-10 Update}} | |||
'''Special installation instructions''': | |||
* Only install the v1.07 through NMM | |||
* Browse to the mod's folder in the virtual install | |||
* Unpack the v1.10 update in here so both Textures folder merges | |||
* Use Archive2 to pack the textures under a .ba2 (see the [[Guide:Archive2|Archive2 guide]]) | |||
* Delete the Textures folder and place your .ba2 in here instead. | |||
* Add your .ba2 to the sResourceIndexFileList in Fallout4.ini | |||
'''Description''' : A set of optimized textures, very little quality loss for a small performance improvement.}} | |||
{{User:Kesta/ModInstructions | === Resource === | ||
| | |||
This section install resources mods required by others in the guide in order to function properly. | |||
==== Nexus Mods ==== | |||
===== Armor and Weapon Keywords Community Resource (AWKCR) ===== | |||
(My understanding is that AWKCR is depreciated and should be avoided. See https://www.nexusmods.com/fallout4/articles/4504. TobyKenobi){{User:Kesta/ModInstructions | |||
|Armor and Weapon Keywords Community Resource (AWKCR)|https://www.nexusmods.com/fallout4/mods/6091/?|2.2.2|Valdacil and Gambit77 | |||
|{{User:Kesta/NexusDownload | |{{User:Kesta/NexusDownload | ||
|name=Files to download | |name=Files to download | ||
|MAIN= | |MAIN=Armor and Weapon Keywords Community Resource v2.2.2}} | ||
| | {{FOMOD Instructions | ||
| | |{{FomodPage | ||
|Armor and Weapons Keyword Community Resource | |||
|{{Fieldset | |{{Fieldset | ||
| | |Game Options | ||
|bullet=yes| | |bullet=yes|All DLC}} {{Fieldset | ||
| | |UFO4P | ||
|}} | |bullet=yes|UFO4P Patch}} | ||
|button=yes|buttonText=Install}} | |button=yes|buttonText=Install }} }} | ||
'''Description''' : This is a community framework that create and assign a new set of keywords for armors and weapons, offering enhanced possibilities for everything related to the crafting of weapons & armors.}} | |||
=== User Interface === | |||
This section improve the user interface, bringing more convenience to the use of menus, while preventing a too intrusive UI that could break immersion. | |||
==== Nexus Mods ==== | |||
===== Full Dialogue Interface ===== | |||
{{User:Kesta/ModInstructions | {{User:Kesta/ModInstructions | ||
|Full Dialogue Interface| | |Full Dialogue Interface|https://www.nexusmods.com/fallout4/mods/1235/?|Beta10|shadwar and Cirosan | ||
|{{User:Kesta/NexusDownload | |{{User:Kesta/NexusDownload | ||
|name=Files to download | |name=Files to download | ||
|MAIN=Full Dialogue Interface - All languages - NMM installer}} | |MAIN=Full Dialogue Interface - All languages - NMM installer | ||
{{FomodPage | |UPDT=(English) Automatron DLC support - English version, (English) Far Harbor DLC support - English version}} | ||
{{FOMOD Instructions | |||
|{{FomodPage | |||
|Full Dialogue Interface Installation | |Full Dialogue Interface Installation | ||
|{{Fieldset | |{{Fieldset | ||
|English | |English Version | ||
|bullet=yes|Full Dialogue Interface - | |bullet=yes|Full Dialogue Interface - Horizontal Brackets With Numbers}} | ||
|button=yes|buttonText=Install}} | |button=yes|buttonText=Install }} }} | ||
''' | '''Notes''' : | ||
* If using a non-English version of the game, choose a version compatible with your language. | |||
* The option you select have no impact on the rest of the guide, just pick the layout you prefer. | |||
'''Description''' : Dialogues options now display the full text. The layout is re-designed in a more classic fashion, and can be selected with 1/2/3/4 keys instead of arrow-keys}} | |||
===== DEF_UI ===== | |||
{{User:Kesta/ModInstructions | {{User:Kesta/ModInstructions | ||
| | |DEF_UI|https://www.nexusmods.com/fallout4/mods/10654/?|1.2.2|Neanka and Valdacil | ||
|{{User:Kesta/NexusDownload | |{{User:Kesta/NexusDownload | ||
|name=Files to download | |name=Files to download | ||
|MAIN= | |MAIN=DEF_UI 1.2.2}} | ||
{{FOMOD Instructions | {{FOMOD Instructions | ||
|{{FomodPage | |{{FomodPage | ||
| | |Main | ||
|{{Fieldset | |{{Fieldset | ||
| | |Readme | ||
|bullet=yes| | |bullet=yes|IMPORTANT}}|button=yes }} {{FomodPage | ||
| | |Interface | ||
|bullet=yes| | |{{Fieldset | ||
|button=yes|buttonText=Install}} }} | |Interface | ||
''' | |bullet=yes|DEF_HUD;DEF_INV}} {{Fieldset | ||
|Language | |||
|bullet=yes|English (EN)}} {{Fieldset | |||
|Screen Ratio | |||
|bullet=yes|16:9}}|button=yes }} {{FomodPage | |||
|HUD | |||
|{{Fieldset | |||
|Display Components | |||
|bullet=yes|Use Sorting Mod Component Tags}} {{Fieldset | |||
|HUD Config | |||
|bullet=yes|Vanilla HUD}}|button=yes }} {{FomodPage | |||
|Sorting-EN | |||
|{{Fieldset | |||
|Sorting Mod | |||
|bullet=yes|I already have sorting xml files}}|button=yes }} {{FomodPage | |||
|Readme | |||
|{{Fieldset | |||
|IMPORTANT | |||
|bullet=yes|Readme - Mods;Readme - HUD;Readme - INV}}|button=yes|buttonText=Install }} }} | |||
'''Notes''' : | |||
* Under Language, pick your game's language. | |||
* Under Screen Ratio, pick your own monitor's ratio. | |||
'''Description''' : This mod come with a lot of improvements to the Inventory, Pipboy and Barter menu, from bigger containers to DPS and Value/Weight indicators, with customized categories for holotapes and notes as well. Everything is configurable through .xml files. Tags in item's names can be replaced by icons. | |||
You can customize the HUD further by yourself by visiting the Data\Interface folder and drag & dropping the HUDMenuSet.swf to the flashplayer_20_sa.exe}} | |||
===== Valdacil's Item Sorting ===== | |||
{{User:Kesta/ModInstructions | {{User:Kesta/ModInstructions | ||
| | |Valdacil's Item Sorting|https://www.nexusmods.com/fallout4/mods/3877/?|7.4.1|Valdacil | ||
|{{User:Kesta/NexusDownload | |{{User:Kesta/NexusDownload | ||
|name=Files to download | |name=Files to download | ||
|MAIN= | |MAIN=Valdacils Item Sorting v7.4.1}} | ||
{{FOMOD Instructions | {{FOMOD Instructions | ||
|{{FomodPage | |{{FomodPage | ||
| | |Valdacil's Item Sorting | ||
|{{Fieldset | |||
|Main | |||
|bullet=yes|Val's Picks (DLC Version - Vanilla Weight)}} {{Fieldset | |||
|Customize | |||
|bullet=yes|Customize}} | |||
|button=yes }} {{FomodPage | |||
|Customize | |||
|{{Fieldset | |||
|Modules | |||
|bullet=no|None}} {{Fieldset | |||
|Aid | |||
|bullet=no|None}} {{Fieldset | |||
|Ammo | |||
|bullet=no|None}} {{Fieldset | |||
|Armor | |||
|bullet=no|None}} {{Fieldset | |||
|Cosmetics | |||
|bullet=No|None}} {{Fieldset | |||
|Explosives | |||
|bullet=no|None}} {{Fieldset | |||
|Junk | |||
|bullet=yes|Better Junk + DEF_INV}} {{Fieldset | |||
|Misc | |||
|bullet=no|None}} {{Fieldset | |||
|Mods | |||
|bullet=no|None}} {{Fieldset | |||
|Not Junk | |||
|bullet=yes|Default}} | |||
|button=yes }} {{FomodPage | |||
|Patches | |||
|{{Fieldset | |{{Fieldset | ||
| | |Compatibility Patches | ||
|bullet=yes| | |bullet=no|None}} {{Fieldset | ||
| | |Chem Redux + VIS:Aid | ||
|bullet=yes| | |bullet=yes|Vanilla Weight}} {{Fieldset | ||
|button=yes|buttonText=Install}} }} }} | |Functional Displays + VIS:Explosives | ||
|bullet=no|None}} {{Fieldset | |||
|Functional Displays + VIS:Misc+Junk | |||
|bullet=no|None}} {{Fieldset | |||
|ReBallistic + VIS:Ammo | |||
|bullet=no|None}} {{Fieldset | |||
|ZephhyrWarrior's F4 PA Overhaul + VIS:Armor | |||
|bullet=no|None}} {{Fieldset | |||
|DEF_INV Tags | |||
|bullet=yes|DEF_INV All}} |button=yes|buttonText=Install }} }} | |||
'''Note''': Because ChemRedux haven't been installed yet, the automated installer won't let you pick the option for the patch. If you're going to use the full BABY Patch, the conflict resolution is already handled in it. If not, you need to either bypass the fomod to install the patch, resolve the conflict by yourself, or install ChemRedux before VIS. | |||
''' Description''' : This mod will allow to take full advantage of {{Fc|Important|DEF_UI}} by modifying Item's names so they can be displayed with icons in the menus, and have a better item sorting in menus. Additionally, the "Not Junk" feature prevent valuable junk or collectible to be treated as such, and instead being "Misc" so they can't be scrapped automatically and can be sold or collected instead. | |||
'''Additional modifications''' : In order to keep a clear load order and reduce the number of .esp, merge manually the plugins with xEdit : | |||
* Make sure the plugins are sorted in the right order : | |||
** Fallout4.esm | |||
** DLCRobot.esm | |||
** DLCworkshop01.esm | |||
** ArmorKeywords.esm | |||
** ValdacilsItemSorting-00-ValsPicks-DLCVersion-VanillaWeight.esp | |||
** ValdacilsItemSorting-JunkBetter+DEF_INV.esp | |||
** ValdacilsItemSorting-NotJunk.esp | |||
* Open FO4Edit, uncheck everything but the above plugins. | |||
* Once the background loader is complete, expand the latest plugin in the tree panel. | |||
* Right click on the first group and select ''Copy As Deep Override To...'' | |||
* In the menu the pop-up, select <new file> | |||
* In the next textbox, enter the name of your destination plugin without the .esp extension. ''Item Sorting'' or ''VIS'' for instance. | |||
* Repeat for each group in the plugin, selecting your newly created .esp in the plugin selection | |||
* Repeat for each plugin from ValdacilsItemSorting in the load order, from the higher priority one to the lower priority one. | |||
* Do NOT to do this with ArmorKeywords.esm or any of the official plugins. | |||
* Close FO4Edit and save your newly created plugin. | |||
* Remove old ValcadisItemSorting*.esp plugins from your installation. | |||
{{alert|type=notice|text=This is not an universal nor error-proof way of merging plugins. This only work because of the low-level of technicality involved in sorting mods (which only changes names). Do not attempt to use a similar technique for more advanced merges, wait for proper tools instead.<br> | |||
For information, this work because the ''(deep) copy as override'' function in xEdit copy records only if they don't already exist in the destination plugin.<br> | |||
Doing this procedure starting with mods having the higher priority ensure that their changes will be the ones in the final plugin. If the procedure is followed in reverse order, the destination file will be identical to the original ValdacilsItemSorting-00-ValsPicks-DLCVersion-VanillaWeight.esp }} }} | |||
===== Satellite World Map ===== | |||
{{User:Kesta/ModInstructions | {{User:Kesta/ModInstructions | ||
| | |Satellite World Map|https://www.nexusmods.com/fallout4/mods/8989/?|1.0|FloorBelow | ||
|{{user:Kesta/NexusDownload | |{{user:Kesta/NexusDownload | ||
|name=Files to download | |name=Files to download | ||
| | |OPT=Monochrome Version - 4k Resolution}} {{user:Kesta/NexusDownload | ||
|name={{User:Kesta/flare|OPT}} Alternative | |||
|OPT=Coloured Version - 4k Resolution}} | |||
= | '''Notes''' : | ||
* Do not be afraid of the resolution size. This is for the worldmap, so the texture is only used when the map is open. Performances and VRAM limits aren't relevant. | |||
* Bigger resolutions make the map actually bigger, meaning it take more time to move from one point to another in the map menu. It help to spread icons, but 8K can make the map uncomfortable to use. | |||
* If using the colored version, don't forget to add the following tweaks to your INIs : | |||
<pre>[Pipboy] | |||
bPipboyDisableFX=1 | |||
[Display] | |||
fPipboyScreenEmitIntensityPA=1.25 | |||
fPipboyScreenDiffuseIntensityPA=0.15</pre> | |||
'''Description''' : Improved map, easier to read and more pleasant to look at. }} | |||
===== LooksMenu ===== | |||
{{User:Kesta/ModInstructions | {{User:Kesta/ModInstructions | ||
| | |LooksMenu|https://www.nexusmods.com/fallout4/mods/12631/?|1.0.3|Expired | ||
|{{ | |{{user:Kesta/NexusDownload | ||
|name=Files to download | |name=Files to download | ||
|MAIN= | |MAIN=LooksMenu v1-0-3}} | ||
'''Description''' : Improved looksmenu for character creation/customisation. Bigger lists, possibility to select face parts from the menu, and presets import/export.}} | |||
''' | |||
=== Environment === | |||
The environment... you see it pretty much everywhere, so better make it as good looking as possible ;) | |||
==== ReShade/ENB Preset ==== | |||
===== Cinematic Excellence ===== | |||
{{User:Kesta/ModInstructions | {{User:Kesta/ModInstructions | ||
| | |Cinematic Excellence|https://www.nexusmods.com/fallout4/mods/95/?|6.4.1|Archalyus | ||
|{{User:Kesta/NexusDownload | |{{User:Kesta/NexusDownload | ||
|name=Files to download | |name=Files to download | ||
|MAIN= | |MAIN=Cinematic Excellence v6.4.1}} | ||
'''Special Instructions''' : | |||
* If you had ReShade 2.0+ installed, uninstall it | |||
* Install the legacy version of ReShade: | |||
** [https://reshade.me/#download Download ReShade v1.1] (bottom of the page) | |||
** Open the archive in 7zip | |||
** Move ReShade64.dll, ReShade.fx, and the ReShade folder into your installation folder | |||
** Rename ReShade64.dll to dxgi.dll | |||
* Download the archive manually | |||
* From the {{Fc|Important|ReShade Main Files}} folder : | |||
** Install files from the "Cinematic Palette" | |||
** Install one of the files from the sharpening folder, depending on your liking.<br> More sharpening mean more texture details, but this lead to objects that are not seen up-close to look noisy. | |||
** Ignore the Depth Of Field folder (The SweetFX DoF included is invasive and will blur your UI and conversations scenes). | |||
* {{User:Kesta/flare|OPT}}From the {{Fc|Important|ENB Test Main Files}} folder | |||
** Install everything but the enblocal.ini | |||
** Edit your own enblocal.ini to make sure that UsePatchSpeedhackWithoutGraphics is set to false. | |||
'''Note''': With the rest of the setup, the ENB part of the mod can darken interiors a bit too much. Also, reflection seems to be somewhat glitchy (might be a GPU-related issue, not everyone seems to encounter the issue) and the eye-adaption is a bit too powerful, thus the ENB part is only optional. It's main interest is the additional bloom. | |||
'''Note''' : | |||
' | |||
'''Description''' : A high quality ReShade + ENB preset, enhancing shadows, lighting, colors, etc... Good enough for current BABY's state, though it might change in the near future if it doesn't see anymore updates (the eye-adaptation is a bit clunky)}} | |||
==== Nexus Mods ==== | |||
===== WET - Water Enhancement Textures ===== | |||
{{User:Kesta/ModInstructions | {{User:Kesta/ModInstructions | ||
|WET - Water Enhancement Textures| | |WET - Water Enhancement Textures|https://www.nexusmods.com/fallout4/mods/244/?|1.65|SparrowPrince | ||
|{{User:Kesta/NexusDownload | |{{User:Kesta/NexusDownload | ||
|name=Files to download | |name=Files to download | ||
|MAIN=WET | |MAIN=WET 1_65}} | ||
{{FOMOD Instructions | {{FOMOD Instructions | ||
|file=WET | |file=WET 1_65 | ||
|{{FomodPage | |{{FomodPage | ||
|WET | |WET | ||
|{{Fieldset | |{{Fieldset | ||
|WET | |WET | ||
|bullet=yes|WET Main Files}}{{Fieldset | |bullet=yes|WET Main Files}} {{Fieldset | ||
|WET | |WET Rain Optional | ||
|bullet= | |bullet=no|None}} {{Fieldset | ||
|WET Plugin Optional | |||
|bullet=no|None}} | |||
|button=yes | |button=yes | ||
|buttonText=Install}} }} | |buttonText=Install}} }} | ||
'''Description''' : Improved water textures and colors, including new ripples effects.}} | |||
===== Radiant Clouds and Fogs ===== | |||
{{User:Kesta/ModInstructions | {{User:Kesta/ModInstructions | ||
|Radiant Clouds and Fogs| | |Radiant Clouds and Fogs|https://www.nexusmods.com/fallout4/mods/735/?|1.3|MangaClub | ||
|{{User:Kesta/NexusDownload | |{{User:Kesta/NexusDownload | ||
|name=Files to download | |name=Files to download | ||
| Line 487: | Line 883: | ||
|bullet=yes|Highres Version}} | |bullet=yes|Highres Version}} | ||
|button=yes | |button=yes | ||
|buttonText=Install }} }} | |buttonText=Install }} }} | ||
'''Note''' : You can pick the MedRes version if the installer if you're worried about performances. | |||
'''Description''' : Improve clouds textures, giving them a more volumetric look. They're also designed to improve the shadows casted by sunlight/moonlight.}} | |||
===== True Storms ===== | |||
{{User:Kesta/ModInstructions | {{User:Kesta/ModInstructions | ||
| | |True Storms - Wasteland Edition|https://www.nexusmods.com/fallout4/mods/4472/?|1.3.1|fadingsignal | ||
|{{User:Kesta/NexusDownload | |{{User:Kesta/NexusDownload | ||
|name=Files to download | |name=Files to download | ||
|MAIN= | |MAIN=True Storms - Wasteland Edition 1.3.1}} | ||
{{FOMOD Instructions | |||
|file=True Storms - Wasteland Edition 1.3.1 | |||
|{{FomodPage | |||
|True Storms - Wasteland Edition | |||
|{{Fieldset | |||
|Standard or LITE Audio | |||
|bullet=yes|Standard Audio (default)}} | |||
|button=yes | |||
|buttonText=Next}}{{FomodPage | |||
|True Storms - Wasteland Edition | |||
|{{Fieldset | |||
|Weather Chances | |||
|bullet=yes|Standard Vanilla}} | |||
|button=yes | |||
|buttonText=Next}}{{FomodPage | |||
|True Storms - Wasteland Edition | |||
|{{Fieldset | |||
|Volatility | |||
|bullet=yes|Longer Weather (default)}} | |||
|button=yes | |||
|buttonText=Next}}{{FomodPage | |||
|True Storms - Wasteland Edition | |||
|{{Fieldset | |||
|Sunset Time | |||
|bullet=yes|Standard Vanilla}} | |||
|button=yes | |||
|buttonText=Next}}{{FomodPage | |||
|True Storms - Wasteland Edition | |||
|{{Fieldset | |||
|Heavy Fogs | |||
|bullet=yes|New Heavy Fogs (default)}} | |||
|button=yes | |||
|buttonText=Next}}{{FomodPage | |||
|True Storms - Wasteland Edition | |||
|{{Fieldset | |||
|Dangerous Glowing Sea | |||
|bullet=yes|3x Damage}} | |||
|button=yes | |||
|buttonText=Finish}} }} | |||
'''Override''' : WET - Water Enhancement Textures | |||
'''Special Instruction''' : | |||
* Make sure that rain occlusion is enabled in Fallout4Prefs.ini : <pre>bEnableRainOcclusion=1</pre> | |||
'''Description''' : Overhaul the storms weathers, improving both sounds and visuals during various climatic situations, and introducing new type of storms for more variety.}} | |||
===== Darker Nights ===== | |||
{{User:Kesta/ModInstructions | {{User:Kesta/ModInstructions | ||
| | |Darker Nights|https://www.nexusmods.com/fallout4/mods/191/?|1.10.6|unforbidable | ||
|{{User:Kesta/NexusDownload | |{{User:Kesta/NexusDownload | ||
|name=Files to download | |name=Files to download | ||
|MAIN= | |MAIN=Darker Nights}} | ||
| | {{FOMOD Instructions | ||
| | |file=Darker Nights | ||
|{{FomodPage | |||
|Darker Nights 1.10.6 | |||
|{{Fieldset | |||
|Darkness Level | |||
|bullet=yes|Light (level 4)}}{{Fieldset | |||
|Sky | |||
|bullet=yes|Vanilla}} | |||
|button=yes | |||
|buttonText=Next}}{{FomodPage | |||
|Darker Nights 1.10.6 | |||
|{{Fieldset | |||
|Detection | |||
|bullet=yes|Easy (level 4)}} | |||
|button=yes | |||
|buttonText=Next}}{{FomodPage | |||
|Darker Nights 1.10.6 | |||
|{{Fieldset | |||
|Night Vision | |||
|bullet=yes|Alternative (Green Tint)}} | |||
|button=yes | |||
|buttonText=Next}}{{FomodPage | |||
|Darker Nights 1.10.6 | |||
|{{Fieldset | |||
|Night Vision Strength | |||
|bullet=yes|Moderate}} | |||
|button=yes | |||
|buttonText=Finish}} }} | |||
'''Notes''' : | |||
* You don't need the patches from the optional downloads. Those two patches still have conflicts with each others. Everything is handled properly in the "BABY Visuals" patch, or in the full BABY Patch. | |||
* If you don't use a post-processing mod which already darken nights, such as one of the two recommended at the beginning of this guide, choose the Dark (level 2) option, and make the next parameters match this choice. In this case, you won't be able to use the patches from BABY and will need to install the optional files. | |||
'''Description''' : Increase nights darkness, and provide additional tweaks to re-adjust NPC detection and Night vision.}} | |||
===== Fr4nsson's Light Tweaks ===== | |||
{{User:Kesta/ModInstructions | |||
|flare={{User:Kesta/flare|OPT}} | |||
|Fr4nsson's Light Tweaks|https://www.nexusmods.com/fallout4/mods/2139/?|1.6|Fr4nsson | |||
|{{User:Kesta/NexusDownload | |||
|name=Files to download | |||
|MAIN=Fr4nsson's Light Tweaks V1.6 - Indoor Only}} | |||
'''Description''' : Edit interiors image-spaces (~built-in post-processing) to remove fake skylights (light from the roof) and tweak bloom effects. This result in somewhat darkers/dimmers interiors leading to an enhanced contrast in enlightened areas. <br> | |||
Look good with the Cinematic Excellence ReShade, not so much with the ENB part (which kill an other part of the ambiant lighting, making scenes extremely dark if no lightsources are around). Pick one or the other (choosing the ENB is more performance intensive)}} | |||
===== Fallout Textures Overhaul Stars ===== | |||
{{User:Kesta/ModInstructions | |||
|Fallout Textures Overhaul Stars|https://www.nexusmods.com/fallout4/mods/145/?|1.0|Gorgulla | |||
|{{User:Kesta/NexusDownload | |||
|name=Files to download | |||
|MAIN=FTO Stars 2K}} {{User:Kesta/NexusDownload | |||
|name={{User:Kesta/flare|HQ}} Alternative | |||
|MAIN=FTO Stars 4k}} | |||
'''Description''' : Densify the number of stars in the sky.}} | |||
===== FO4 MOON ===== | |||
{{User:Kesta/ModInstructions | {{User:Kesta/ModInstructions | ||
| | |FO4 MOON|https://www.nexusmods.com/fallout4/mods/226/?|4.0|ramccoid | ||
|{{User:Kesta/NexusDownload | |{{User:Kesta/NexusDownload | ||
|name=Files to download | |name=Files to download | ||
|MAIN= | |MAIN=FO4 MOON v4 x1024}} {{User:Kesta/NexusDownload | ||
|name={{User:Kesta/flare|HQ}} Alternative | |name={{User:Kesta/flare|HQ}} Alternative | ||
|MAIN= | |MAIN=FO4 MOON v4 x2048}} | ||
'''Description''' : Bigger and better-looking moon !}} | |||
==== BABY Patch ==== | |||
{{User:Kesta/ModInstructions | {{User:Kesta/ModInstructions | ||
| | |flare={{User:Kesta/flare|OPT}} | ||
|BABY Visuals|https://www.nexusmods.com/fallout4/mods/4790/?|0.1.4.1|Kesta | |||
|{{User:Kesta/NexusDownload | |{{User:Kesta/NexusDownload | ||
|name=Files to download | |name=Files to download | ||
| | |OPT=BABY Visuals}} | ||
''' | '''Note''': Only use this patch if you don't install the whole guide and thus can't use the full BABY Patch. | ||
'''Description''': Fix conflicts between Darker Nights, True Storms and Radiants Clouds and Fogs, including those between the two patches included in Darker Nights}} | |||
=== Textures - Landscape & Architecture === | |||
Same as for environment, landscape and architectures are seen pretty much everywhere in Fallout 4. | |||
==== Nexus Mods ==== | |||
===== FAR - Faraway Area Reform ===== | |||
{{User:Kesta/ModInstructions | {{User:Kesta/ModInstructions | ||
| | |FAR - Faraway Area Reform|https://www.nexusmods.com/fallout4/mods/1355/?|1.1|SparrowPrince | ||
|{{User:Kesta/NexusDownload | |{{User:Kesta/NexusDownload | ||
|name=Files to download | |name=Files to download | ||
|MAIN= | |MAIN=FAR - Faraway Area Reform 1_1 | ||
|OPT=FAR - Optimised Default Bump Maps 1-1}} | |||
'''Description''' : Improved textures of the distant terrain, also improving performances, killing two pidgeys with one stone.}} | |||
===== Rock On ===== | |||
{{User:Kesta/ModInstructions | |||
|Rock On|https://www.nexusmods.com/fallout4/mods/680/?|09beta|3AMt | |||
|{{User:Kesta/NexusDownload | |||
|name=Files to download | |||
|MAIN=Rock On}} | |||
'''Description''' : Improved rock textures, more patterned and a bit darker then vanilla's.}} | |||
===== Better Quarry Sights ===== | |||
{{User:Kesta/ModInstructions | |||
|Better Quarry Sights|https://www.nexusmods.com/fallout4/mods/1366/?|2.2|LucidAPs | |||
|{{User:Kesta/NexusDownload | |||
|name=Files to download | |||
|MAIN=Better Quarry Sites}} {{User:Kesta/NexusDownload | |||
|name={{User:Kesta/flare|HQ}} Optional | |||
|OPT = Better Quarry Sites - HD Normal Maps}} | |||
'''Description''' : Improved quarry sights with higher res textures, contributing to rectify some visual glitches/stretching.}} | |||
===== Vivid Fallouts - Landscapes ===== | |||
{{User:Kesta/ModInstructions | {{User:Kesta/ModInstructions | ||
| | |Vivid Fallouts - Landscapes|https://www.nexusmods.com/fallout4/mods/1769/?|2.1|Hein84 | ||
|{{User:Kesta/NexusDownload | |{{User:Kesta/NexusDownload | ||
|name=Files to download | |name=Files to download | ||
|MAIN= | |MAIN=Vivid Fallout - Landscapes - Best Choice}} {{User:Kesta/NexusDownload | ||
|name={{User:Kesta/flare|LQ}} Alternative | |||
|MAIN=Vivid Fallout - Landscapes - Best Performances}} {{User:Kesta/NexusDownload | |||
|name={{User:Kesta/flare|HQ}} Alternative | |||
|MAIN=xVivid Fallout - Landscapes - 2k}} | |||
'''Description''' : Improved ground textures. Albeit those textures are higher-res and better looking than vanilla's, they still contribute to improve performances thanks to compression format magic.}} | |||
===== New Road Enhanced ===== | |||
{{User:Kesta/ModInstructions | {{User:Kesta/ModInstructions | ||
| | |New Road Enhanced|https://www.nexusmods.com/fallout4/mods/1954/?|2.0|Rufus696 | ||
|{{User:Kesta/NexusDownload | |{{User:Kesta/NexusDownload | ||
|name=Files to download | |name=Files to download | ||
|MAIN= | |MAIN=New Road BETA V2}} | ||
'''Override''' : Vivid Fallouts - Landscapes | |||
'''Description''' : Improved road textures, a little bit more crackled than vanilla.}} | |||
===== Langleys HD Textures Workshop ===== | |||
{{User:Kesta/ModInstructions | {{User:Kesta/ModInstructions | ||
| | |Langleys HD Textures Workshop|https://www.nexusmods.com/fallout4/mods/1897/?|0.8|Langley | ||
|{{User:Kesta/NexusDownload | |{{User:Kesta/NexusDownload | ||
|name=Files to download | |name=Files to download | ||
|MAIN= | |MAIN=Langleys HD Textures Workshop}} {{User:Kesta/NexusDownload | ||
|name=Files to download | |||
|OPT=Optional Files}} | |||
'''Special Instructions''' : | |||
* Do not install the optional files as is. | |||
* Disable the main file install in NMM | |||
* Open NMM's mod folder for Langley's workshop | |||
* Open the optional archive with 7zip | |||
* Extract the content of Rust Bobblehead Stand and Broken Bricks sub-folders into it (''Textures'' folders should merge) | |||
'''Override''' : | |||
* Vivid Fallouts - Landscapes | |||
'''Description''' : High quality retex of various architecture and decoration items.}} | |||
===== Haul'd Out ===== | |||
{{User:Kesta/ModInstructions | {{User:Kesta/ModInstructions | ||
| | |flare={{User:Kesta/flare|core}} | ||
|Haul'd Out 4K|https://www.nexusmods.com/fallout4/mods/5086/?|1.1.1|DUST2DEATH | |||
|{{User:Kesta/NexusDownload | |{{User:Kesta/NexusDownload | ||
|name=Files to download | |name=Files to download | ||
|MAIN= | |MAIN=HaulD Out 2K - Pier, HaulD Out 2K - Warehouse}} | ||
'''Description''' : High-quality retextures of two architecture sets, warehouses and pier.}} | |||
===== Prydwen 2K Textures ===== | |||
{{User:Kesta/ModInstructions | {{User:Kesta/ModInstructions | ||
| | |flare={{User:Kesta/flare|HQ}} | ||
|Prydwen 2K Textures|https://www.nexusmods.com/fallout4/mods/4141/?|1.0|tamu75 | |||
|{{User:Kesta/NexusDownload | |{{User:Kesta/NexusDownload | ||
|name=Files to download | |name=Files to download | ||
|MAIN= | |MAIN=Prydwen 2K Textures v1.0}} | ||
'''Description''' : Reflective and shiny textures for the Prydwen's floor ! Plus texture improvements to the overall Prydwen's textures.}} | |||
=== Textures - Equipment === | === Textures - Equipment === | ||
Time to pimp up the various pieces of equipment found around the commonwealth. | |||
==== Nexus Mods ==== | |||
===== Proto Vault Suit ===== | |||
{{User:Kesta/ModInstructions | {{User:Kesta/ModInstructions | ||
|Proto Vault Suit| | |Proto Vault Suit|https://www.nexusmods.com/fallout4/mods/2187/?|1.2|nitronizer | ||
|{{User:Kesta/NexusDownload | |{{User:Kesta/NexusDownload | ||
|name=Files to download | |name=Files to download | ||
|MAIN=ProtoVaultSuit - Blue 1.2}} {{User:Kesta/NexusDownload | |MAIN=ProtoVaultSuit - Blue 1.2}} {{User:Kesta/NexusDownload | ||
|name=Alternatives | |name=Alternatives | ||
|OPT=Any of the alternative colors you prefer}} }} | |OPT=Any of the alternative colors you prefer}} | ||
'''Description''' : High quality retexture of the vaultsuit, with color alternatives. Different than vanilla though true to the original look.}} | |||
===== Fallout textures Overhaul PipBoy ===== | |||
{{User:Kesta/ModInstructions | {{User:Kesta/ModInstructions | ||
|Fallout textures Overhaul PipBoy| | |Fallout textures Overhaul PipBoy|https://www.nexusmods.com/fallout4/mods/449/?|2.3|Gorgulla | ||
|{{User:Kesta/NexusDownload | |{{User:Kesta/NexusDownload | ||
|name=Files to download | |name=Files to download | ||
| Line 578: | Line 1,127: | ||
|name=Alternative | |name=Alternative | ||
|OPT=FTO Pip-Boy UHD 4K Dark Version}} | |OPT=FTO Pip-Boy UHD 4K Dark Version}} | ||
'''Note''' : Do {{Fc|Important|NOT}} override the map from Satellite World Map | |||
'''Description''' : HD retexture of the Pip-Boy.}} | |||
===== Immersive Wastelander's Ammunition ===== | |||
{{User:Kesta/ModInstructions | {{User:Kesta/ModInstructions | ||
|Immersive Wastelanders Ammunitions| | |Immersive Wastelanders Ammunitions|https://www.nexusmods.com/fallout4/mods/523/?|1.0|Atrioch | ||
|{{User:Kesta/NexusDownload | |{{User:Kesta/NexusDownload | ||
|name=Files to download | |name=Files to download | ||
|MAIN=Immersive Wastelander's Ammunition}} }} | |MAIN=Immersive Wastelander's Ammunition}} | ||
'''Description''' : Retexture of the ammo boxes, giving them a more weathered look way more plausible than the almost-shiny vanilla ones.}} | |||
===== Combat Armor No Star Decal ===== | |||
{{User:Kesta/ModInstructions | {{User:Kesta/ModInstructions | ||
|flare={{User:Kesta/flare|OPT}} | |flare={{User:Kesta/flare|OPT}} | ||
| | |Combat Armor No Star Decal|https://www.nexusmods.com/fallout4/mods/524/?|0.1|Milacetious | ||
|{{User:Kesta/NexusDownload | |{{User:Kesta/NexusDownload | ||
|name=Files to download | |name=Files to download | ||
|MAIN=Combat Armor No Star Decal}} }} | |MAIN=Combat Armor No Star Decal}} | ||
'''Description''' : Remove the star decal from the power armor, preventing from an undesired cap'tain america look.}} | |||
===== New Double Barrel Shotgun Textures ===== | |||
{{User:Kesta/ModInstructions | {{User:Kesta/ModInstructions | ||
|New Double Barrel Shotgun Textures| | |New Double Barrel Shotgun Textures|https://www.nexusmods.com/fallout4/mods/2211/?|1.0|Millenia | ||
|{{User:Kesta/NexusDownload | |{{User:Kesta/NexusDownload | ||
|name=Files to download | |name=Files to download | ||
|MAIN=ScratchMade - FO4 Double Barrel Shotgun retexture}} }} | |MAIN=ScratchMade - FO4 Double Barrel Shotgun retexture}} | ||
'''Description''' : HQ retexture for double barrels shotguns.}} | |||
===== New Combat Shotgun and Rifle textures ===== | |||
{{User:Kesta/ModInstructions | {{User:Kesta/ModInstructions | ||
|New Combat Shotgun and Rifle textures| | |New Combat Shotgun and Rifle textures|https://www.nexusmods.com/fallout4/mods/4046/?|1.1|Millenia | ||
|{{User:Kesta/NexusDownload | |{{User:Kesta/NexusDownload | ||
|name=Files to download | |name=Files to download | ||
| Line 606: | Line 1,161: | ||
|name={{User:Kesta/flare|LQ}} | |name={{User:Kesta/flare|LQ}} | ||
|OPT=Fallout 4 Combat Shotgun and Rifle retexture - 2048 tex}} | |OPT=Fallout 4 Combat Shotgun and Rifle retexture - 2048 tex}} | ||
'''Override''': New Double Barrel Shotgun Textures (same files) | '''Override''': New Double Barrel Shotgun Textures (same files) | ||
'''Description''' : HQ retexture for shotguns and rifles.}} | |||
===== 4K Black Suit and Tuxedo ===== | |||
{{User:Kesta/ModInstructions | {{User:Kesta/ModInstructions | ||
|4K Black Suit and Tuxedo| | |4K Black Suit and Tuxedo|https://www.nexusmods.com/fallout4/mods/2625/?|1.1|TwistedMethod | ||
|{{User:Kesta/NexusDownload | |{{User:Kesta/NexusDownload | ||
|name=Files to download | |name=Files to download | ||
|MAIN=4k Black Suit (Smoother) ; 4k Tuxedo (as requested)}} }} | |MAIN=4k Black Suit (Smoother) ; 4k Tuxedo (as requested)}} | ||
'''Description''' : HQ retexture of the black suit and the tuxedo.}} | |||
===== Fallout Textures Overhaul Power Armors ===== | |||
{{User:Kesta/ModInstructions | {{User:Kesta/ModInstructions | ||
|Fallout Textures Overhaul Power Armors| | |Fallout Textures Overhaul Power Armors|https://www.nexusmods.com/fallout4/mods/3344/?|1.3|Gorgulla | ||
|{{User:Kesta/NexusDownload | |{{User:Kesta/NexusDownload | ||
|name=Files to download | |name=Files to download | ||
|MAIN=FTO Power Armors UHD 4K T-45}} {{User:Kesta/NexusDownload | |MAIN=FTO Power Armors UHD 4K Power Armor FRAME;FTO Power Armors UHD 4K T-45;FTO Power Armors UHD 4K T-60}} {{User:Kesta/NexusDownload | ||
|name={{User:Kesta/flare|LQ}} Alternative | |name={{User:Kesta/flare|LQ}} Alternative | ||
| | |OPT=FTO Power Armors UHD 2K Power Armor FRAME;FTO Power Armors UHD 2K T-45;FTO Power Armors UHD 2K T-60}} | ||
'''Description''' : HQ retexture of the Power Armor Frame, the T-45 Power Armor, and the T-60.}} | |||
===== .44 Magnum Retexture ===== | |||
{{User:Kesta/ModInstructions | {{User:Kesta/ModInstructions | ||
|.44 Magnum Retexture| | |.44 Magnum Retexture|https://www.nexusmods.com/fallout4/mods/4383/?|1.1|Exodus | ||
|{{User:Kesta/NexusDownload | |{{User:Kesta/NexusDownload | ||
|name=Files to download | |name=Files to download | ||
|MAIN=.44 Magnum Double Resolution}} {{User:Kesta/NexusDownload | |MAIN=.44 Magnum Double Resolution}} {{User:Kesta/NexusDownload | ||
|name={{User:Kesta/flare|LQ}} Alternative | |name={{User:Kesta/flare|LQ}} Alternative | ||
|MAIN=.44 Magnum Standard Resolution}} }} | |MAIN=.44 Magnum Standard Resolution}} | ||
'''Description''' : Good-looking retexture of the .44 Magnum, slightly cleaner than vanilla.}} | |||
=== | ===== Eyewear and mask retexture ===== | ||
{{User:Kesta/ModInstructions | |||
|Eyewear and mask retexture|https://www.nexusmods.com/fallout4/mods/5021/?|1.4|Castell | |||
|{{User:Kesta/NexusDownload | |||
|name=Files to download | |||
|MAIN=Eyewear and mask retexture}} | |||
'''Description''' : High quality retexture of eyewear (and masks with eye-protection) to give them a realistic look.}} | |||
=== Textures - Clutter === | |||
Improved visuals for various clutters items seen around the commonwealth. | |||
==== Nexus Mods ==== | |||
===== Weathered First Aid Kit ===== | |||
{{User:Kesta/ModInstructions | |||
|Weathered First Aid Kit|https://www.nexusmods.com/fallout4/mods/1293/?|1.0|Kazeite | |||
|{{User:Kesta/NexusDownload | |||
|name=Files to download | |||
|MAIN=Weathered First Aid Kit}} | |||
'''Description''' : Retexture of the First Aid Kit so it match better the general atmosphere of the game, vanilla's kit being too clean and thus looking out of place in some places.}} | |||
===== High Resolution Pack - Valius ===== | |||
{{User:Kesta/ModInstructions | |||
|High Resolution Pack - Valius|https://www.nexusmods.com/fallout4/mods/318/?|1.2.3|Valius | |||
|{{User:Kesta/NexusDownload | |||
|name=Files to download | |||
|MAIN=Textures - 2K Version}} | |||
'''Description''' : Improve some furniture textures such as desks and cabinets}} | |||
===== Better Computer Terminals ===== | |||
{{User:Kesta/ModInstructions | |||
|Better Computer Terminals|https://www.nexusmods.com/fallout4/mods/2154/?|1.0|Jomla97 | |||
|{{User:Kesta/NexusDownload | |||
|name=Files to download | |||
|MAIN=Better Computer Terminals - 2K Dirtier}} | |||
'''Description''' : Improve terminals textures, with letters on the keyboard !}} | |||
===== HD ReTexture 4X 2X WIP ===== | |||
{{User:Kesta/ModInstructions | {{User:Kesta/ModInstructions | ||
| | |HD ReTexture 4X 2X WIP|https://www.nexusmods.com/fallout4/mods/3747/?|3.3|FlaconOil | ||
|{{User:Kesta/NexusDownload | |{{User:Kesta/NexusDownload | ||
|name=Files to download | |name=Files to download | ||
|MAIN= | |MAIN=Full Main Fomod installer 3.0 | ||
| | |UPDT=Update 3.0 to 3.1;Update 3.1 to 3.2;Update 3.2 to 3.3}} {{User:Kesta/NexusDownload | ||
|name={{User:Kesta/flare|LQ}} Optional | |||
|OPT=Optional for performance 3.1;Optional for performance Update 3.2;Optional for performance Update 3.3}} | |||
{{FOMOD Instructions | |||
|{{FomodPage | |{{FomodPage | ||
| | |FlaconOil 4X 2X FromScratch ReTexture WIP - Main Full | ||
|{{Fieldset | |{{Fieldset | ||
|Info | |||
|bullet=no|None}} {{Fieldset | |||
|Main | |Main | ||
|bullet=yes| | |bullet=yes|MegaLoader;BusStop;CigaretteMachine;PowerGenerator;NewsStand;RedRocketGasSign;PlutoniumWellTurbineShell;FolderPapers;OfficeBoxPapers;TrashBin;Trashcan;SafeFloor;SafeStanding;SafeWall;ACducts;CashRegister;ChashierNumber;Block and BrickCinder}} | ||
|button=yes|buttonText=Next}} {{FomodPage | |button=yes|buttonText=Next}} {{FomodPage | ||
| | |FlaconOil 4X 2X FromScratch ReTexture WIP - Main Full | ||
|{{Fieldset | |||
|FlaconOil Style Optional | |||
|bullet=no|None}} | |||
|button=yes|buttonText=Finish}} }} {{FOMOD Instructions | |||
|{{FomodPage | |||
|FlaconOil 4X 2X FromScratch ReTexture WIP - Update | |||
|{{Fieldset | |||
|3.0 to 3.1 | |||
|bullet=yes|Greebs and Lattices}} | |||
|button=yes|buttonText=Finish}} }} {{FOMOD Instructions | |||
|{{FomodPage | |||
|FlaconOil 4X 2X FromScratch ReTexture WIP - Update | |||
|{{Fieldset | |||
|3.1 to 3.2 | |||
|bullet=yes|FuseBox;IceMachine}} | |||
|button=yes|buttonText=Finish}} }} {{FOMOD Instructions | |||
|{{FomodPage | |||
|FlaconOil 4X 2X FromScratch ReTexture WIP - Update | |||
|{{Fieldset | |{{Fieldset | ||
| | |3.2 to 3.3 | ||
|bullet=yes| | |bullet=yes|BookVendingMachine}} | ||
|button=yes | |button=yes|buttonText=Finish}} }} | ||
|buttonText= | '''Override''' : Langleys Workshop | ||
'''Description''' : High quality retex of various outdoors furnitures and other machines}} | |||
===== OJO BUENO NUKA-COLA MACHINE ===== | |||
{{User:Kesta/ModInstructions | {{User:Kesta/ModInstructions | ||
| | |OJO BUENO NUKA-COLA MACHINE|https://www.nexusmods.com/fallout4/mods/4403/?|2.0|tapioks | ||
|{{User:Kesta/NexusDownload | |{{User:Kesta/NexusDownload | ||
|name=Files to download | |name=Files to download | ||
|MAIN= | |MAIN=Ojo Bueno Nuka-Cola Machine - 2K Full}} {{User:Kesta/NexusDownload | ||
|name={{User:Kesta/flare|HQ}} Alternative | |||
|MAIN=Ojo Bueno Nuka-Cola Machine - 4K}} {{User:Kesta/NexusDownload | |||
|name={{User:Kesta/flare|LQ}} Alternative | |||
|MAIN=Ojo Bueno Nuka-Cola Machine - 2K Lite}} | |||
'''Description''' : Improve Nuka-Cola distributors textures}} | |||
===== OJO BUENO MILK VENDING MACHINE ===== | |||
{{User:Kesta/ModInstructions | {{User:Kesta/ModInstructions | ||
| | |OJO BUENO MILK VENDING MACHINE|https://www.nexusmods.com/fallout4/mods/11640/?|2.0|tapioks | ||
|{{User:Kesta/NexusDownload | |{{User:Kesta/NexusDownload | ||
|name=Files to download | |name=Files to download | ||
|MAIN= | |MAIN=Ojo Bueno Milk Vending Machine - 2K Lite}} {{User:Kesta/NexusDownload | ||
|name={{User:Kesta/flare|HQ}} Alternative | |||
|MAIN=Ojo Bueno Milk Vending Machine - 4K}} {{User:Kesta/NexusDownload | |||
|name={{User:Kesta/flare|LQ}} Alternative | |||
|MAIN=Ojo Bueno Milk Vending Machine - 1K}} | |||
'''Description''' : Improve Milk vending machines textures}} | |||
===== Fallout 4 HD Reworked Project ===== | |||
{{User:Kesta/ModInstructions | {{User:Kesta/ModInstructions | ||
| | |Fallout 4 HD Reworked Project|https://www.nexusmods.com/fallout4/mods/10467/?|1.0|Halk Hogan | ||
|{{User:Kesta/NexusDownload | |{{User:Kesta/NexusDownload | ||
|name=Files to download | |name=Files to download | ||
|MAIN= | |MAIN=Fallout 4 HD Reworked Project 1.0 - QUALITY}} {{User:Kesta/NexusDownload | ||
| | |name={{User:Kesta/flare|LQ}} Alternative | ||
|MAIN=Fallout 4 HD Reworked Project 1.0 - xPERFORMANCE}} | |||
'''Description''' : Upgrade several clutters elements to high quality visuals, both textures and meshes.}} | |||
===== FOAM - Better Locks ===== | |||
{{User:Kesta/ModInstructions | {{User:Kesta/ModInstructions | ||
| | |FOAM - Better Locks|https://www.nexusmods.com/fallout4/mods/4370/?|2.2.1a|Dread | ||
|{{User:Kesta/NexusDownload | |{{User:Kesta/NexusDownload | ||
|name=Files to download | |name=Files to download | ||
|MAIN= | |MAIN=Better Locks v2.1.1a}} | ||
'''Note''' : The mod is wrongly packaged. NMM will install the blue screwdriver by default. That's fine if you're ok with it. Install the alternative folder if you prefer the vanilla red (recommended) or a green one. | |||
'''Description''' : Improve lock's texture seen during the lockpicking mini-game.}} | |||
=== Textures - Items === | |||
==== Nexus Mods ==== | |||
===== Improved Pre-War Money ===== | |||
{{User:Kesta/ModInstructions | {{User:Kesta/ModInstructions | ||
| | |Improved Pre-War Money|https://www.nexusmods.com/fallout4/mods/1784/?|1.0|Zaldiir | ||
|{{User:Kesta/NexusDownload | |{{User:Kesta/NexusDownload | ||
|name=Files to download | |name=Files to download | ||
| | |MAIN=Improved Pre-War Money}} | ||
'''Description''' : Improve the very low-res Pre-War money texture.}} | |||
===== Comics Got Back ===== | |||
{{User:Kesta/ModInstructions | {{User:Kesta/ModInstructions | ||
| | |Comics Got Back|https://www.nexusmods.com/fallout4/mods/1644/?|2.0|tonicmole | ||
|{{User:Kesta/NexusDownload | |{{User:Kesta/NexusDownload | ||
|name=Files to download | |name=Files to download | ||
|MAIN= | |MAIN=COMICS GOT BACK 2.0 | ||
|OPT=Optional Survival Guide Fix}} | |||
|OPT=Optional | '''Description''' : Give a back with an ad to collectibles magazines.}} | ||
''' | ===== FTO Pip-Boy - Holotape ===== | ||
{{User:Kesta/ModInstructions | {{User:Kesta/ModInstructions | ||
| | |FTO Pip-Boy - Holotape|https://www.nexusmods.com/fallout4/mods/449/?|2.3|Gorgulla | ||
|{{User:Kesta/NexusDownload | |{{User:Kesta/NexusDownload | ||
|name=Files to download | |name=Files to download | ||
| | |OPT=FTO Pip-Boy Holotape}} | ||
'''Description''' : Part of Gorgulla's pipboy overhaul, huge improvement of the holotapes textures.}} | |||
===== Chem Redux ===== | |||
{{User:Kesta/ModInstructions | {{User:Kesta/ModInstructions | ||
| | |Chem Redux|https://www.nexusmods.com/fallout4/mods/2099/?|2.5|Derp | ||
|{{User:Kesta/NexusDownload | |{{User:Kesta/NexusDownload | ||
|name=Files to download | |name=Files to download | ||
|MAIN= | |MAIN=Chem Redux 2.5 - No Glow}} | ||
'''Description''' : Small retexture of chems, offering more variety between the different declination of mentats and other drugs by giving each a more unique appearance.}} | |||
=== Textures - Creatures === | |||
We're don't exactly want awful creatures to look sexy. but that doesn't mean we cannot make them better looking ;) | |||
==== Nexus Mods ==== | |||
===== Detailled deathclaws ===== | |||
{{User:Kesta/ModInstructions | {{User:Kesta/ModInstructions | ||
|Detailled deathclaws| | |Detailled deathclaws|https://www.nexusmods.com/fallout4/mods/2865/?|2|jim | ||
|{{User:Kesta/NexusDownload | |{{User:Kesta/NexusDownload | ||
|name=Files to download | |name=Files to download | ||
|OPT=Detailed Deathclaws - 2k x 2k resolution}} {{User:Kesta/NexusDownload | |OPT=Detailed Deathclaws - 2k x 2k resolution}} {{User:Kesta/NexusDownload | ||
|name={{User:Kesta/flare|HQ}} Alternative | |name={{User:Kesta/flare|HQ}} Alternative | ||
|MAIN=Detailed Deathclaws - 4k x 4k resolution}} }} | |MAIN=Detailed Deathclaws - 4k x 4k resolution}} | ||
'''Description''' : Improve deathclaw's textures.}} | |||
=== Textures - | === Textures - Characters === | ||
==== Nexus Mods ==== | |||
===== Immersive Mouth and Teeth ===== | |||
{{User:Kesta/ModInstructions | {{User:Kesta/ModInstructions | ||
|Immersive Mouth and Teeth| | |Immersive Mouth and Teeth|https://www.nexusmods.com/fallout4/mods/903/?|3.1.0|ClearanceClarence | ||
|{{User:Kesta/NexusDownload | |{{User:Kesta/NexusDownload | ||
|name=Files to download | |name=Files to download | ||
| | |MAIN=Immersive Mouth and Teeth - All-In-One - 3.1.0}} | ||
| | {{FOMOD Instructions | ||
| | |file=Immersive Mouth and Teeth - All-In-One - 3.1.0 | ||
|{{FomodPage | |||
|Immersive Mouth and Teeth | |||
|{{Fieldset | |||
|Which Type | |||
|bullet=yes|Type 1}} | |||
|button=yes }} {{FomodPage | |||
|Immersive Mouth and Teeth | |||
|{{Fieldset | |||
|Size (Type1) | |||
|bullet=yes|1K (Recommended)}} | |||
|button=yes | |||
|buttonText=Finish}} }} | |||
'''Description''' : Improve character's mouth and teeth textures.}} | |||
===== Med-Tek Facial Reconstruction - Eyes ===== | |||
{{User:Kesta/ModInstructions | {{User:Kesta/ModInstructions | ||
|Med-Tek Facial Reconstruction - Eyes| | |Med-Tek Facial Reconstruction - Eyes|https://www.nexusmods.com/fallout4/mods/1/?|1.0|Xenius | ||
|{{User:Kesta/NexusDownload | |{{User:Kesta/NexusDownload | ||
|name=Files to download | |name=Files to download | ||
|MAIN=MTFR}} }} | |MAIN=MTFR}} | ||
'''Description''' : Slight improvement of character's eyes and eyelashes textures.}} | |||
===== Lore-Friendly Ghoul Eyes ===== | |||
{{User:Kesta/ModInstructions | {{User:Kesta/ModInstructions | ||
|Lore-Friendly Ghoul Eyes| | |Lore-Friendly Ghoul Eyes|https://www.nexusmods.com/fallout4/mods/209/?|1.0|Pommymax | ||
|{{User:Kesta/NexusDownload | |{{User:Kesta/NexusDownload | ||
|name=Files to download | |name=Files to download | ||
|OPT=Lore-Friendly Ghoul Eyes (Nuclear Edition)}} | |OPT=Lore-Friendly Ghoul Eyes (Nuclear Edition)}} | ||
''' | '''Override''' : Med-Tek Facial Reconstruction - Eyes | ||
'''Description''' : Change ghouls' eyes to a cataract-looking style instead of the default full black one. }} | |||
===== deLuxe Makeup ===== | |||
{{User:Kesta/ModInstructions | {{User:Kesta/ModInstructions | ||
|deLuxe | |deLuxe Makeup|https://www.nexusmods.com/fallout4/mods/4398/?|0.1|Cilbas | ||
|{{User:Kesta/NexusDownload | |{{User:Kesta/NexusDownload | ||
|name=Files to download | |name=Files to download | ||
|MAIN= | |MAIN=Lip Liner Mask}} | ||
'''Note''': For now, only the lip-liner part of the mod is recommended for BABY. You can still install the eyeliners modifications if you like them but those are currently untested. | |||
'''Description''': Improve character's lips, smoothing the weird color gradient on the contour.}} | |||
=== Sounds Improvements === | === Sounds Improvements === | ||
Often left-aside, the audio setup are actually a critical part of a high-quality (modded) game. | |||
{{alert|type=construction|text=This section isn't up to date.}} | |||
==== Nexus Mods ==== | |||
===== No More Cash Register Sound ===== | |||
{{User:Kesta/ModInstructions | {{User:Kesta/ModInstructions | ||
|No More Cash Register Sound| | |No More Cash Register Sound|https://www.nexusmods.com/fallout4/mods/100/?|1.0|LiquidBronze | ||
|{{User:Kesta/NexusDownload | |{{User:Kesta/NexusDownload | ||
|name=Files to download | |name=Files to download | ||
|MAIN=No more cash register sound}} }} | |MAIN=No more cash register sound}} | ||
'''Description''' : Remove the annoying gling-gling sound played whenever you gain experience points.}} | |||
===== Power Armor Movement Sounds ===== | |||
{{User:Kesta/ModInstructions | {{User:Kesta/ModInstructions | ||
|Power Armor Movement Sounds| | |Power Armor Movement Sounds|https://www.nexusmods.com/fallout4/mods/1544/?|1.2|ONIXer | ||
|{{User:Kesta/NexusDownload | |{{User:Kesta/NexusDownload | ||
|name=Files to download | |name=Files to download | ||
| Line 778: | Line 1,423: | ||
Sound\FX\FST\ArmorPower\FST_ArmorPower_Grass_Walk_*.wav | Sound\FX\FST\ArmorPower\FST_ArmorPower_Grass_Walk_*.wav | ||
</pre>''* means all the files which start by the same path & name''<br> | </pre>''* means all the files which start by the same path & name''<br> | ||
This is to remove the hydraulic sound from regular movement, and keep it only for special moves such as jumps. Otherwise the hydraulic sounds get very quickly annoying. | This is to remove the hydraulic sound from regular movement, and keep it only for special moves such as jumps. Otherwise the hydraulic sounds get very quickly annoying. | ||
'''Description''' : Improve the power armor's sounds, making it sound heavier and somewhat more robotic.}} | |||
===== Towbie's Realistic Weapon Sounds ===== | |||
{{User:Kesta/ModInstructions | {{User:Kesta/ModInstructions | ||
|Towbie's Realistic Weapon Sounds| | |Towbie's Realistic Weapon Sounds|https://www.nexusmods.com/fallout4/mods/130/?|0.56|towbiekun | ||
|{{User:Kesta/NexusDownload | |{{User:Kesta/NexusDownload | ||
|name=Files to download | |name=Files to download | ||
|MAIN=Towbie's Realistic Firearms}} }} | |MAIN=Towbie's Realistic Firearms}} | ||
'''Description''' : Improve firearms sounds, making them more resounding.}} | |||
===== Energy Weapon Sounds ===== | |||
{{User:Kesta/ModInstructions | {{User:Kesta/ModInstructions | ||
| | |Energy Weapon Sounds|https://www.nexusmods.com/fallout4/mods/4306/?|1.6|Kelleth | ||
|{{User:Kesta/NexusDownload | |{{User:Kesta/NexusDownload | ||
|name=Files to download | |name=Files to download | ||
|MAIN= | |MAIN=Energy Weapons 1.6 Evreything.}} | ||
'''Description''' : Improve energy weapon sounds, making the plasma ones sound closer to a blaster and the laser one more... "laseric" ? :)}} | |||
=== Visuals === | === Visuals === | ||
==== Nexus Mods ==== | |||
===== Lowered Weapons ===== | |||
{{User:Kesta/ModInstructions | {{User:Kesta/ModInstructions | ||
|Lowered Weapons| | |Lowered Weapons|https://www.nexusmods.com/fallout4/mods/522/?|1.1|lesma666 | ||
|{{User:Kesta/NexusDownload | |{{User:Kesta/NexusDownload | ||
|name=Files to download | |name=Files to download | ||
| Line 808: | Line 1,458: | ||
meshes\actors\powerarmor\_1stperson\animations\gatlinglaser | meshes\actors\powerarmor\_1stperson\animations\gatlinglaser | ||
meshes\actors\powerarmor\_1stperson\animations\fatman</pre> | meshes\actors\powerarmor\_1stperson\animations\fatman</pre> | ||
There is a glitch with the first 3 which have a warm-up time before firing. The fatman will just block your view if you keep it. | There is a glitch with the first 3 which have a warm-up time before firing. The fatman will just block your view if you keep it. | ||
'''Description''' : This mod will allow you to have your weapons lowered in 1st person view, when you are not shooting.}} | |||
===== Enhanced Blood Textures ===== | |||
{{User:Kesta/ModInstructions | {{User:Kesta/ModInstructions | ||
| | |Enhanced Blood Textures|https://www.nexusmods.com/fallout4/mods/212/?|1.0|dDefinder | ||
|{{User:Kesta/NexusDownload | |{{User:Kesta/NexusDownload | ||
|name=Files to download | |name=Files to download | ||
|MAIN= | |MAIN=EBT_Basic v1}} {{FOMOD Instructions | ||
|file=Enhanced Blood Textures | |||
|{{FomodPage | |||
|Enhanced Blood Textures | |||
|{{Fieldset | |||
|Main | |||
|bullet=yes|Enhanced Blood Textures Main}} {{Fieldset | |||
|Screen Blood | |||
|bullet=yes|Subtle}} {{Fieldset | |||
|Blood Mist | |||
|bullet=no|None}} {{Fieldset | |||
|Eye Cube Map | |||
|bullet=no|None}} {{Fieldset | |||
|Dark Outdoor | |||
|bullet=no|None}} {{Fieldset | |||
|Screen Duration | |||
|bullet=no|None}} {{Fieldset | |||
|Blood Size | |||
|bullet=no|None}} | |||
|button=yes }} {{FomodPage | |||
|Enhanced Blood Textures | |||
|{{Fieldset | |||
|Resolution and Color | |||
|bullet=yes|High, Alternate Darker Color}} | |||
|button=yes | |||
|buttonText=Install}} }} | |||
'''Description''' : Improvement of blood textures and modifications of various blood splashes impacts. Include a plugin for additional decal and impacts parameters.}} | |||
<!-- | |||
===== Brighter Settlement Lights ===== | |||
{{User:Kesta/ModInstructions | {{User:Kesta/ModInstructions | ||
| | |Brighter Settlement Lights|https://www.nexusmods.com/fallout4/mods/2494/?|1.2|Elvani | ||
|{{User:Kesta/NexusDownload | |{{User:Kesta/NexusDownload | ||
|name=Files to download | |name=Files to download | ||
|MAIN= | |MAIN=Brighter Settlement Lights v1.2}} | ||
{{FOMOD Instructions | {{FOMOD Instructions | ||
|file= | |file=Brighter Settlement Lights v1.2 | ||
|{{FomodPage | |{{FomodPage | ||
| | |Brighter Settlement Lights | ||
|{{Fieldset | |{{Fieldset | ||
| | |Pick a version | ||
|bullet=yes| | |bullet=yes|Brighter}} | ||
|button=yes | |button=yes | ||
|buttonText= | |buttonText=Install}} }} | ||
'''Description''' : Increase settlements lights level, resulting in a higher contrast with Darker Nights installed, for awesome nightly settlements.}}--> | |||
===== PipBoy Shadows ===== | |||
{{User:Kesta/ModInstructions | {{User:Kesta/ModInstructions | ||
| | |PipBoy Shadows|https://www.nexusmods.com/fallout4/mods/281/?|0.4|McGuffin | ||
|{{User:Kesta/NexusDownload | |{{User:Kesta/NexusDownload | ||
|name=Files to download | |name=Files to download | ||
|MAIN= | |MAIN=PipBoyShadows_HeadLamps}} | ||
'''Note''': We're only using the headlamps shadows, not the pipboy shadows, as this one look glitchy in most situations. | |||
'''Description''': Add shadows casting to power armors and mining headlamps}} | |||
===== Dynamic Muzzle Shadow ===== | |||
{{User:Kesta/ModInstructions | {{User:Kesta/ModInstructions | ||
| | |flare={{User:Kesta/flare|HQ}} | ||
|Dynamic Muzzle Shadow|https://www.nexusmods.com/fallout4/mods/2571/?|1.3|Troy Irving | |||
|{{User:Kesta/NexusDownload | |{{User:Kesta/NexusDownload | ||
|name=Files to download | |name=Files to download | ||
|MAIN= | |MAIN=Dynamic Weapon Shadows}} | ||
'''Description''' : Potential FPS crusher, this mod force shadows to be cast by the light of firing weapons.<br> | |||
The performance hit is only during battle, though that's when you need your game as smooth as possible.}} | |||
===== Shell Rain ===== | |||
{{User:Kesta/ModInstructions | {{User:Kesta/ModInstructions | ||
| | |Shell Rain|https://www.nexusmods.com/fallout4/mods/870/?|1.2|pauderek | ||
|{{User:Kesta/NexusDownload | |{{User:Kesta/NexusDownload | ||
|name=Files to download | |name=Files to download | ||
|MAIN= | |MAIN=Shell Rain}} | ||
'''Description''' : Drastically increase the number of visible shells, as well as the time they stay visible and the distance at which they appear.}} | |||
=== Settlements === | === Settlements === | ||
{{alert|type=construction|size=80|text=This section is being revamped, a large part of it and is currently hidden.}} | |||
==== Nexus Mods ==== | |||
===== Longer Powerlines ===== | |||
{{User:Kesta/ModInstructions | {{User:Kesta/ModInstructions | ||
| | |Longer Powerlines|https://www.nexusmods.com/fallout4/mods/2241/?|1.1|Puma361 | ||
|{{User:Kesta/NexusDownload | |{{User:Kesta/NexusDownload | ||
|name=Files to download | |name=Files to download | ||
|MAIN= | |MAIN=Longer Power Lines 3x}} | ||
'''Description''' : Increase the maximal length of power lines.}} | |||
<!-- | |||
===== ===== | |||
{{User:Kesta/ModInstructions | {{User:Kesta/ModInstructions | ||
| | |Expanded Settlements Buildings|https://www.nexusmods.com/fallout4/mods/3126/?|1.0|FloorBelow | ||
|{{User:Kesta/NexusDownload | |{{User:Kesta/NexusDownload | ||
|name=Files to download | |name=Files to download | ||
|MAIN= | |MAIN=ExpandedSettlementBuildingsV1.0}} | ||
'''Description''' : Add a few walls and doors available to build settlements}} | |||
===== ===== | |||
{{User:Kesta/ModInstructions | {{User:Kesta/ModInstructions | ||
| | |OCDecorator|https://www.nexusmods.com/fallout4/mods/4270/?|0.32c|Geoff Dow | ||
|{{User:Kesta/NexusDownload | |{{User:Kesta/NexusDownload | ||
|name=Files to download | |name=Files to download | ||
|MAIN= | |MAIN=OCDecorator - VER 0.32c}} | ||
'''Description''' : Add miscellaneous objects craftables via settlements' workshops as static objects to decorate the place.}} | |||
===== ===== | |||
{{User:Kesta/ModInstructions | {{User:Kesta/ModInstructions | ||
| | |Homemaker|https://www.nexusmods.com/fallout4/mods/1478/?|1.21|NovaCuru | ||
|{{User:Kesta/NexusDownload | |{{User:Kesta/NexusDownload | ||
|name=Files to download | |name=Files to download | ||
| | |MAIN=Homemaker 1.21}} | ||
'''Description''' : Add A LOT of new items available for crafting at settlements' workshops}} | |||
===== ===== | |||
{{User:Kesta/ModInstructions | {{User:Kesta/ModInstructions | ||
|Increased Settler Population with Infinite Settlement Budget| | |Increased Settler Population with Infinite Settlement Budget|https://www.nexusmods.com/fallout4/mods/1613/?|1.2|Puma361 | ||
|{{User:Kesta/NexusDownload | |{{User:Kesta/NexusDownload | ||
|name=Files to download | |name=Files to download | ||
|MAIN=IncreasedSettlerPopulation50 | |MAIN=IncreasedSettlerPopulation50 | ||
|OPT=NoObjectLimit}} }} | |OPT=NoObjectLimit}} | ||
'''Description''' : Remove the objects limits size on settlements, and increase the maximum numbers of settlers.}} | |||
===== ===== | |||
{{User:Kesta/ModInstructions | {{User:Kesta/ModInstructions | ||
| | |flare={{User:Kesta/flare|OPT}} | ||
|Flags of the Old World|https://www.nexusmods.com/fallout4/mods/4296/?|2.0|Zaldir | |||
|{{User:Kesta/NexusDownload | |{{User:Kesta/NexusDownload | ||
|name=Files to download | |name=Files to download | ||
|MAIN= | |MAIN=Flags of the Old World 2.0}} {{User:Kesta/NexusDownload | ||
|OPT= | |name={{User:Kesta/flare|SAFE}} Optional | ||
|OPT=Germany and Austria Safe Patch}} | |||
'''Description''' : Add more than a hundred of flag to personalize your settlement to your liking.}} | |||
--> | |||
=== Crafting === | === Crafting === | ||
==== ==== | |||
{{ | {{alert|type=construction|size=80|text=This section have to be reviewed from scratch and is currently hidden.}} | ||
<!-- | |||
===== ===== | |||
''' | {{User:Kesta/ModInstructions | ||
|Armorsmith Extended|https://www.nexusmods.com/fallout4/mods/2228/?|2.0|Gambit77 | |||
|{{User:Kesta/NexusDownload | |||
|name=Files to download | |||
|MAIN=Armorsmith Extended v2.0}} | |||
'''Description''' : Allow you to wear multiple armor pieces on clothing, as well as mixing up bandanas and head gear. Make most of the outfits upgradables with various mods. Add a new workbench with a few new outfits to be crafted there. }} | |||
===== ===== | |||
{{User:Kesta/ModInstructions | |||
|Crafting Workbenches|https://www.nexusmods.com/fallout4/mods/2451/?|1.0.2|drdanzel | |||
|{{User:Kesta/NexusDownload | |||
|name=Files to download | |||
|MAIN=Crafting Workbenches - NMM}} | |||
{{FOMOD Instructions | {{FOMOD Instructions | ||
|{{FomodPage | |{{FomodPage | ||
|Craftable | |Craftable Ammunition | ||
|{{Fieldset | |{{Fieldset | ||
|Main | |Main File | ||
|bullet=yes| | |bullet=yes|Base Mod|}} {{Fieldset | ||
| | |Ammo Crafting | ||
| | |bullet=yes|No ammunition crafting|}} {{Fieldset | ||
|button=yes|buttonText=Finish}} }} | |Optional Files | ||
|bullet=yes|Junk Item|}} {{Fieldset | |||
|Interface Changes | |||
|bullet=yes|Use edited interface|}} | |||
|button=yes|buttonText=Finish}} }} | |||
'''Note''' : The ''Pre War and Manufactured'' and ''Power Armor'' options in the ''Optional Files'' are balanced with high-tier perks and can be considered. | |||
'''Description''' : Add three new workbenches available at every workshop's settlement, allowing you to craft respectively vanilla armors, weapons, and clothes. Optionals files add new craft options, such as power armor and prewar weapons. The ammunition crafting feature is deprecated in BABY for Craftable Ammunition}} | |||
{{ | ===== ===== | ||
| | {{User:Kesta/ModInstructions | ||
|Craftable | |Craftable Armor Size|https://www.nexusmods.com/fallout4/mods/4550/?|1.2.0|johndoebowler | ||
|{{User:Kesta/NexusDownload | |||
| | |name=Files to download | ||
| | |MAIN=Craftable Armor Size}} | ||
| | '''Description''' : Allow you to modify a piece of armor to its light/sturdy/heavy variant via the mod system. Great feature since Crafting Workbenches items are created in random state.}} | ||
| | ===== ===== | ||
{{User:Kesta/ModInstructions | |||
|Power Armor Materials AND Paints|https://www.nexusmods.com/fallout4/mods/4619/?|1.01|Mcgan | |||
|{{User:Kesta/NexusDownload | |||
|name=Files to download | |||
|MAIN=PA_Materials_Paints}} | |||
'''Description''' : Separate power armor's paintings bonus from their visuals, allowing you to associate any upgrade with any look.}} | |||
===== ===== | |||
{{User:Kesta/ModInstructions | |||
|Craftable Ammunition|https://www.nexusmods.com/fallout4/mods/1018/?|1.13|Xylozi | |||
|{{User:Kesta/NexusDownload | |||
|name=Files to download | |||
|MAIN=Craftable Ammunition 1.13}} | |||
{{FOMOD Instructions | {{FOMOD Instructions | ||
|{{FomodPage | |{{FomodPage | ||
| Line 996: | Line 1,667: | ||
|{{Fieldset | |{{Fieldset | ||
|Install | |Install | ||
|bullet= | |bullet=no|None|}} | ||
|button=yes}} {{FomodPage | |button=yes}} {{FomodPage | ||
|Craftable Ammunition | |Craftable Ammunition | ||
|{{Fieldset | |{{Fieldset | ||
|Install | |Install | ||
|bullet= | |bullet=no|None|}} | ||
|button=yes|buttonText=Finish}} }} | |button=yes|buttonText=Finish}} }} | ||
'''Description''' : Add a Fallout New Vegas - like ammo crafting system, relying on base components available either by crafting or scrapping other ammos. Technological ammos such as Cryo Cells or Plasma Rounds can't be made from scratch but instead have to be converted from an other cell such as Fusion Cells. Everything is accomplished through a new dedicated workbench available at every settlement's workshop.<br> Nuka grenade and fusion core features are deprecated in BABY for Commonwealth Chemistry Expanded.}} | |||
===== ===== | |||
{{User:Kesta/ModInstructions | |||
|Commonwealth Chemistry Expanded|https://www.nexusmods.com/fallout4/mods/2514/?|1.10|Omnigma | |||
|{{User:Kesta/NexusDownload | |||
|name=Files to download | |||
|MAIN=Commonwealth Chemistry Expanded Full}} | |||
'''Description''' : Add a lot of items craftables at the chemistry station, including vanilla and new chems, gadgets, fusion cores and explosives.}} | |||
===== ===== | |||
{{User:Kesta/ModInstructions | |||
|Adhesive Recipes|https://www.nexusmods.com/fallout4/mods/3327/?|0.3.2|Mofakin | |||
|{{User:Kesta/NexusDownload | |||
|name=Files to download | |||
|MAIN=Adhesive Recipes}} | |||
'''Description''' : Add a few lore-friendly recipes to the cooking station allowing you to cook adhesive-yielding food from natural ingredients.}} | |||
===== ===== | |||
{{User:Kesta/ModInstructions | |||
|Craftable Cooking Oil|https://www.nexusmods.com/fallout4/mods/3840/?|1.0|ByDesign91 | |||
|{{User:Kesta/NexusDownload | |||
|name=Files to download | |||
|MAIN=Craftable Cooking Oil}} | |||
'''Description''' : Add a Cooking Oil recipe to the cooking station, made of natural ingredients.}} | |||
--> | |||
=== New items === | === New items and paintjobs === | ||
==== ==== | |||
{{ | {{alert|type=construction|size=80|text=This section have to be reviewed from scratch and is currently hidden.}} | ||
<!-- | |||
===== ===== | |||
'''Description''' : Add equippable gloves to the game. | {{User:Kesta/ModInstructions | ||
|Gloves of the commonwealth|https://www.nexusmods.com/fallout4/mods/2693/?|1.1|fadingsignal | |||
|{{User:Kesta/NexusDownload | |||
''' | |name=Files to download | ||
'''Description''' : | |MAIN=Gloves of the Commonwealth}} | ||
'''Description''' : Add equippable gloves to the game.}} | |||
===== ===== | |||
'''Description''' : Add | {{User:Kesta/ModInstructions | ||
|Gloves Of The Commonwealth - Crafting Workbench Patch|https://www.nexusmods.com/fallout4/mods/3387/?|1.0|Azrael_wtf | |||
|{{User:Kesta/NexusDownload | |||
|name=Files to download | |||
|MAIN=Crafting Workbench - GlovesOfTheCommonwealth Patch}} | |||
'''Description''' : Make gloves from ''Gloves of the commonwealth'' available for craft at the Crafting Workbench clothing workbench.}} | |||
===== ===== | |||
{{User:Kesta/ModInstructions | |||
|Wearable Travel Backpack|https://www.nexusmods.com/fallout4/mods/3258/?|1.3|Aldebaran90 | |||
|{{User:Kesta/NexusDownload | |||
|name=Files to download | |||
|MAIN=Wearable Travel Backpack - 1.3}} | |||
'''Description''' : Add an equippable backpack to the game, with multiple carry weight options.}} | |||
===== ===== | |||
{{User:Kesta/ModInstructions | |||
|Wearable Travel Backpack - Crafting Workbenches Patch|https://www.nexusmods.com/fallout4/mods/3343/?|1.2.1|Azrael_wtf | |||
|{{User:Kesta/NexusDownload | |||
|name=Files to download | |||
|MAIN=Crafting Workbench ALD Backpack Patch 1.2.1}} | |||
'''Description''' : Make the backpack from ''Wearable Travel Backpack'' available for craft at the Crafting Workbench clothing workbench.}} | |||
===== ===== | |||
{{User:Kesta/ModInstructions | |||
|Wearable Postman Shoulder Bag or Backpack|https://www.nexusmods.com/fallout4/mods/3965/?|1.5|Eferas | |||
|{{User:Kesta/NexusDownload | |||
|name=Files to download | |||
|MAIN=EferasShoulderBagV.1.5}} | |||
'''Description''' : Add 14 equippable shoulder bags to the game.}} | |||
===== ===== | |||
{{User:Kesta/ModInstructions | |||
|Wearable Postman Shoulder Bag - Crafting Workbenches Patch|https://www.nexusmods.com/fallout4/mods/4196/?|1.1|thehiddenedge | |||
|{{User:Kesta/NexusDownload | |||
|name=Files to download | |||
|MAIN=Postman Shoulder Bag 1.5 - Crafting Workbenches Patch}} | |||
'''Description''' : Make the shoulder bags from ''Wearable Postman Shoulder Bag or Backpack'' available for craft at the Crafting Workbench clothing workbench instead of the chemistry station.}} | |||
===== ===== | |||
{{User:Kesta/ModInstructions | |||
|Wasteland Scarves|https://www.nexusmods.com/fallout4/mods/4317/?|1.2|Stndmunki | |||
|{{User:Kesta/NexusDownload | |||
|name=Files to download | |||
|MAIN=Wasteland Scarves 1.2 | |||
|OPT=Armorsmith Extended Crafting}} | |||
'''Description''' : Add equippable scarves to the game, craftable at the Armorsmith extended workbench with the patch.}} | |||
===== ===== | |||
{{User:Kesta/ModInstructions | |||
|Jackets and Coats of the Commonwealth|https://www.nexusmods.com/fallout4/mods/3571/?|1.16|Hunk92 | |||
|{{User:Kesta/NexusDownload | |||
|name=Files to download | |||
|MAIN=Jacket of the commonwealth - EN | |||
|UPDT=Update 1.16 - EN}} | |||
'''Description''' : Add equippable jackets and coats to the game, craftable at the Crafting workbench clothing workbench with the patch.}} | |||
===== ===== | |||
{{User:Kesta/ModInstructions | |||
|Brotherhood of Steel Paintjobs for X-01 Power Armor|https://www.nexusmods.com/fallout4/mods/796/?|0.4|Hocter | |||
|{{User:Kesta/NexusDownload | |||
|name=Files to download | |||
|MAIN=BOS Standalone Paint Jobs 0.4}} | |||
'''Description''' : Add BoS paintjobs available for the X-01 armor, which unlocks when raising in the BoS' hierarchy.}} | |||
===== ===== | |||
{{User:Kesta/ModInstructions | |||
|flare={{User:Kesta/flare|OPT}} | |||
|The Commonwealth Rascal paintjob|https://www.nexusmods.com/fallout4/mods/4051/?|v2|Burny300 | |||
|{{User:Kesta/NexusDownload | |||
|name=Files to download | |||
|MAIN=CommonWealth Rascals}} | |||
'''Description''' : Add a badass paintjob available on all of your power armors.}} | |||
--> | |||
=== Looting === | === Looting === | ||
==== Nexus Mods ==== | |||
===== Pre War Safes ===== | |||
{{User:Kesta/ModInstructions | {{User:Kesta/ModInstructions | ||
|Pre War Safes| | |Pre War Safes|https://www.nexusmods.com/fallout4/mods/3306/?|1.1|Armstrad | ||
|{{User:Kesta/NexusDownload | |{{User:Kesta/NexusDownload | ||
|name=Files to download | |name=Files to download | ||
|MAIN=Pre War Safes}} }} | |MAIN=Pre War Safes}} | ||
'''Description''': Remove post-apocalyptic weapons from pre-war safes, as they don't belong there.}} | |||
===== Dynamic Flora Harvesting ===== | |||
{{User:Kesta/ModInstructions | {{User:Kesta/ModInstructions | ||
|Dynamic Flora Harvesting| | |Dynamic Flora Harvesting|https://www.nexusmods.com/fallout4/mods/3581/?|1.1|Chikawowwow | ||
|{{User:Kesta/NexusDownload | |{{User:Kesta/NexusDownload | ||
|name=Files to download | |name=Files to download | ||
|MAIN=Dynamic Flora Harvesting}} }} | |MAIN=Dynamic Flora Harvesting}} | ||
'''Description''': Make plants yield a number of ingredients consistent with their visual.}} | |||
=== Patches === | === Patches === | ||
===== BABY Patches ===== | |||
{{User:Kesta/ModInstructions | {{User:Kesta/ModInstructions | ||
|BABY Patches| | |BABY Patches|https://www.nexusmods.com/fallout4/mods/4790/?|0.1.4.1|Kesta | ||
|{{User:Kesta/NexusDownload | |{{User:Kesta/NexusDownload | ||
|name=Files to download | |name=Files to download | ||
|MAIN= | |MAIN=BABY Patches}} | ||
''' | |||
'''Description''' : BABY-specific patch, to ensure you get the best out of the whole installation ;) }} | |||
== Load Order management == | == Load Order management == | ||
Delete or ghost (change there extensions to something irrelevant such as .ghost) the files made obsolete by the BABY Patch: | |||
* DarkerNights-TrueStorms.esp | |||
* DarkerNights-Radiant.esp | |||
* VIS-PatchChemRedux.esp | |||
* chem redux.esp | |||
Start LOOT. | |||
Added metadata rule to BABY Patch.esp to ensure that it get loaded after all of the mods it override, even if those aren't a direct dependency (In this case, the merged VIS plugin). | |||
{{AlertSmall|type=loot|text= | |||
''BABY Patch.esp'' | |||
'''MAIN:''' | |||
*Priority Value: 1000 (or anything above 0) | |||
----}} | |||
Sort plugins with LOOT. | |||
== Credits and Thanks == | == Credits and Thanks == | ||
DoubleYou - For the fallout background picture.<br> | |||
DoubleYou and InsanePlumber - Some great INI tweaks mentioned here, and more to come ;)<br> | DoubleYou and InsanePlumber - Some great INI tweaks mentioned here, and more to come ;)<br> | ||
The STEP staff | The STEP staff - For a wonderful wiki and a lot of advice for wiki-edition<br> | ||
Latest revision as of 16:29, October 23, 2023
WIP
BABY is a WIP. While it is usable in its current state, the most interesting sections (gameplay, crafting, settlements,...) are currently hidden.
The guide is currently being updated to revolve around MO2 features, and cooler visuals... but author's computer is starting to have a few issues and need an upgrade :P
Title : Boston Atomic Bomb Yankee
Version : 0.1.5.1 changelog
Forum thread : HERE

Help support STEP! ALL donations are applied to operating expenses.
Introduction
This guide is destined to enhance your fallout 4 experience using the extended modding possibilities made possible by both Bethesda and its awesome community. Of course, as every modding guide, it'll be down to personal preferences.
Boston Atomic Bomb Yankee doesn't mean anything... yeah, I know that. It's just some words related to the Fallout 4 universe I mashed-up together. But who care, the acronym is awesome !
While I'm trying to provide as much explanations and tips as I can, BABY isn't suited for complete beginners. If you've never modded a Bethesda's game before, you might have a hard time following the guide.
In BABY, you'll find some great visuals enhancements and retexture. That said, I consider Fallout 4 default visuals to be already decent, so I'm not aiming at "modding everything". Some things just don't need to be improved.
This means that textures and other visuals mods linked here will either be covering some critical aspects where Fallout 4 failed to be good-looking, unexpected but awesome improvements, or personals coup de coeur.
As for gameplay changes, BABY essentially aim to expand player's capabilities rather than overhauling existing ones. I haven't played the game enough yet to get bored already, and don't feel like in-depth gameplay changes balance overhaul is needed to enjoy the game. This might change in future versions though.
Finally, about overall compatibility : The current number of available mods make it rather easy to track down compatibility issues. Patches will be created specifically for this guide when they're not already available on their respective mod page, so you don't have to worry about it as long as you follow the instructions and advice properly.

The beginning
How to read this guide ?
From the top to the bottom, obviously !
General Informations
Everything but the mod list under Time to mod is pretty much mandatory for a decent modding setup, though you can skip it / skim through if you're already familiar with commons modding tools, tweaks and extenders.
All the ramble is there so the mod installation section can be streamlined in an easy-to-follow step by step flow (or should I say ftep by ftep ? ).
The mod installation part have been broken down in various categories, as you can see in the content resume on the right.
The way mods are split between categories isn't only thematic but also technical. Save for a few exceptions, there should be close to no conflicts across mods from different section. This mean that you can install categories in a non-linear order, or only those you're interested into, and still get a perfectly functional modded game.
Mods installation
Mods in each sections should be installed in the order they appear, as this is the order they'll overwrite each others if need be.
Mods are presented as a "card", providing informations about everything you need to know about the mod, from download link to mod-specific installation instructions.
Each card is preceded by a flare:
- COREThis mod is a full part of the guide and is expected to be installed.
- TOOLThis isn't a mod, but a modding utility to be used during your modding adventure.
- PerformanceThis mod improve game's performance, but might slightly decrease visual quality.
- OptionalThis mod is optional. This is an addition considered useful to the setup, but might be more of a personal preference.
- HQThis mod is to be used only for users looking for a High Quality visual experience. This doesn't necessarily means it should be avoided at all cost by low-end system users, but simply that the performance hit might not be worth the visuals improvements on weaker machines.
- NSFWThis mod contains Not safe For Work content. No childporn, I promise, but depending on where you are when browsing this guide, it's better for you to know. Of course, NSFW are still consideredCORE, because of reasons.
There is no
flare for main downloads. Obviously, a mod deserving such flare would just be downgrading Vanilla's visuals, without significant performance improvement that would win him the
flare.
We don't want this kind of mod for BABY. If you need to downgrade vanilla visuals to play the game, here is the best advice I can give you : Close this page, uninstall FO4, find a job, earn money, buy a better computer with the money, come back modding, play, loose your job, keep playing.
The files to download are listed in a similar layout than the one in Nexus. They should be installed in the same order as they appear in the list. This means that the answer to "should I overwrite ?" will always be YES between two files belonging to the same mods, except if explicitly stated otherwise.
Options and Alternatives
Listed mods may also have potentials alternatives and options, aside the main files to download.
- When there is Optional files listed, this means you have to install them along with the proposed files if you want them.
- On the contrary, Alternatives files are meant to replace the files from the main download entirely.
Options and alternative usually have flares as well, indicating why they're proposed to complement/replace the main files :
- OptionalThis is a nice feature, but falls under personal preference.
- HQThis is an higher visuals version of theCOREone, worth installing on decent machines.
- LQThis is a lower visuals version of theCOREone, in case the main file is too performance-heavy for low-end machines.
- SAFEThere is a safe for work version available, to prevent sexual or not-so-politically-correct content.
- easyThis version will make gameplay easier.
- survivalThis version will make gameplay harder.
Note that not all the files available on the nexus mod page are listed under options/alternatives. This isn't laziness, but usually means that the "lower resolution" version isn't worth installing, the "high quality" one is just overkill, or simply that other files aren't relevant in the context of BABY.
Guide versions
At the beginning of the guide, you maybe noticed the 4-digits version number. It allow you to keep track of the advancement of the guide. The current version being 0.1.5.1
More informations on the version system, along with the last update date and the complete changelog can be found on the BABY - Version page.
Interesting-looking mods planed for review to be potentially added are listed on the testing page, though It's messy. That's basically my online clipboard.
Post-installation
Records conflicts (aka conflicts due to multiple .esp altering the same set of data), and load order management are handled at the end of the guide:
- Patches tailored specifically for BABY will be provided on their own Nexus page.
- Advanced load order management, atop of what automated sorting utilities can do, will be explained in the Load Order mangement section.
- In-game configuration advice for mods are currently given in the mod's card.
Installing Fallout 4
Head to steam, buy the game if you haven't already, and download. Seriously, if you haven't done this yet, what are you even doing here ?
On a more important note : DLCs and updates expand the modding possibilities by providing new features to be used by modders. BABY is built assuming you're using :
- The latest stable version of FO4, but NOT the beta.
- All of the currently released DLCs
To make sure you have all the DLCs, check the DLC section of FO4's steam page and make sure all of them are ticked and have the installed mention, or open Fallout 4 steam's properties and check the DLC tab :
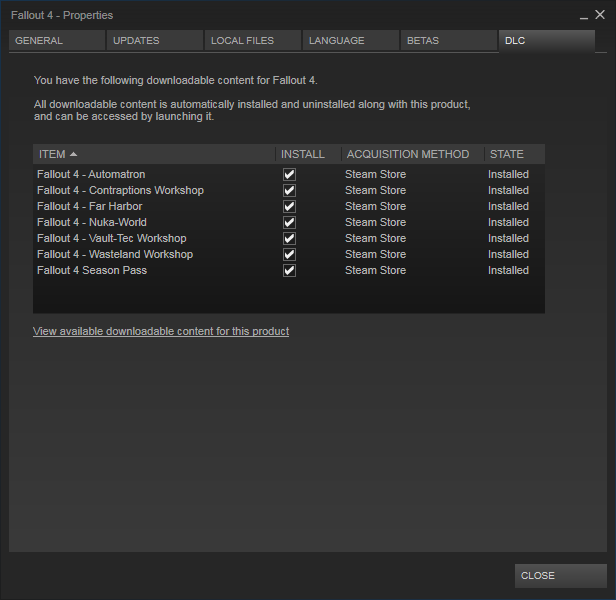
If not, right click on Fallout 4 in your game list, select properties, look under the DLC tab, and tick everything.
For easier modding support, make sure that Steam is installed OUTSIDE your program files folder.
This will prevent several modding utilities to be thwarted by windows' UAC.
Installing useful programs
If you don't have them already, there is two generic programs very usefull when modding games :
7-zip : This is an archive extractor. It'll allow you to extract archives (.zip, .rar, .7z). Since most mods and other utilities come in this format, it's critical to be able to extract them.
To make it even more convenient to use :
- Locate the 7-zip File manager : 7zFM.exe, (located by default in C:\Program Files\7-Zip, or simply type in 7-zip File Manager in windows' search bar)
- Start it with administrator privileges (right-click -> run as administrator).
- Navigate under Tools -> Options.. and look at the System tab, you'll find the file association manager.
- Associate 7zip with .7z, .zip, and .rar files by simply clicking on them.
This way, you will be able to preview the content of archives and extract what you want out of them by simply double-clicking on it.
Notepad++ : An advanced text editor. Usefull to edit various configurations files, as its layout, syntax-coloration, and other built-in search functions are by far superior to what your basic notepad can do.
Since we're going to open a lot of .ini files in this guide, it's a good idea to tell windows that you want to automatically open them with Notepad++ :
- After you've installed it, right click on any .ini file on your system (if you don't have any yet, just read a bit further, you'll discover them ;) )
- Select Open With... -> Choose default program...
- Select Notepad++. If Notepad++ is not on the list, use the Browse... button and navigate to NP++ installation path (by default C:\Program Files (x86)\Notepad++).
- Make sure that the Always use the selected program to open this kind of file check-box is ticked in.
I also recommend to follow the same procedure for regular text files, as NP++ is more convenient than Notepad anyway.
Optionally, you can also install the NP++ Compare Plugin, which is an addon for Notepad++ that allow for easy comparison between files. In BABY's context, it'll help you check various INI configurations.
Setting some things up
Make sure you have the latest drivers for your GPU. This is especially true if using an AMD video card, as some of the not-so-outdated-but-a-little-bit drivers will lead to a crash on the FO4 main menu.
- AMD users : Click here
- nVidia users : Click here
It is also recommended to clean your computer if you're not doing this regularly.
If you're not exactly an advanced PC user, there is several utilities that can take of that automatically, but free ones aren't extremely efficient. You can still have a look at CCleaner which is one of the most efficient free ones.
Once your computer is ready, the first thing to do is to initialize your game once : Simply press Play in the FO4's steam page, and this message will appear :
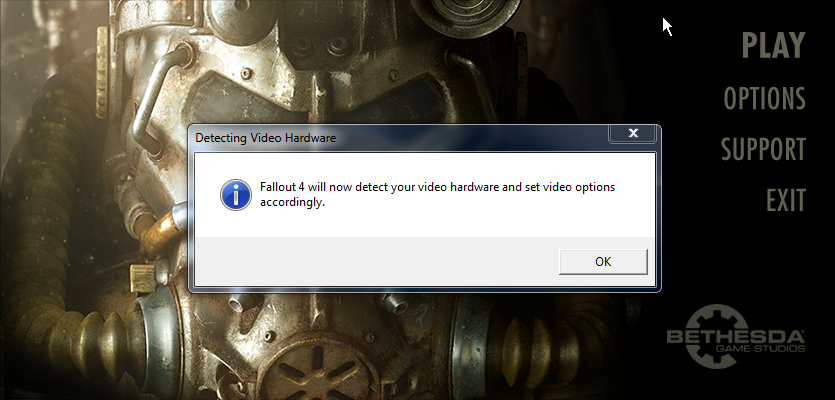
This will automatically detect your hardware and select a configuration preset accordingly.
It's time to have a look at two important locations on your computer you'll be visiting often :
- The game's installation folder, which depend on where Steam is installed : <Steam>\steamapps\common\Fallout 4\
- The game's document folder, created after the previous step have been completed : <Documents>\My Games\Fallout4
If you intend to dedicate some times to modding your games, it is highly recommended that you favorite those two folders in windows explorer to have a quick access to them, or put a shortcut to them wherever you like to have your shortcuts.
Tailoring your configuration
Now is the moment to configure Fallout 4 according to your preferences. This is done by modifying the INI files Fallout4.ini and Fallout4Prefs.ini located in the game documents folder we just talked about. There is several way of doing it :
- Manually editing the INI files with Notepad++
- Using configuration tools with GUI (incomplete and not always error-proof, but easier).
- Using the game's configuration tool by clicking on Option in the launcher (Very incomplete)
Starting on a good base
Before working with INI files, make sure they are valid. The default files aren't easy to work with, because they're filled with bogus settings, and aren't sorted nor exhaustive.
Files to download :
Setup :
Fallout INI Project 4 offer a convenient way to prepare your ini files. It will edit the default template used by the automatic INI generation of the launcher in a way that your ini files will be filled exhaustively, free of bogus or placebo settings, and sorted in alphabetical order, and then proceed to run the launcher. |
For additional informations on how INI files behave and affect your games, see the Fallout 4 configuration reference. For a complete review of all the settings, see the Fallout4Prefs.ini Guide.
Adjusting your settings
You can most likely skip this if you can play on Ultra without noticing even a slight drop in performances during gameplay. If you can't, two things to test before down-grading your visuals is to
- Disable Godrays
- Set Shadow Distance to Medium
If you still can't have decent FPS with it, use a lower setting that match your computer's performance. Some settings have a high quality/performance ratio, and thus should be maxed out :
- Anisotropy -> Set it to at least 8x. Performance hit is only noticeable at 16x, but 8x look 1000x time better than 0 or 2x.
- Anti-Aliasing -> TAA. There is a small performance hit, but TAA look infinitely better than FXAA (not even talking about no-AA at all).
Note that there is an issue with Godrays pixelating your character if they aren't set on Ultra. So you either use ultra godrays, or no godrays.
Shadow distance should be left to Medium, as this is handled later in the guide.
An other option for good-quality AA is too use SMAA in combinations with downsampling. Setting this is a bit more complex, so google for it if you want. The main reason for doing so instead of using TAA is to avoid the slight blurriness on edges introduced by TAA.
Further INI tweaking
Go to the game's documents folders and start tweaking your INIs
In Fallout4(Custom).ini
NOTE
It is recommended that you create Fallout4Custom.ini and make your tweaks to the Fallout4.ini settings in there instead of directly editing the original file.Put bInvalidateOlderFiles=1 and blank out sResourceDataDirsFinal in the [Archive] section, so loose files will load through the game.
[Archive]
bInvalidateOlderFiles=1
sResourceDataDirsFinal=
If you've already played the game enough, you'll probably want to disable tutorials message for your future playthrough:
[Interface]
bShowTutorials=0
You can improve the usability/readability of the console by expanding its size and modifying its font color and size with the following settings:
[Menu]
iConsoleSizeScreenPercent=65
iConsoleTextSize=16
rConsoleHistoryTextColor=153,160,153
rConsoleTextColor=255,255,255
rDebugTextColor=255,235,222
In Fallout4Prefs.ini
Make sure iShadowMapResolution is at least 2048. Even if it cost some FPS, 1024 is way too ugly to play. 4096 is the default Ultra setting. You can even raise this setting to 8192 if you've got an ultra-powerful computer.
[Display]
iShadowMapResolution=4096
External sources :
A lot of interesting settings are exposed here : Useful INI Settings, thanks to InsanePlumber.
There is especially a lot of priceless informations for UI configuration.
Nice UI colors presets can be found in the Vogue UI Colors nexus page.
Setting up your modding environment
Choose and install a mod manager
Only NMM have been properly updated for Fallout 4. This is in my opinion the best choice, since Mod Organizer 2 isn't going to see any updates to fix the various issues and annoyances it come with. An other alternative is Wrye Flash, which also have been partially updated for FO4 support, but the public version got hidden.
Resetting "Download with Manager" for NMM
If you're using Mod Organizer as mod manager for other games, and want to use NMM for now with Fallout4, here is the procedure to re-associate "Download with NMM" buttons on nexus with NMM instead of MO for Fallout 4 only :
Browse through your ModOrganizer install folder and find nxmhandlers.ini. open it with Notepad++
Make it look something like this :
[handlers]
size=2
1\games="oblivion,fallout3,falloutnv,skyrim,other"
1\executable=E:\\Modding Tools\\ModOrganizer\\ModOrganizer.exe
2\games=fallout4
2\executable=E:\\Modding Tools\\Nexus Mod Manager\\NexusClient.exe
Save and close nxmhandlers.ini, and run nxmhandler.exe located in the same folder. Click "register active", and press "yes" on the prompt. Done. Fallout4 downloads will now be directed towards NMM instead of MO.
Working with NMM
Tinkering loose files
NMM isn't as convenient as MO to customize your installation, especially when you need to adjust loose files.
To access loose files from a specific mod via NMM :
- Install the mod so all the files you have to work with are in place.
- Disable the mod :
 it'll avoid glitchy behavior from NMM visualization system.
 - Open NMM's Mod folder :

- Browse to Nexus Mod Manager\Fallout4\Mods\VirtualInstall
- Folders here have the same name as the archive they've been installed with, not necessarily the mod's name !
- Locate the mod's folder you're looking for
- Make whatever you have to do in there
- Go back to NMM and activate the mod to use your "adjusted" version.
Conflicting files installation
When two mods try to install the same file (or should I say, in NMM's case, when a mod try to install a file already installed by an other mod), NMM will ask you to choose between the two with this dialogue :

You have 2x 4 options (4 for "YES" and 4 for "NO") :
- _ to all
- _ to folder
- _ to mod
- _
Never select "_ to all". This will deprive you from any control on your installation, as the mod will either overwrite/be overridden by any conflicting mods, without you knowing which one.
The "_ to folder" is pretty much the same, except it'll present you with the dialogue again for each different folder (folders being assailable to "category of loose files" here).
"_ to mod" is the option you will usually want to use. It allow you to check exactly with which mods the one you're installing present conflicts, and let you choose for each of them if you want to overwrite it, or let it overwrite the one you're installing.
The simplest "_" option is the most powerful, however it is extremely tedious to use as NMM will present you the dialogue for every conflicting files. This can be thousands of them in the case of large texture overhauls. Plus, if you're still reading this paragraph, this probably means you have no idea what most of the file names represent, so you can't exactly choose ^^
In this guide, conflict-resolution for loose files will be oriented towards the use of the "_ to mod" options.
If you've made a mistake when choosing yes/no, you can simply disable and re-enable the mod, NMM will ask you again for each conflicts which mod should overwrite which one.
Install and Configure LOOT
LOOT (Load Order Optimization Tool) is an utility that aim to sort your load order in the most optimized way possible. This will ensure that mods with dependencies are loaded before their masters properly without having to sort them manually.
Installation :
|
Install Advanced tools
FO4Edit
A good thing to do in those obscure time is also to grab a copy of FO4Edit so you can checks the mods you install yourself.
Some early mods have been released with a lot of errors, so checking them with FO4Edit to ensure they aren't to risky for your playthrough and savegame is a good habit.
On top of that, it will allow you to make some customisations.
Installation :
|
FO4Edit will also allow you to check conflicting records when your whole load order is analyzed. This is how you're supposed to organize priorities in your load order to fine-tune what automated tools such as LOOT offer. Indications for load order management specific to BABY are given in the Load Order management section.
More informations on how to use FO4Edit can be found on the xEdit guide
Fallout 4's Creation Kit & Co
The creation kit for fallout 4 is more than just the creation kit. It also come with various tools, especially Archive2, that we're going to use to repack .ba2 files.
The creation kit and its toolpack have to be installed through the Bethesda.net launcher.
You can download the installer by clicking here.
Once the download is complete, run BethesdaNetLauncher_Setup.exe to install it to the location of your choice.
Then, start the launcher (either from the shortcut if you chose to create one during the installation, or by launching BethesdaNetLauncher.exe ). You will be presented with this page:
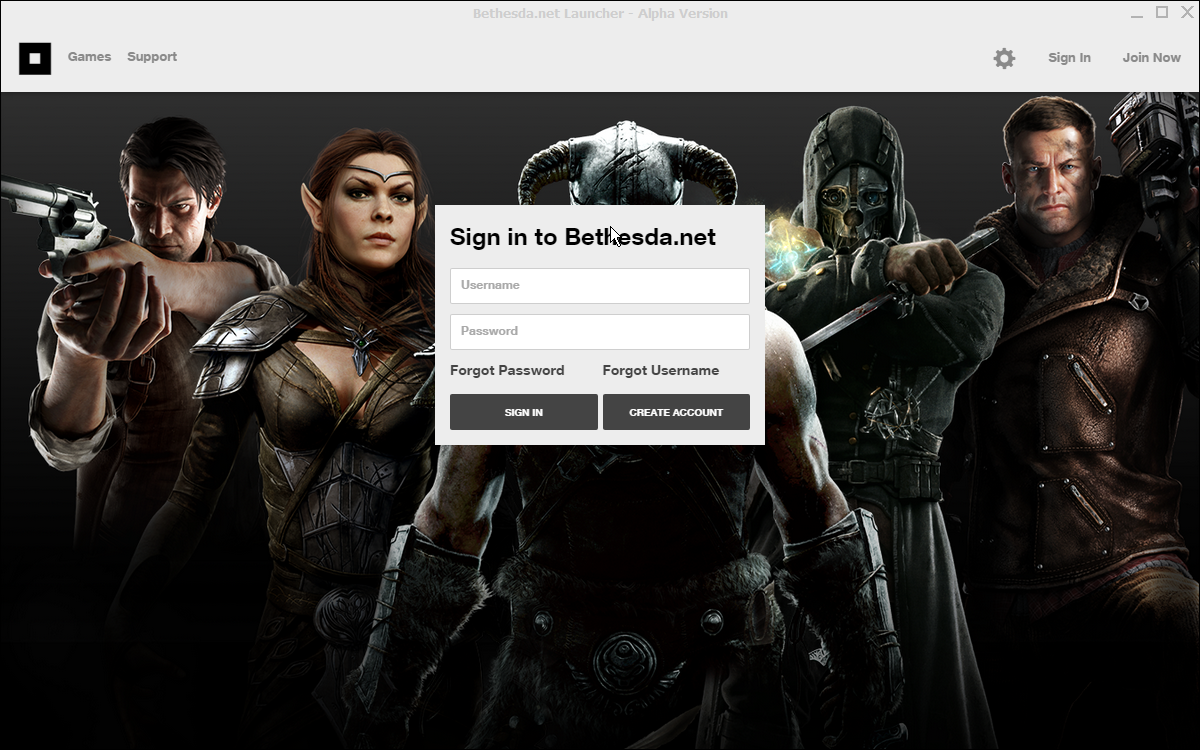
If you don't already have a Bethesda.net account, you will need to create a one by clicking on CREATE ACCOUNT. If you already have one, simply enter your credentials to gain access to the launcher:
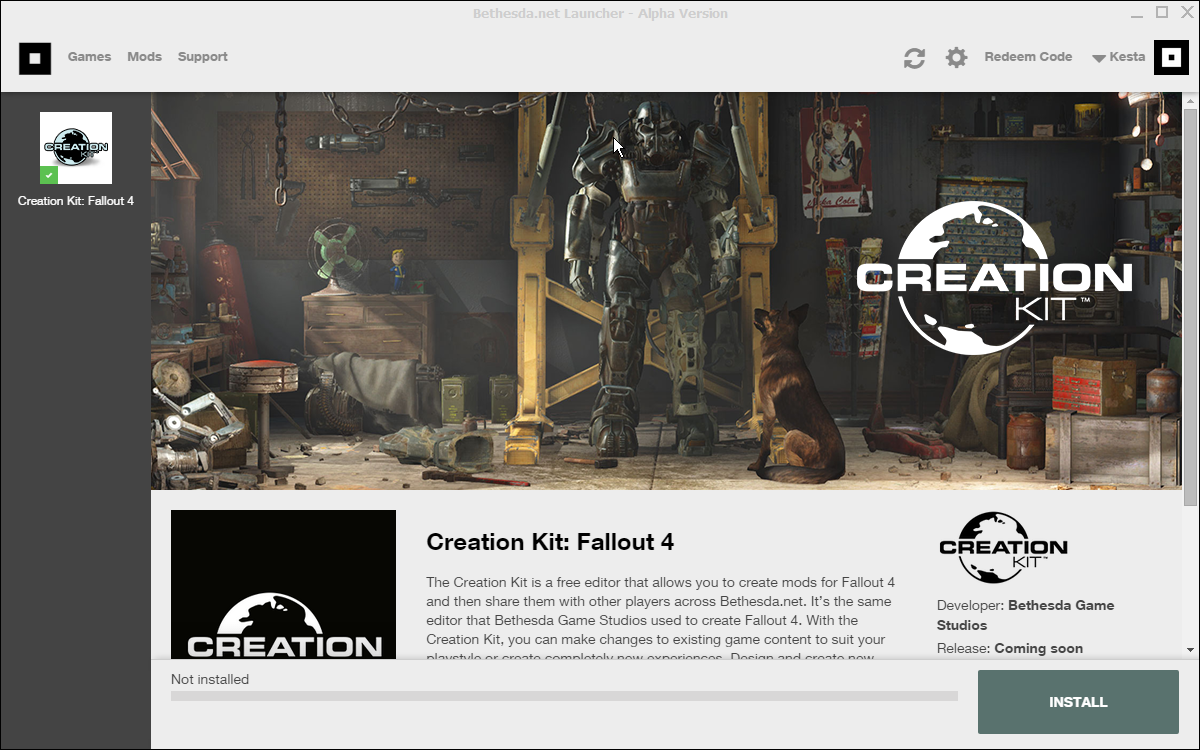
Simply select Creation Kit: Fallout 4 in the left panel, and click INSTALL on the bottom-left corner of the launcher. Accept the EULA, and leave the install options at default (except for shortcuts if you want/don't want them).
Wait for the download/installation to complete (less than 1 minute).
Congratulation ! You know have access the the FO4's creation kit and all of its toolset.
Bethesda Archive Extractor
Installation :
Description : This tool allow you to have a quick peek inside .BA2 or .BSA archive files (Bethesda's specific archive format), or even extract them to an external location. While essentially aimed at modders to extract, analyze, and edit resources, B.A.E. can allow you to better understand which files exist within the original game, and which files will be provided brand new by installed mods. More informations on how to setup and use B.A.E. are available on its dedicated guide. If you also installed the Creation Kit, you might want to use Archive2 instead, which offer way possibility. BAE is still nice to just preview .ba2 because of the visualized arborescence. |
Installing extenders and injectors
Fallout 4 Script Extender
F4SE have already become critical to your modding setup, as it will allow you to bypass the Launcher, preventing any unwanted modifications and faster gamestart.
It also come with the possibility to customize heavily your keybindings, some extended scripting functions that beta mods might require, and the possibility to load powerful .dll plugins, which you can think of as "mod written in C++ hooking directly in the game engine without the burden of the regular modding API". Those .dll basically allow more freedom on modding possibilities, such as re-enabling achievments on modded game or save/load presets/settings files independently from the original system.
| Files to download :
Fallout 4 runtime 1.9.7 Current build: 0.3.7 - 7z archive Installation : Put the following files into your installation folder :
Utilization : |
To customize keymapping (from F4SE readme) :
- Extract CustomControlMap.txt to Data\F4SE\CustomControlMap.txt
- Edit that file with Notepad++ to set your bindings.
- You have to specify what is known as Virtual-Key codes.
- A full list of VK Key is available here : MSDN Virtual-Key Codes. Note that 0xff means unbound.
- If using a non-qwerty keyboards, you will also need those official Look-Up tables : Translating Scan Codes to Virtual-Key Codes
- Do not use the space-bar when editing the file, columns have to be separated by tabulations only.
- The first column is the name of the internal keybind.
- The second column is the Virtual-Key code that should activate the bind.
- The third column is for mice.
- The fourth column is for controllers.
- The next three columns control whether or not a control should be written to the user's config file.
- The final column specifies which input layer the bind is associated with. You will probably not want to change that.
- Delete Custom_MapControl.txt from Documents\My Games\Fallout4\ if you have one here.
ENBoost and ENBSeries
Not as critical as its Skyrim counter-part, ENBoost allow you to disable fake NPC-lighting without having to enter the command manually each time you load the game.
This also fix some multi-threading issues with shaders, but fixes aren't necessarily noticeable on all configurations.
No performance hit. You also have a nice FPS counter available at will (* key on your numpad).
Download Binaries
Click on the latest binaries available, and on the next page on ![]() download.
download.
Look for the folder named WrapperVersion in the archive, and extract the following files in your installation folder
Copy the following files in your installation folder :
- d3d11.dll
- d3dcompiler_46e.dll
- enblocal.ini
Edit enblocal.ini with Notepad++ to modify the following setting :
UsePatchSpeedhackWithoutGraphics=true
This will disable the graphical part of enbseries (which require the other files from the wrapper folder we didn't install) to only leave bugfixes enabled. If you install a post-processing mod later based on enbseries, you'll need to come back to set this parameter to false. Note that such post-processing mods (known as ENB Presets) come with their own effect files, so you won't need those in the original enbseries (which are mostly here as template / examples for presets authors, though you can still use them).
If you wish to install the default effect files and tweak them by yourself (i.e. design your own preset), some help to get started is available on the STEP Forum, thanks to JawZ
NOTE
The d3dcompiler_46e.dll isn't technically required for ENBoost only.
More informations :
Official Nexus Page
There is some information and preset here regarding the ForceVideoMemorySizeparameter. Leaving it at default (disabled) is recommended for lower configuration. Only systems with a lot of RAM will take advantage of this.
More general informations about enbseries can be found around STEP, check the forum and other guides. Keep in mind that some of the content might not apply to Fallout 4 though.
ReShade
ReShade is a framework to enhance post-processing. This allow to inject shaders in games at run-time. The most known shader library now using ReShade is SweetFX.
WARNING
Do NOT install ReShade if you don't intend to install a preset.
The main download is here : ReShade
Installation :
- Extract the archive in a temporary folder
- Rename ReShade64.dll to dxgi.dll
- Move dxgi.dll, ReShade.fx, and the ReShade folder with all of its content to your Fallout 4 installation folder.
Note that some presets might require an older ReShade framework to work as intended. Always check the preset's mod page you're downloading for special instructions.
Installing a ReShade Preset
Installing a ReShade is rather straightforward.
- Go to the (nexus) page of the preset
- Download manually
- Open the archive with 7zip
- Drag and drop the files/folders so :
- They overwrite the ones installed by the framework.
- The ReShade folder merge with the one installed by the framework.
As mentioned above, if your preset require a different version than the one you currently have installed, you will first need to uninstall your current ReShade framework, install the legacy version, and only then install your preset.
Time to mod !
BugFixes & Annoyances removal
This section aim to fix game's bugs, inconsistencies and issues, as well as removing some annoyances present in the original game.
Nexus Mods
Unofficial Fallout 4 Patch
Files to download :
Description : This is the unofficial patch for Fallout 4. This fix several bugs, glitches, issues and inconsistencies not dealt with by Bethesda in the official version of the game. |
Dead Body Collision
Files to download :
Description : Enable collision physic on dead bodies. |
Realistic Death Physics
Files to download :
Description : Reduce impacts' strength to prevent NPCs from flying around the place when taking a fatal bullet, and replace odd-looking death animations by simple ragdoll to make body crumbles in a more natural fashion |
Faster terminal Display
Files to download :
Description : Increase the speed at which terminals text is displayed. |
Achievements
Files to download :
Description : Re-enable steam achievements even when playing a modded game. You obviously don't need it if you already have all of the achievements (or don't care about them). |
Unlimited Survival Action
Files to download :
Description : The original purpose of this mod is to allow the player to switch in and out of survival mode at will, which is basically a cheat to get rid off survival malus. However, this feature might come in handy if you're planing on a long play-through and need to switch survival mode off for a few hours. But the main interest is the merged file download, that re-enable regular save and quicksaves from the menu. (Quicksaves using F5 still won't work). |
Highly Customizable Survival Damages
Files to download :
Description : A collection of difficulty presets for survival mode. Recommended download will make NPC and PC damages even. |
Survival Mode Console
Files to download :
Description : Re-enable the use of the console in survival mode. The alternative optional download will also re-enable fast-travel, though using it will seriously reduce the interest of survival mode. |
Performances Improvements
Though Bethesda did way better with Fallout 4 than with their previous titles regarding stability and performances, there is still work to do to make things as smooth as possible.
External Mods
Shadow Boost
| Use the Download link Installation :
Official Shadow Boost Nexus Page Description: Remember the advice earlier about setting shadow distance to medium to drastically increase performance ? |
Nexus Mods
Optimized vanilla Textures
Files to download :
Special installation instructions:
Description : A set of optimized textures, very little quality loss for a small performance improvement. |
Resource
This section install resources mods required by others in the guide in order to function properly.
Nexus Mods
Armor and Weapon Keywords Community Resource (AWKCR)
(My understanding is that AWKCR is depreciated and should be avoided. See https://www.nexusmods.com/fallout4/articles/4504. TobyKenobi)
Files to download :
WARNING Template:FOMOD_Instructions is deprecated and should no longer be used on this wiki. Please change this template call to use the better-looking and simpler Template:Fomod. We apologize for the inconvenience.
Description : This is a community framework that create and assign a new set of keywords for armors and weapons, offering enhanced possibilities for everything related to the crafting of weapons & armors. |
User Interface
This section improve the user interface, bringing more convenience to the use of menus, while preventing a too intrusive UI that could break immersion.
Nexus Mods
Full Dialogue Interface
Files to download :
WARNING Template:FOMOD_Instructions is deprecated and should no longer be used on this wiki. Please change this template call to use the better-looking and simpler Template:Fomod. We apologize for the inconvenience.
Description : Dialogues options now display the full text. The layout is re-designed in a more classic fashion, and can be selected with 1/2/3/4 keys instead of arrow-keys |
DEF_UI
Files to download :
WARNING Template:FOMOD_Instructions is deprecated and should no longer be used on this wiki. Please change this template call to use the better-looking and simpler Template:Fomod. We apologize for the inconvenience.
Notes :
Description : This mod come with a lot of improvements to the Inventory, Pipboy and Barter menu, from bigger containers to DPS and Value/Weight indicators, with customized categories for holotapes and notes as well. Everything is configurable through .xml files. Tags in item's names can be replaced by icons. You can customize the HUD further by yourself by visiting the Data\Interface folder and drag & dropping the HUDMenuSet.swf to the flashplayer_20_sa.exe |
Valdacil's Item Sorting
Files to download :
WARNING Template:FOMOD_Instructions is deprecated and should no longer be used on this wiki. Please change this template call to use the better-looking and simpler Template:Fomod. We apologize for the inconvenience.
Note: Because ChemRedux haven't been installed yet, the automated installer won't let you pick the option for the patch. If you're going to use the full BABY Patch, the conflict resolution is already handled in it. If not, you need to either bypass the fomod to install the patch, resolve the conflict by yourself, or install ChemRedux before VIS. Description : This mod will allow to take full advantage of DEF_UI by modifying Item's names so they can be displayed with icons in the menus, and have a better item sorting in menus. Additionally, the "Not Junk" feature prevent valuable junk or collectible to be treated as such, and instead being "Misc" so they can't be scrapped automatically and can be sold or collected instead. Additional modifications : In order to keep a clear load order and reduce the number of .esp, merge manually the plugins with xEdit :
NOTE This is not an universal nor error-proof way of merging plugins. This only work because of the low-level of technicality involved in sorting mods (which only changes names). Do not attempt to use a similar technique for more advanced merges, wait for proper tools instead. For information, this work because the (deep) copy as override function in xEdit copy records only if they don't already exist in the destination plugin. |
Satellite World Map
Files to download :
Optional Alternative :
Notes :
[Pipboy]
bPipboyDisableFX=1

[Display]
fPipboyScreenEmitIntensityPA=1.25
fPipboyScreenDiffuseIntensityPA=0.15
Description : Improved map, easier to read and more pleasant to look at. |
LooksMenu
Files to download :
Description : Improved looksmenu for character creation/customisation. Bigger lists, possibility to select face parts from the menu, and presets import/export. |
Environment
The environment... you see it pretty much everywhere, so better make it as good looking as possible ;)
ReShade/ENB Preset
Cinematic Excellence
Files to download :
Special Instructions :
Note: With the rest of the setup, the ENB part of the mod can darken interiors a bit too much. Also, reflection seems to be somewhat glitchy (might be a GPU-related issue, not everyone seems to encounter the issue) and the eye-adaption is a bit too powerful, thus the ENB part is only optional. It's main interest is the additional bloom. Description : A high quality ReShade + ENB preset, enhancing shadows, lighting, colors, etc... Good enough for current BABY's state, though it might change in the near future if it doesn't see anymore updates (the eye-adaptation is a bit clunky) |
Nexus Mods
WET - Water Enhancement Textures
Files to download :
WARNING Template:FOMOD_Instructions is deprecated and should no longer be used on this wiki. Please change this template call to use the better-looking and simpler Template:Fomod. We apologize for the inconvenience.
Description : Improved water textures and colors, including new ripples effects. |
Radiant Clouds and Fogs
Files to download :
WARNING Template:FOMOD_Instructions is deprecated and should no longer be used on this wiki. Please change this template call to use the better-looking and simpler Template:Fomod. We apologize for the inconvenience.
Note : You can pick the MedRes version if the installer if you're worried about performances. Description : Improve clouds textures, giving them a more volumetric look. They're also designed to improve the shadows casted by sunlight/moonlight. |
True Storms
Files to download :
WARNING Template:FOMOD_Instructions is deprecated and should no longer be used on this wiki. Please change this template call to use the better-looking and simpler Template:Fomod. We apologize for the inconvenience.
Override : WET - Water Enhancement Textures Special Instruction :
Description : Overhaul the storms weathers, improving both sounds and visuals during various climatic situations, and introducing new type of storms for more variety. |
Darker Nights
Files to download :
WARNING Template:FOMOD_Instructions is deprecated and should no longer be used on this wiki. Please change this template call to use the better-looking and simpler Template:Fomod. We apologize for the inconvenience.
Notes :
Description : Increase nights darkness, and provide additional tweaks to re-adjust NPC detection and Night vision. |
Fr4nsson's Light Tweaks
Files to download :
Description : Edit interiors image-spaces (~built-in post-processing) to remove fake skylights (light from the roof) and tweak bloom effects. This result in somewhat darkers/dimmers interiors leading to an enhanced contrast in enlightened areas. |
Fallout Textures Overhaul Stars
Files to download :
HQ Alternative :Description : Densify the number of stars in the sky. |
FO4 MOON
Files to download :
HQ Alternative :Description : Bigger and better-looking moon ! |
BABY Patch
Files to download :
Note: Only use this patch if you don't install the whole guide and thus can't use the full BABY Patch. Description: Fix conflicts between Darker Nights, True Storms and Radiants Clouds and Fogs, including those between the two patches included in Darker Nights |
Textures - Landscape & Architecture
Same as for environment, landscape and architectures are seen pretty much everywhere in Fallout 4.
Nexus Mods
FAR - Faraway Area Reform
Files to download :
Description : Improved textures of the distant terrain, also improving performances, killing two pidgeys with one stone. |
Rock On
Files to download :
Description : Improved rock textures, more patterned and a bit darker then vanilla's. |
Better Quarry Sights
Files to download :
HQ Optional :
Description : Improved quarry sights with higher res textures, contributing to rectify some visual glitches/stretching. |
Vivid Fallouts - Landscapes
Files to download :
LQ Alternative :HQ Alternative :Description : Improved ground textures. Albeit those textures are higher-res and better looking than vanilla's, they still contribute to improve performances thanks to compression format magic. |
New Road Enhanced
Files to download :
Override : Vivid Fallouts - Landscapes Description : Improved road textures, a little bit more crackled than vanilla. |
Langleys HD Textures Workshop
Files to download :
Special Instructions :
Override :
Description : High quality retex of various architecture and decoration items. |
Haul'd Out
Files to download :
Description : High-quality retextures of two architecture sets, warehouses and pier. |
Prydwen 2K Textures
Files to download :
Description : Reflective and shiny textures for the Prydwen's floor ! Plus texture improvements to the overall Prydwen's textures. |
Textures - Equipment
Time to pimp up the various pieces of equipment found around the commonwealth.
Nexus Mods
Proto Vault Suit
Files to download :
Description : High quality retexture of the vaultsuit, with color alternatives. Different than vanilla though true to the original look. |
Fallout textures Overhaul PipBoy
Files to download :
Note : Do NOT override the map from Satellite World Map Description : HD retexture of the Pip-Boy. |
Immersive Wastelander's Ammunition
Files to download :
Description : Retexture of the ammo boxes, giving them a more weathered look way more plausible than the almost-shiny vanilla ones. |
Combat Armor No Star Decal
Files to download :
Description : Remove the star decal from the power armor, preventing from an undesired cap'tain america look. |
New Double Barrel Shotgun Textures
Files to download :
Description : HQ retexture for double barrels shotguns. |
New Combat Shotgun and Rifle textures
Files to download :
LQ :
Override: New Double Barrel Shotgun Textures (same files) Description : HQ retexture for shotguns and rifles. |
4K Black Suit and Tuxedo
Files to download :
Description : HQ retexture of the black suit and the tuxedo. |
Fallout Textures Overhaul Power Armors
Files to download :
LQ Alternative :
Description : HQ retexture of the Power Armor Frame, the T-45 Power Armor, and the T-60. |
.44 Magnum Retexture
Files to download :
LQ Alternative :Description : Good-looking retexture of the .44 Magnum, slightly cleaner than vanilla. |
Eyewear and mask retexture
Files to download :
Description : High quality retexture of eyewear (and masks with eye-protection) to give them a realistic look. |
Textures - Clutter
Improved visuals for various clutters items seen around the commonwealth.
Nexus Mods
Weathered First Aid Kit
Files to download :
Description : Retexture of the First Aid Kit so it match better the general atmosphere of the game, vanilla's kit being too clean and thus looking out of place in some places. |
High Resolution Pack - Valius
Files to download :
Description : Improve some furniture textures such as desks and cabinets |
Better Computer Terminals
Files to download :
Description : Improve terminals textures, with letters on the keyboard ! |
HD ReTexture 4X 2X WIP
Files to download :
LQ Optional :
WARNING Template:FOMOD_Instructions is deprecated and should no longer be used on this wiki. Please change this template call to use the better-looking and simpler Template:Fomod. We apologize for the inconvenience.
WARNING Template:FOMOD_Instructions is deprecated and should no longer be used on this wiki. Please change this template call to use the better-looking and simpler Template:Fomod. We apologize for the inconvenience.
WARNING Template:FOMOD_Instructions is deprecated and should no longer be used on this wiki. Please change this template call to use the better-looking and simpler Template:Fomod. We apologize for the inconvenience.
WARNING Template:FOMOD_Instructions is deprecated and should no longer be used on this wiki. Please change this template call to use the better-looking and simpler Template:Fomod. We apologize for the inconvenience.
Override : Langleys Workshop Description : High quality retex of various outdoors furnitures and other machines |
OJO BUENO NUKA-COLA MACHINE
Files to download :
HQ Alternative :LQ Alternative :Description : Improve Nuka-Cola distributors textures |
OJO BUENO MILK VENDING MACHINE
Files to download :
HQ Alternative :LQ Alternative :Description : Improve Milk vending machines textures |
Fallout 4 HD Reworked Project
Files to download :
LQ Alternative :Description : Upgrade several clutters elements to high quality visuals, both textures and meshes. |
FOAM - Better Locks
Files to download :
Note : The mod is wrongly packaged. NMM will install the blue screwdriver by default. That's fine if you're ok with it. Install the alternative folder if you prefer the vanilla red (recommended) or a green one. Description : Improve lock's texture seen during the lockpicking mini-game. |
Textures - Items
Nexus Mods
Improved Pre-War Money
Files to download :
Description : Improve the very low-res Pre-War money texture. |
Comics Got Back
Files to download :
Description : Give a back with an ad to collectibles magazines. |
FTO Pip-Boy - Holotape
Files to download :
Description : Part of Gorgulla's pipboy overhaul, huge improvement of the holotapes textures. |
Chem Redux
Files to download :
Description : Small retexture of chems, offering more variety between the different declination of mentats and other drugs by giving each a more unique appearance. |
Textures - Creatures
We're don't exactly want awful creatures to look sexy. but that doesn't mean we cannot make them better looking ;)
Nexus Mods
Detailled deathclaws
Files to download :
HQ Alternative :Description : Improve deathclaw's textures. |
Textures - Characters
Nexus Mods
Immersive Mouth and Teeth
Files to download :
WARNING Template:FOMOD_Instructions is deprecated and should no longer be used on this wiki. Please change this template call to use the better-looking and simpler Template:Fomod. We apologize for the inconvenience.
Description : Improve character's mouth and teeth textures. |
Med-Tek Facial Reconstruction - Eyes
Files to download :
Description : Slight improvement of character's eyes and eyelashes textures. |
Lore-Friendly Ghoul Eyes
Files to download :
Override : Med-Tek Facial Reconstruction - Eyes Description : Change ghouls' eyes to a cataract-looking style instead of the default full black one. |
deLuxe Makeup
Files to download :
Note: For now, only the lip-liner part of the mod is recommended for BABY. You can still install the eyeliners modifications if you like them but those are currently untested. Description: Improve character's lips, smoothing the weird color gradient on the contour. |
Sounds Improvements
Often left-aside, the audio setup are actually a critical part of a high-quality (modded) game.
WIP
This section isn't up to date.Nexus Mods
No More Cash Register Sound
Files to download :
Description : Remove the annoying gling-gling sound played whenever you gain experience points. |
Power Armor Movement Sounds
Files to download :
Sound\FX\FST\ArmorPower\FST_ArmorPower_Dirt_Run_*.wav
Sound\FX\FST\ArmorPower\FST_ArmorPower_Dirt_Walk_*.wav
Sound\FX\FST\ArmorPower\FST_ArmorPower_Grass_Walk_*.wav
* means all the files which start by the same path & name This is to remove the hydraulic sound from regular movement, and keep it only for special moves such as jumps. Otherwise the hydraulic sounds get very quickly annoying. Description : Improve the power armor's sounds, making it sound heavier and somewhat more robotic. |
Towbie's Realistic Weapon Sounds
Files to download :
Description : Improve firearms sounds, making them more resounding. |
Energy Weapon Sounds
Files to download :
Description : Improve energy weapon sounds, making the plasma ones sound closer to a blaster and the laser one more... "laseric" ? :) |
Visuals
Nexus Mods
Lowered Weapons
Files to download :
meshes\actors\character\_1stperson\animations\gaussrifle
meshes\actors\character\_1stperson\animations\minigun
meshes\actors\character\_1stperson\animations\gatlinglaser
meshes\actors\character\_1stperson\animations\fatman
meshes\actors\powerarmor\_1stperson\animations\gaussrifle
meshes\actors\powerarmor\_1stperson\animations\minigun
meshes\actors\powerarmor\_1stperson\animations\gatlinglaser
meshes\actors\powerarmor\_1stperson\animations\fatman
There is a glitch with the first 3 which have a warm-up time before firing. The fatman will just block your view if you keep it. Description : This mod will allow you to have your weapons lowered in 1st person view, when you are not shooting. |
Enhanced Blood Textures
Files to download :
WARNING Template:FOMOD_Instructions is deprecated and should no longer be used on this wiki. Please change this template call to use the better-looking and simpler Template:Fomod. We apologize for the inconvenience.
Description : Improvement of blood textures and modifications of various blood splashes impacts. Include a plugin for additional decal and impacts parameters. |
PipBoy Shadows
Files to download :
Note: We're only using the headlamps shadows, not the pipboy shadows, as this one look glitchy in most situations. Description: Add shadows casting to power armors and mining headlamps |
Dynamic Muzzle Shadow
Files to download :
Description : Potential FPS crusher, this mod force shadows to be cast by the light of firing weapons. |
Shell Rain
Files to download :
Description : Drastically increase the number of visible shells, as well as the time they stay visible and the distance at which they appear. |
Settlements
WIP
This section is being revamped, a large part of it and is currently hidden.Nexus Mods
Longer Powerlines
Files to download :
Description : Increase the maximal length of power lines. |
Crafting
WIP
This section have to be reviewed from scratch and is currently hidden.New items and paintjobs
WIP
This section have to be reviewed from scratch and is currently hidden.Looting
Nexus Mods
Pre War Safes
Files to download :
Description: Remove post-apocalyptic weapons from pre-war safes, as they don't belong there. |
Dynamic Flora Harvesting
Files to download :
Description: Make plants yield a number of ingredients consistent with their visual. |
Patches
BABY Patches
Files to download :
Description : BABY-specific patch, to ensure you get the best out of the whole installation ;) |
Load Order management
Delete or ghost (change there extensions to something irrelevant such as .ghost) the files made obsolete by the BABY Patch:
- DarkerNights-TrueStorms.esp
- DarkerNights-Radiant.esp
- VIS-PatchChemRedux.esp
- chem redux.esp
Start LOOT.
Added metadata rule to BABY Patch.esp to ensure that it get loaded after all of the mods it override, even if those aren't a direct dependency (In this case, the merged VIS plugin).
MAIN:
- Priority Value: 1000 (or anything above 0)
Sort plugins with LOOT.
Credits and Thanks
DoubleYou - For the fallout background picture.
DoubleYou and InsanePlumber - Some great INI tweaks mentioned here, and more to come ;)
The STEP staff - For a wonderful wiki and a lot of advice for wiki-edition