User:Fenris95/FO4 - My Personal Setup: Difference between revisions
No edit summary |
No edit summary |
||
| Line 256: | Line 256: | ||
</pre> | </pre> | ||
== | == Essentials == | ||
For each of these mods, and the mods in each further section, the required files will usually be downloadable | For each of these mods, and the mods in each further section, the required files will usually be downloadable via Nexus Mod Manager by simply pressing the 'Download With Manager' button in the files tab of the mod. | ||
[[File:Download_With_Manager.JPG|189px]] | [[File:Download_With_Manager.JPG|189px]] | ||
The file or files to download will be specified as being under either the Main Files | The file or files to download will be specified as being under either the Main Files, Optional Files, or Update section of the files tab. | ||
{{User:Kesta/NexusDownload | {{User:Kesta/NexusDownload | ||
|MAIN=Main}} | |MAIN=Main}} | ||
{{User:Kesta/NexusDownload | {{User:Kesta/NexusDownload | ||
|OPT=Optional}} | |OPT=Optional}} | ||
{{User:Kesta/NexusDownload | |||
|UPDT=Update}} | |||
==== Armor and Weapon Keywords Community Resource (AWKCR) ==== | |||
{{User:Kesta/ModInstructions | |||
|flare={{User:Kesta/flare|Core}} | |||
|Armor and Weapon Keywords Community Resource (AWKCR)|http://www.nexusmods.com/fallout4/mods/6091/?|3.2|Valdacil - Gambit77 - AndrewCX<br/><br/> | |||
|{{User:Kesta/NexusDownload | |||
|name=Files to download | |||
|MAIN=Armor and Weapon Keywords Community Resource v3.2}} | |||
{{FOMOD Instructions | |||
|{{FomodPage | |||
|Armor and Weapon Keywords Community Resource (AWKCR) | |||
|{{Fieldset | |||
|Game Options (Select One) | |||
|bullet=yes|All DLC}} | |||
|button=yes|buttonText=Finish }} }} | |||
'''Description''' : "This resource accomplishes the following things: | |||
# Creates a standardized framework for armor and cosmetics keywords for mod authors to prevent conflicts | |||
# Standardizes armor and cosmetics slot usage to prevent conflicts (contributed by all major cosmetics mod authors). | |||
# Creates a standard armor and weapons workbench to be utilized for crafting items added by mods. | |||
# Adds a standard ma keyword for use by weapon modders, a set of OMODs for damage upgrades for blade weapons, and dn keywords for Tactical Light, Laser Sight, & Tactical Light/Laser Sight combo OMODs. The release of Weaponsmith Extended will demonstrate how to replace ma keyword filtering for mod weapons with a GetEquipped condition. This was set up so that people can use lots of mod weapons without using up a bunch of the very limited amount of ma keywords that we have available before hitting the cap and causing the mod menu category formlist cap/ invisible robot bug. | |||
# Adds sorting keywords for weapon calibers to make it easier for weapon modders to set up their gun mods for dynamic sorting." | |||
}} | |||
==== Armorsmith Extended ==== | |||
{{User:Kesta/ModInstructions | |||
|flare={{User:Kesta/flare|Core}} | |||
|Armorsmith Extended|http://www.nexusmods.com/fallout4/mods/2228/?|3.31|Gambit77<br/><br/> | |||
|{{User:Kesta/NexusDownload | |||
|name=Files to download | |||
|MAIN=Armorsmith Extended v3.31}} {{User:Kesta/NexusDownload | |||
|name=Additionally, in the main files section | |||
|UPDT=Armorsmith All DLCs Patch v3.3}} | |||
'''Description''' : "This mod does twelve things: | |||
# Every outfit in the game can now be worn under armor pieces and all armor pieces should show up when equipped. | |||
# Every hat and helmet in the game that doesn't cover your face can be worn with bandanas & gas masks. | |||
# Every outfit and every hat & helmet in the game can have ballistic weave armor added to it. | |||
# I completely redid the entire clothing modding system from scratch. | |||
# Adds new craftable outfits, headgear, gloves, custom Dogmeat armors, Helmets/Hats With Hair, Under Helmet Flight Cap & BOS/Sack Hoods, Nudifying Rings, Invisible Therm Optics Combat Armor, Pistol/Revolver Harnesses, Katana Belt, Sniper Rifle on back, a working jetpack, and a wide variety of wearable weapons. Outfits are crafted at the Armorsmith bench, wearable weapons are crafted at the Weaponsmith bench. | |||
# All clothing items are moddable now and are also rename-able. | |||
# I made this mod compatible with Legendary Modification by teaLz. | |||
# For the master armorsmith/scientists out there I've implemented a new craftable set of armor called Therm Optics Combat Armor. Using stealth technology it is now possible to create cloaked combat armor pieces. | |||
# This mod is now fully compatible with Valdacil's Item Sorting. | |||
# I optimized the slot usage for all vanilla clothing to use the minimum amount of slots necessary for things to work properly. | |||
# All apparel can now be worn by Nick Valentine. | |||
# Strong or any other future super mutant followers/settlers can wear all hats/helmets, gas masks, bandanas/masks, and glasses." | |||
}} | |||
== Bug Fixes / Patches == | |||
==== Unofficial Fallout 4 Patch ==== | ==== Unofficial Fallout 4 Patch ==== | ||
{{User:Kesta/ModInstructions | {{User:Kesta/ModInstructions | ||
|Unofficial Fallout 4 Patch|http://www.nexusmods.com/fallout4/mods/4598/?|2.0.0|Unofficial Patch Project Team | |flare={{User:Kesta/flare|Core}} | ||
|Unofficial Fallout 4 Patch|http://www.nexusmods.com/fallout4/mods/4598/?|2.0.0|Unofficial Patch Project Team<br/><br/> | |||
|{{User:Kesta/NexusDownload | |{{User:Kesta/NexusDownload | ||
|name=Files to download | |name=Files to download | ||
| Line 280: | Line 330: | ||
==== Achievements ==== | ==== Achievements ==== | ||
{{User:Kesta/ModInstructions | {{User:Kesta/ModInstructions | ||
|Achievements|http://www.nexusmods.com/fallout4/mods/12465/?|1.0.4|Expired6978 | |flare={{User:Kesta/flare|Core}} | ||
|Achievements|http://www.nexusmods.com/fallout4/mods/12465/?|1.0.4|Expired6978<br/><br/> | |||
|{{User:Kesta/NexusDownload | |{{User:Kesta/NexusDownload | ||
|name=Files to download | |name=Files to download | ||
| Line 289: | Line 340: | ||
==== Dead Body Collision ==== | ==== Dead Body Collision ==== | ||
{{User:Kesta/ModInstructions | {{User:Kesta/ModInstructions | ||
|Dead Body Collision|http://www.nexusmods.com/fallout4/mods/2570/?|1.0|MadAce | |flare={{User:Kesta/flare|Core}} | ||
|Dead Body Collision|http://www.nexusmods.com/fallout4/mods/2570/?|1.0|MadAce<br/><br/> | |||
|{{User:Kesta/NexusDownload | |{{User:Kesta/NexusDownload | ||
|name=Files to download | |name=Files to download | ||
| Line 298: | Line 350: | ||
==== Realistic Death Physics - No Animations ==== | ==== Realistic Death Physics - No Animations ==== | ||
{{User:Kesta/ModInstructions | {{User:Kesta/ModInstructions | ||
|Realistic Death Physics - No Animations|http://www.nexusmods.com/fallout4/mods/4371/?|1.2|mm137 | |flare={{User:Kesta/flare|Core}} | ||
|Realistic Death Physics - No Animations|http://www.nexusmods.com/fallout4/mods/4371/?|1.2|mm137<br/><br/> | |||
|{{User:Kesta/NexusDownload | |{{User:Kesta/NexusDownload | ||
|name=Files to download | |name=Files to download | ||
|MAIN=Realistic Death Physics - ALL DLC version.}} | |MAIN=Realistic Death Physics - ALL DLC version.}} | ||
'''Description''' : "This mod decreases the amount of force of both melee and ranged attacks (especially crits) to more realistic levels." | '''Description''' : "This mod decreases the amount of force of both melee and ranged attacks (especially crits) to more realistic levels." | ||
}} | |||
==== Faster Terminal Displays ==== | |||
{{User:Kesta/ModInstructions | |||
|flare={{User:Kesta/flare|Core}} | |||
|Faster Terminal Displays|http://www.nexusmods.com/fallout4/mods/937/?|3.0|Old Nick<br/><br/> | |||
|{{User:Kesta/NexusDownload | |||
|name=Files to download | |||
|OPT=Faster Terminal Displays (5x) Creation Kit Version}} | |||
'''Description''' : "I find the speed that the text on the terminal screens takes to appear is too slooooooooow, I always find myself just clicking to get it all to show up. | |||
So I've increased it by 2, 3, 5, 10, 20 and 100 times, just download whichever file suits your needs." | |||
}} | |||
==== Survival Unlocker ==== | |||
{{User:Kesta/ModInstructions | |||
|flare={{User:Kesta/flare|OPT}} | |||
|Survival Unlocker|http://www.nexusmods.com/fallout4/mods/23197/?|1.0.2|Expired6978<br/><br/> | |||
|{{User:Kesta/NexusDownload | |||
|name=Files to download | |||
|MAIN=Survival Unlocker v1-0-2}} | |||
'''Description''' : "This mod patches the hardcoded "features" that come with the Survival difficulty. | |||
This mod restores: | |||
* Using the console | |||
* Using Quicksave | |||
* Saving from the Pause menu | |||
* Fast travelling | |||
* Saving while travelling | |||
This mod also allows you to return to the Survival difficulty if you had previously downgraded your difficulty.<br/> | |||
Godmode is also partially restored, but not fully functional i.e. you still die, however you have infinite resources in the workshop.<br/> | |||
This mod comes with an ini file to enable or disable the mentioned features." | |||
}} | |||
==== 3rd Person Beard Fix ==== | |||
{{User:Kesta/ModInstructions | |||
|flare={{User:Kesta/flare|Core}} | |||
|3rd Person Beard Fix|http://www.nexusmods.com/fallout4/mods/11325/?|1|karniage<br/><br/> | |||
|{{User:Kesta/NexusDownload | |||
|name=Files to download | |||
|MAIN=Beard Fix}} | |||
'''Description''' : "This is a small Material edit to make the beards in 3rd appear solid and like a proper beard." | |||
}} | |||
==== Workshop Spotlight Fix ==== | |||
{{User:Kesta/ModInstructions | |||
|flare={{User:Kesta/flare|Core}} | |||
|Workshop Spotlight Fix|http://www.nexusmods.com/fallout4/mods/11090/?|v1.0DLC|ccmads<br/><br/> | |||
|{{User:Kesta/NexusDownload | |||
|name=Files to download | |||
|MAIN=Workshop Spotlight Fix with DLC - All in One Installer}} | |||
{{FOMOD Instructions | |||
|{{FomodPage | |||
|Workshop Spotlight Fix | |||
|{{Fieldset | |||
|Main Files (Select One) | |||
|bullet=yes|200 Range Shadow}} | |||
|button=yes|buttonText=Finish }} }} | |||
'''Description''' : "This mod will fix the fast travel blackout bug of the vanilla workshop spotlight and partially fix the wall spotlight from DLC Automatron and provide several light range and shadow options for the workshop spotlight." | |||
}} | |||
==== Rain of Brass ==== | |||
{{User:Kesta/ModInstructions | |||
|flare={{User:Kesta/flare|Core}} | |||
|Rain of Brass|http://www.nexusmods.com/fallout4/mods/1097/?|1.0.1|XLSJ<br/><br/> | |||
|{{User:Kesta/NexusDownload | |||
|name=Files to download | |||
|MAIN=RainOfBrass_v_1_0_1}} | |||
'''Description''' : "Rain of Brass is a small mod that makes shell casings from the player and NPCs last longer, and be visible from far away, so that after a firefight you can find piles of spent brass wherever anyone was shooting. | |||
Main version: Shells stay for 1 hour and are visible from weapons fired within 500 meters." | |||
}} | |||
==== Visual Reload ==== | |||
{{User:Kesta/ModInstructions | |||
|flare={{User:Kesta/flare|Core}} | |||
|Visual Reload|http://www.nexusmods.com/fallout4/mods/15118/?|1.8|pauderek<br/><br/> | |||
|{{User:Kesta/NexusDownload | |||
|name=Files to download | |||
|MAIN=Visual Reload}} | |||
'''Description''' : "With this mod the ejected magazines will drop to the ground and stay there. | |||
It also affects the ejected shells when reloading the double barrel shotgun or the revolvers." | |||
}} | |||
==== Personal Vertibird Flight Altitude Fix ==== | |||
{{User:Kesta/ModInstructions | |||
|flare={{User:Kesta/flare|Core}} | |||
|Personal Vertibird Flight Altitude Fix|http://www.nexusmods.com/fallout4/mods/15004/?|1.0|Console_Pheasant<br/><br/> | |||
|{{User:Kesta/NexusDownload | |||
|name=Files to download | |||
|MAIN=Vartibird Fix}} | |||
'''Description''' : "This mod prevents your personal vertibirds from defying physics. In other words: no more flying through buildings, trees, the ground, etc. when you ride a vertibird. Now they should detect buildings and such and will adjust their altitude and/or heading to prevent crashing into buildings." | |||
'''Notes''' : You only need the Far Harbor version of this mod if you also have a mod that allows vertiderps to be used in Far Harbor. | |||
}} | |||
==== Automatron DLC Legendary Drops (plus Legendary Clothing Loot) ==== | |||
{{User:Kesta/ModInstructions | |||
|flare={{User:Kesta/flare|OPT}} | |||
|Automatron DLC Legendary Drops (plus Legendary Clothing Loot)|http://www.nexusmods.com/fallout4/mods/11755/?|1.0|Old Nick<br/><br/> | |||
|{{User:Kesta/NexusDownload | |||
|name=Files to download | |||
|MAIN=Automatron DLC Legendaries plus Legendary Clothing Loot}}{{User:Kesta/NexusDownload | |||
|name=Additionally | |||
|OPT=Automatron DLC Legendaries - Armorsmith Extended Patch}} | |||
'''Description''' : "Adds the various 'Robot' armor parts (chest, arms and legs), the three helmets (Assaultron, Eyebot and Sentry Bot) and the two melee weapons (Assaultron Blade and Mr Handy Buzz Blade) to the drop lists for legendaries. Adds all vanilla clothing items to the allowed legendary loot lists." | |||
}} | |||
==== Less Annoying Berry Mentats ==== | |||
{{User:Kesta/ModInstructions | |||
|flare={{User:Kesta/flare|Core}} | |||
|Less Annoying Berry Mentats|http://www.nexusmods.com/fallout4/mods/11838/?|1.0|Old Nick<br/><br/> | |||
|{{User:Kesta/NexusDownload | |||
|name=Files to download | |||
|MAIN=Less Annoying Berry Mentats}} | |||
'''Description''' : "Prevents the Berry Mentats effect from highlighting your current companion and disables the effect entirely while your weapon is holstered or you are in dialogue. Also includes the fix to stop the effect from turning certain neutral NPCs hostile." | |||
}} | |||
==== Glowing Animals Emit Light ==== | |||
{{User:Kesta/ModInstructions | |||
|flare={{User:Kesta/flare|Core}} | |||
|Glowing Animals Emit Light|http://www.nexusmods.com/fallout4/mods/9239/?|1.1|mm137<br/><br/> | |||
|{{User:Kesta/NexusDownload | |||
|name=Files to download | |||
|MAIN=Glowing Animals Emit Light - ALL DLC}} | |||
'''Description''' : "This mod simply attaches a light source to every glowing animal variant, making them emit light. The size of the animal determines the radius and strength of the lights, so deathclaws are brighter than ghouls, which are brighter than radroaches, etc. | |||
This also fixes the Glowing Behemoths and Glowing Mutant Hounds, neither of which had actual glow maps. The Glowing Behemoth also has a radiation cloak like all other glowing variants." | |||
}} | }} | ||
Revision as of 06:35, May 27, 2017
Fenris' Personal Mod Guide / Setup
Because I'm gonna forget what to install in a year or two.
Title: Waiting on that part of my brain to come up with something decent.
Game
- Fallout 4 v1.9.4.0
DLC Required
- Wasteland Workshop
- Automatron
- Far Harbour
- Contraptions Workshop
- Vault-Tec Workshop
- Nuka-World
Introduction
If you're following this guide I'm going to make an ass of you and me and assume that you know what you're doing when it comes to modding Bethesda games.
I'll do my best to have the mods here ordered in a way that makes sense, though my usual install methodology is to go down the list of the top 100 mods and install them one after the other.
I tend to favor lore friendly mods that spice up the visuals, as well as grabbing as many lore friendly weapon and armour mods as I can fit into a load order.
I'll include reminders to run LOOT and to check that your game isn't derping out after each section.
Here's my PC's config if you're into that sort of thing, it's probably worth mentioning that this guide will favor high fidelity over FPS, with little to no compromises:
- CPU: Intel Core i5 4670K @ 4.2Ghz
- GPU: MSI GeForce GTX 980Ti @ 1440Mhz / 7Ghz
- RAM: 16GB Corsair Vengeance 1600Mhz CL9
- Mobo: MSI Z87-GD65 Gaming Motherboard
- SSDs: 2x Kingston HyperX 120GB RAID0
Using Kesta's flares and fancy mod sections until I figure out how to do it myself.
Getting Started
First things first: Install the game
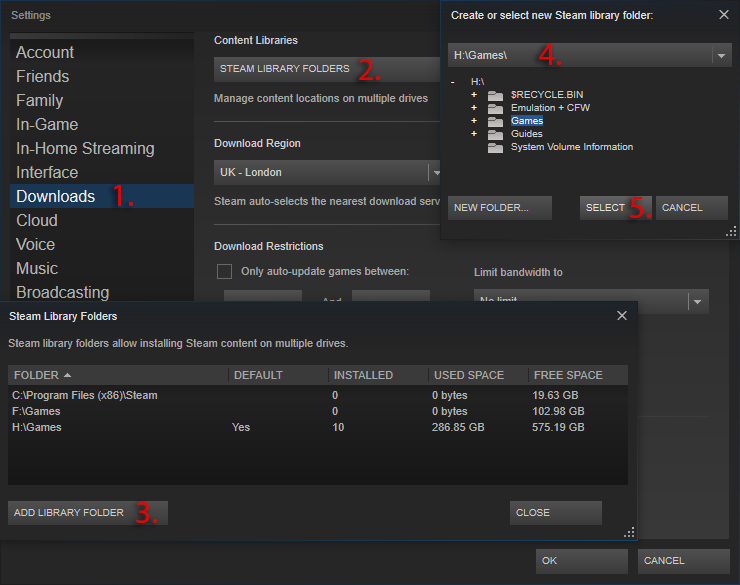
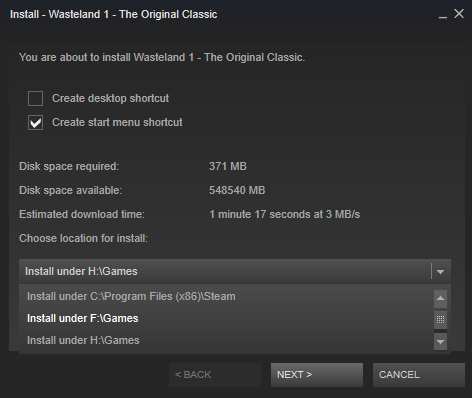
Whether via steam or some other platform, it's usually a good idea to install the game to a directory that isn't Steam's default.
That is to say, anywhere that isn't either C:\Program Files or C:\Program Files (x86).
Below is a small walkthrough of how to set up a secondary install location in Steam.
If you have a second hard drive or an SSD just for games, then you have no doubt done this already.
Drivers & Applications
Whilst the game is downloading, this is the perfect time to prepare the other applications that we're going to use.
Update your graphics card drivers
Choose a text editing program
There are a few choices here, the main two being Notepad++ and Sublime Text 3.
Once you have chosen a text editor you should set it as the default program to open both .ini and .txt files.
To do this go to your Fallout 4 directory and right click an ini file such as Fallout4_Default.ini, then select Open With > Choose another app.
Ensure that Always use this app to open .ini files is ticked, then scroll down the list and click More apps > Look for another app on this PC.
Point Windows to the editor's executable file.
For Notepad++ this is a file named notepad++.exe located in C:\Program Files (x86)\Notepad++
For Sublime Text this is a file named sublime_text.exe located in C:\Program Files\Sublime Text 3
Repeat this process for .txt files as well.
Next, install an archiving program like WinRAR
I've been using WinRAR forever, so it's just what I'm familiar with. It's available in 32bit and 64bit versions.
Another option is 7-zip, which is also available in 32bit and 64bit flavors.
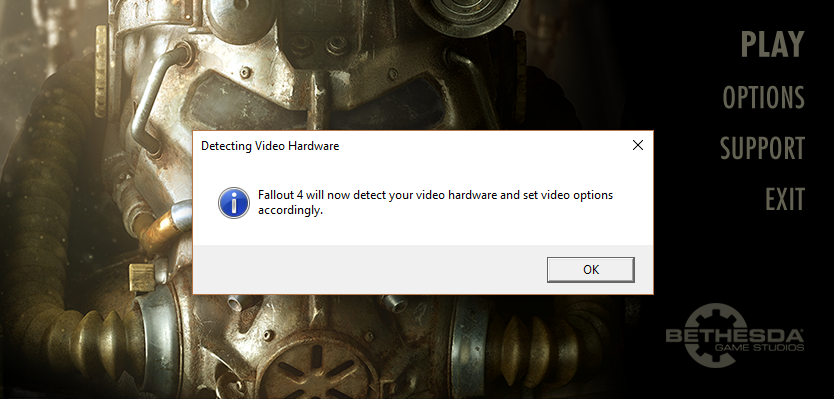
Run the game for the first time
This will set up the necessary registry entries and will create two files in your documents inside of \Documents\My Games\Fallout4
- Fallout4.ini
- Fallout4Prefs.ini
Go to the Options menu and click Advanced, then change the Godrays Quality option to either Medium or High. I'll be using Medium.
File:Fallout-4-god-rays-quality-performance-640px.png
There seems to be no difference aside from the FPS drop.
Nexus Mod Manager
Mod Organizer 2 has frustrating problems when installing a mod with multiple options, the menus simply don't work on some mod installers so you'll be stuck with the default settings.
This is quite a shame as Mod Organizer 2 is more feature complete then NMM, and I prefer it greatly. NMM will work fine for our purposes however until Mod Organizer 2 is fixed.
You can download Nexus Mod Manager from this link.
- Install Nexus Mod Manager and point it to your Fallout 4 install directory, create a folder on the same drive as your Fallout 4 install that will hold all of your mods.
- When you first select Fallout 4 as the game to use with NMM, it will ask where to install your mods, and where to keep the install info. Choose the folder on the same drive as your Fallout 4 install.
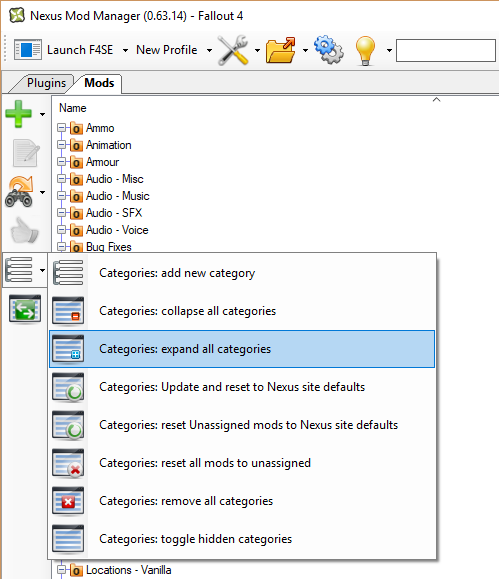
- Go to the mods tab and under Categories, click Categories: expand all categories, this will just make it easier to see the mods that you're going to be downloading.
Next you're going to need to log into Nexus Mod Manager using your Nexus account. This will enable you to download mods over 2MB through NMM.
LOOT
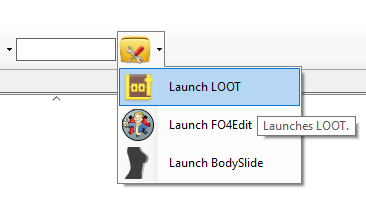
LOOT is a tool that automates load order optimization, it is also able to tell you if a mod has dirty edits and needs cleaning. You are able to run it through Nexus Mod Manager.
Installation :
|
FO4Edit
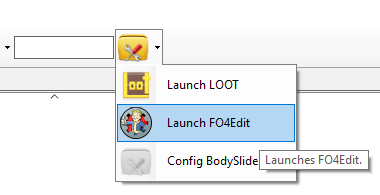
FO4Edit is a powerful tool that has a myriad of features. We'll be using it to automate the cleaning process of mods with dirty edits.
Here's a guide for using xEdit to clean your mods.
Installation :
|
INI Tweaks
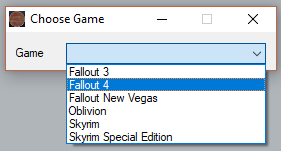
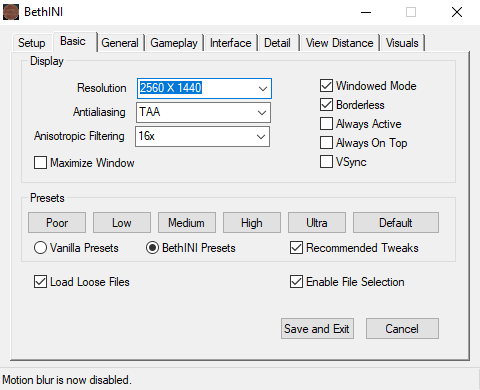
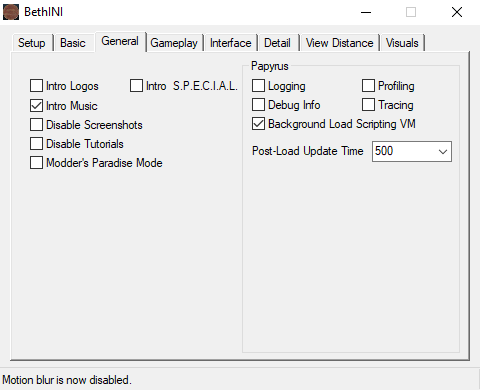
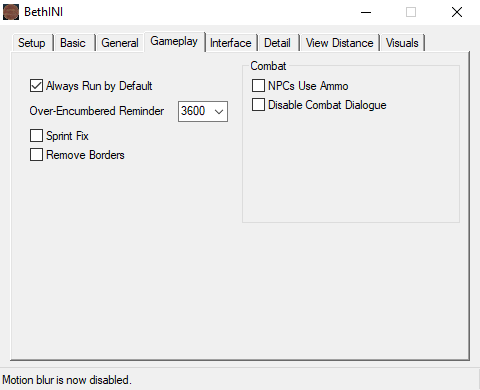
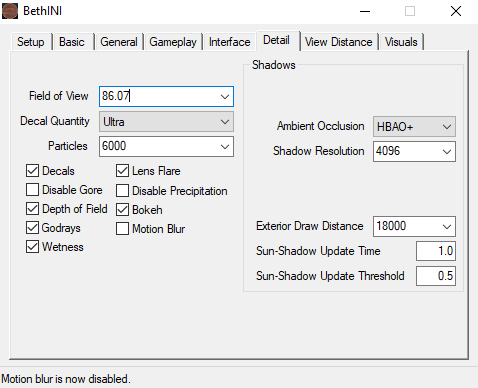
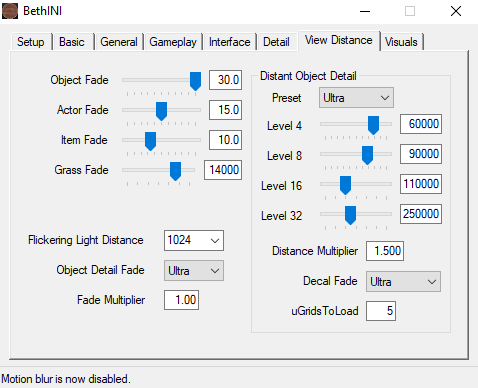
BethINI
Installation :
|
Manual Tweaks
Make a copy of 'Fallout4.ini' inside of \Documents\My Games\Fallout4 and name it 'Fallout4Custom.ini'; this is the file we will be editing.
Open Fallout4Custom.ini in your chosen text editor and scroll down to the [Interface] section. If you have played the game a lot before you can disable the tutorial messages by adding 'bShowTutorials=0' at the bottom of the section so that it looks like this:
[Interface]
fSafeZoneX=15.0
fSafeZoneXWide=64.0
fSafeZoneXWide16x10=64.0
fSafeZoneY=15.0
fSafeZoneYWide16x10=36.0
bShowTutorials=0
We're going to improve the readability of the in-game console by adding a new section underneath the [MapMenu] section.
Copy this text and add it underneath 'uLockedTerrainLOD=32' in the [MapMenu] section:
[Menu]
iConsoleSizeScreenPercent=65
iConsoleTextSize=16
rConsoleHistoryTextColor=153,160,153
rConsoleTextColor=255,255,255
rDebugTextColor=255,235,222
If you're interested in learning more about the different settings available in the .ini files, you can check out InsanePlumber's post here.
Extenders and Plugins
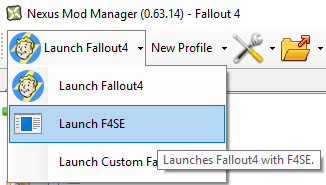
Fallout 4 Script Extender (F4SE)
This is an essential mod that continues the work from the Skyrim Script Extender.
Installation :
|
Shadow Boost
Shadow Boost dynamically controls the the shadow draw distance in Fallout 4 to attempt to keep you at a specified framerate.
Installation :
|
You can modify ShadowBoost.ini if you wish, however I find that the default settings work fine:
fTargetFramerate= - This setting determines your desired framerate, if you are playing with vsync or an fps lock enabled then be sure to keep it at least a couple fps lower than the maximum, otherwise the plugin won't increase the shadow draw distance when you reach that framerate.
fDistChangeSpeed= - This setting determines how quickly the shadow distance will change. The safe range is between 0.5 and 5.0.
fShadowDrawDistMin= - This setting determines the minimum distance that shadows will render.
fShadowDrawDistMax= - This setting determines the maximum distance that shadows will render. Users with lower-end PCs may want to reduce this setting.
Essentials
For each of these mods, and the mods in each further section, the required files will usually be downloadable via Nexus Mod Manager by simply pressing the 'Download With Manager' button in the files tab of the mod.
The file or files to download will be specified as being under either the Main Files, Optional Files, or Update section of the files tab.
- MAIN FILES - Main
- OPTIONAL FILES - Optional
- UPDATES - Update
Armor and Weapon Keywords Community Resource (AWKCR)
Files to download :
WARNING Template:FOMOD_Instructions is deprecated and should no longer be used on this wiki. Please change this template call to use the better-looking and simpler Template:Fomod. We apologize for the inconvenience.
Description : "This resource accomplishes the following things:
|
Armorsmith Extended
Files to download :
Description : "This mod does twelve things:
|
Bug Fixes / Patches
Unofficial Fallout 4 Patch
Files to download :
Description : "A comprehensive bugfixing mod for Fallout 4. The goal of the Unofficial Fallout 4 Patch (aka UFO4P) is to eventually fix every bug with Fallout 4 not officially resolved by the developers to the limits of the Creation Kit and community-developed tools, in one easy-to-install package." |
Achievements
Files to download :
Description : "Uses F4SE to re-enable achievements while mods are active." |
Dead Body Collision
Files to download :
Description : "This mod will make actors collide with dead bodies, a.k.a. ragdolls, so you can push them, climb on them, etc...and won't just clip through them." |
Realistic Death Physics - No Animations
Files to download :
Description : "This mod decreases the amount of force of both melee and ranged attacks (especially crits) to more realistic levels." |
Faster Terminal Displays
Files to download :
Description : "I find the speed that the text on the terminal screens takes to appear is too slooooooooow, I always find myself just clicking to get it all to show up. So I've increased it by 2, 3, 5, 10, 20 and 100 times, just download whichever file suits your needs." |
Survival Unlocker
Files to download :
Description : "This mod patches the hardcoded "features" that come with the Survival difficulty. This mod restores:
This mod also allows you to return to the Survival difficulty if you had previously downgraded your difficulty. |
3rd Person Beard Fix
Files to download :
Description : "This is a small Material edit to make the beards in 3rd appear solid and like a proper beard." |
Workshop Spotlight Fix
Files to download :
WARNING Template:FOMOD_Instructions is deprecated and should no longer be used on this wiki. Please change this template call to use the better-looking and simpler Template:Fomod. We apologize for the inconvenience.
Description : "This mod will fix the fast travel blackout bug of the vanilla workshop spotlight and partially fix the wall spotlight from DLC Automatron and provide several light range and shadow options for the workshop spotlight." |
Rain of Brass
Files to download :
Description : "Rain of Brass is a small mod that makes shell casings from the player and NPCs last longer, and be visible from far away, so that after a firefight you can find piles of spent brass wherever anyone was shooting. Main version: Shells stay for 1 hour and are visible from weapons fired within 500 meters." |
Visual Reload
Files to download :
Description : "With this mod the ejected magazines will drop to the ground and stay there. It also affects the ejected shells when reloading the double barrel shotgun or the revolvers." |
Personal Vertibird Flight Altitude Fix
Files to download :
Description : "This mod prevents your personal vertibirds from defying physics. In other words: no more flying through buildings, trees, the ground, etc. when you ride a vertibird. Now they should detect buildings and such and will adjust their altitude and/or heading to prevent crashing into buildings." Notes : You only need the Far Harbor version of this mod if you also have a mod that allows vertiderps to be used in Far Harbor. |
Automatron DLC Legendary Drops (plus Legendary Clothing Loot)
Files to download :
Description : "Adds the various 'Robot' armor parts (chest, arms and legs), the three helmets (Assaultron, Eyebot and Sentry Bot) and the two melee weapons (Assaultron Blade and Mr Handy Buzz Blade) to the drop lists for legendaries. Adds all vanilla clothing items to the allowed legendary loot lists." |
Less Annoying Berry Mentats
Files to download :
Description : "Prevents the Berry Mentats effect from highlighting your current companion and disables the effect entirely while your weapon is holstered or you are in dialogue. Also includes the fix to stop the effect from turning certain neutral NPCs hostile." |
Glowing Animals Emit Light
Files to download :
Description : "This mod simply attaches a light source to every glowing animal variant, making them emit light. The size of the animal determines the radius and strength of the lights, so deathclaws are brighter than ghouls, which are brighter than radroaches, etc. This also fixes the Glowing Behemoths and Glowing Mutant Hounds, neither of which had actual glow maps. The Glowing Behemoth also has a radiation cloak like all other glowing variants." |


